Наши проекты:
3D печать и услуги :
Wiki :
Сувениры :
Walkarounds :
ВНИМАНИЕ: Сайт пока работает в тестовом режиме после переезда! Что-то может работать не так как ожидается, проверяем...
Thank you for these warm words. Unfortunately I can't post any better pictures (I wish my telephone camera had a better macro mode). I wouldn't say my craft could be compared to CNC machinig. It is more or less accurate but still it's far from being perfect. I think the best motivation to progress is awareness of ones limits. I know my limits and I constantly try to push them. That's why my every next model is better from the previous one.
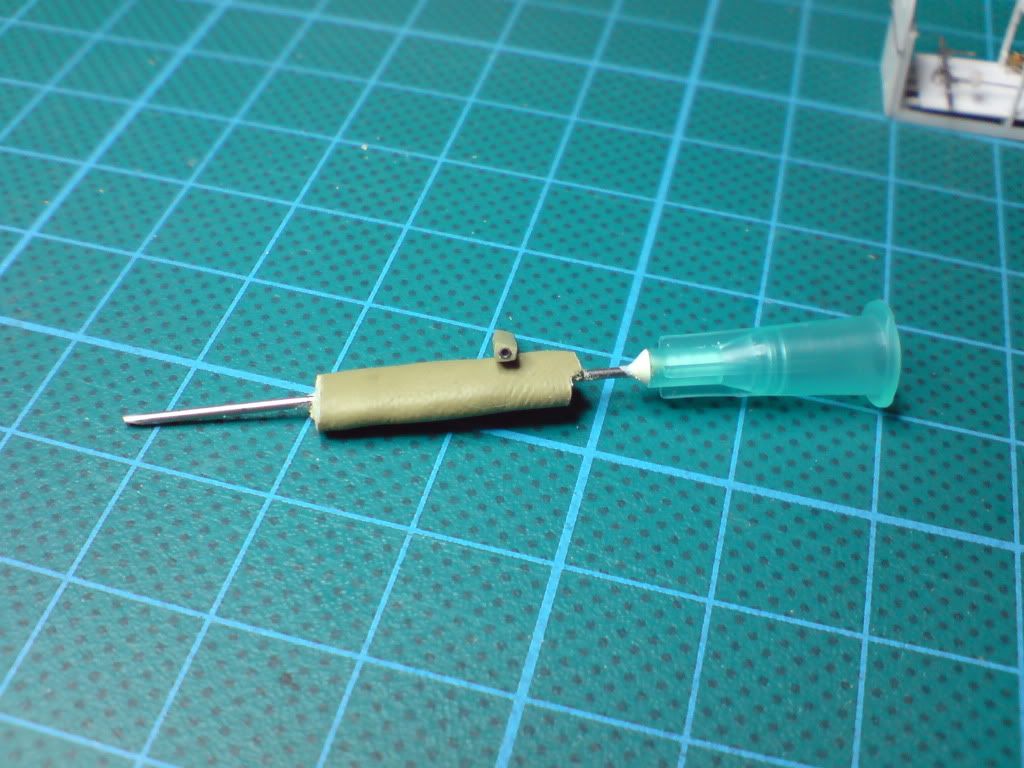
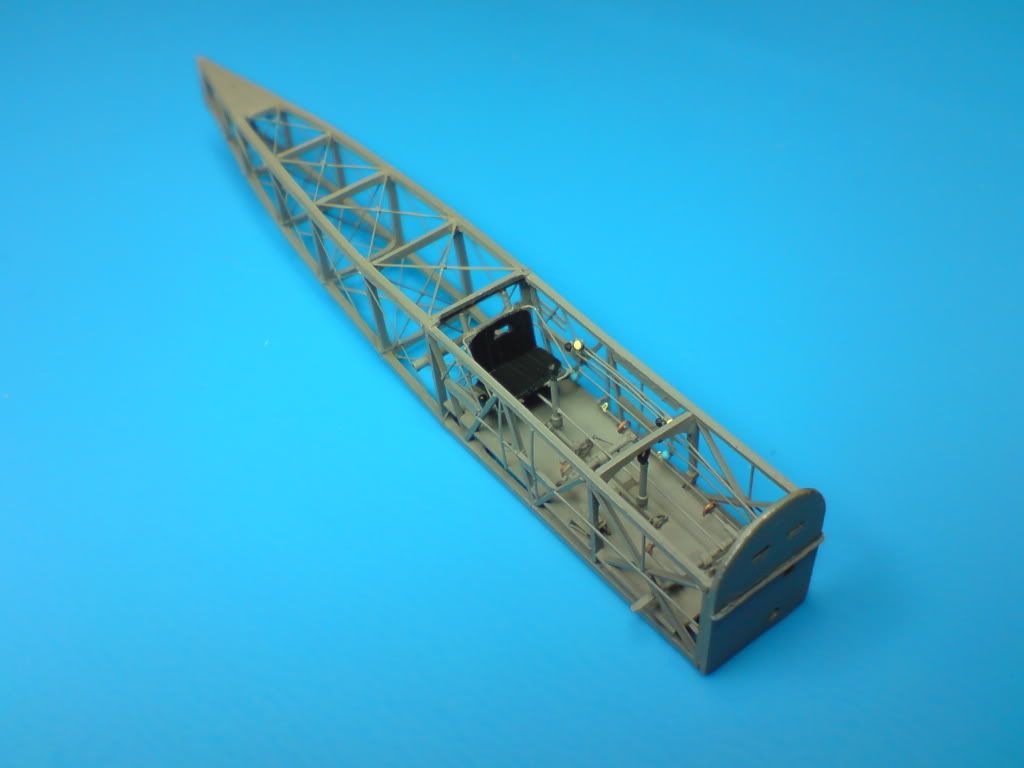
I figured how to sort the bottom wing mounting. I simply sticked some Milliput to 0,8 mm injection needle and sanded down to shape (It's much easier than drilling through such a small bit..). I made two parts like this and used it to replace two bits from the fuselage structure. After I finish the fuselage I plan to make wings with location pins made of 0,5 mm needle whch precisely fits the 0,8 mm one.
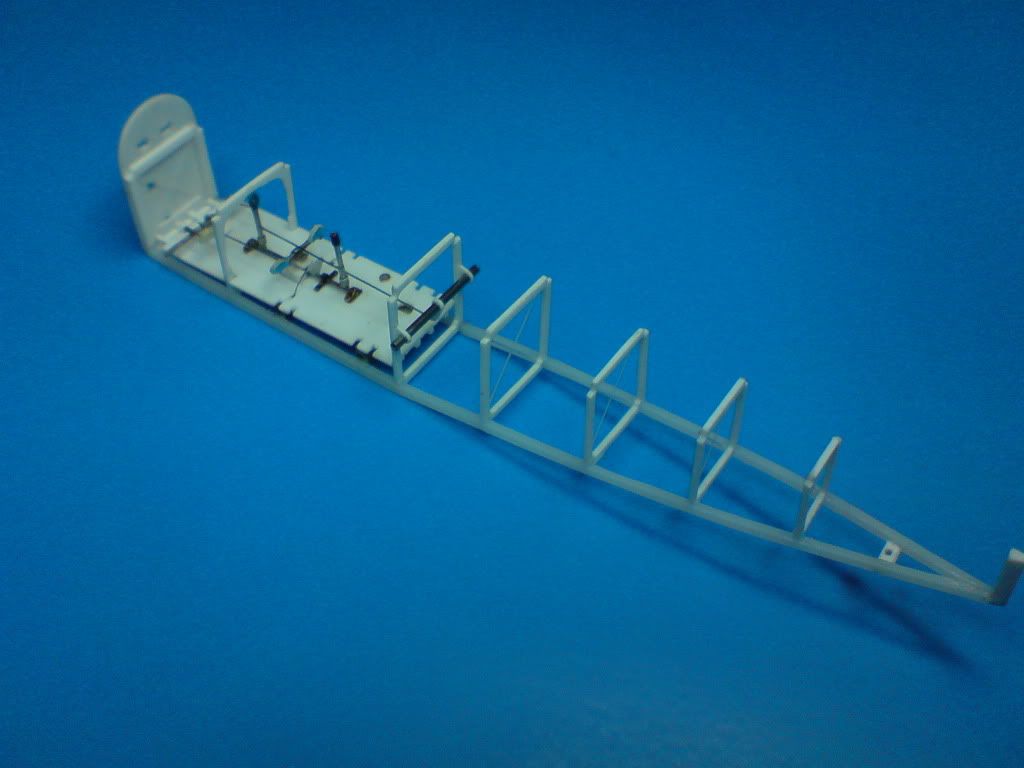
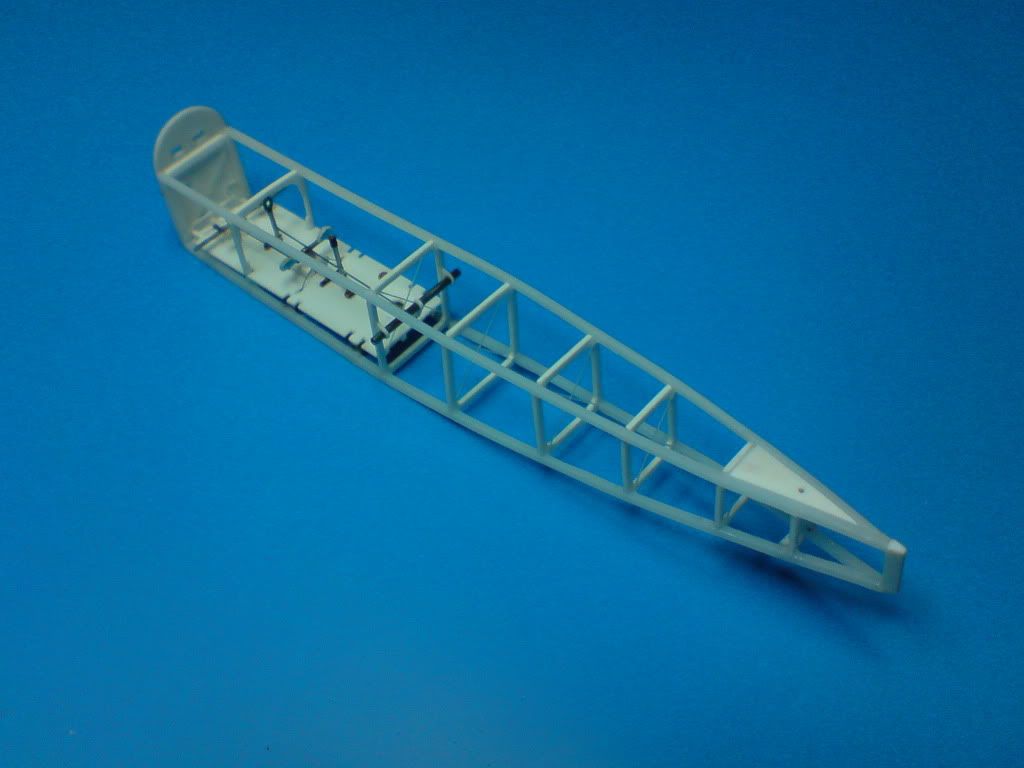
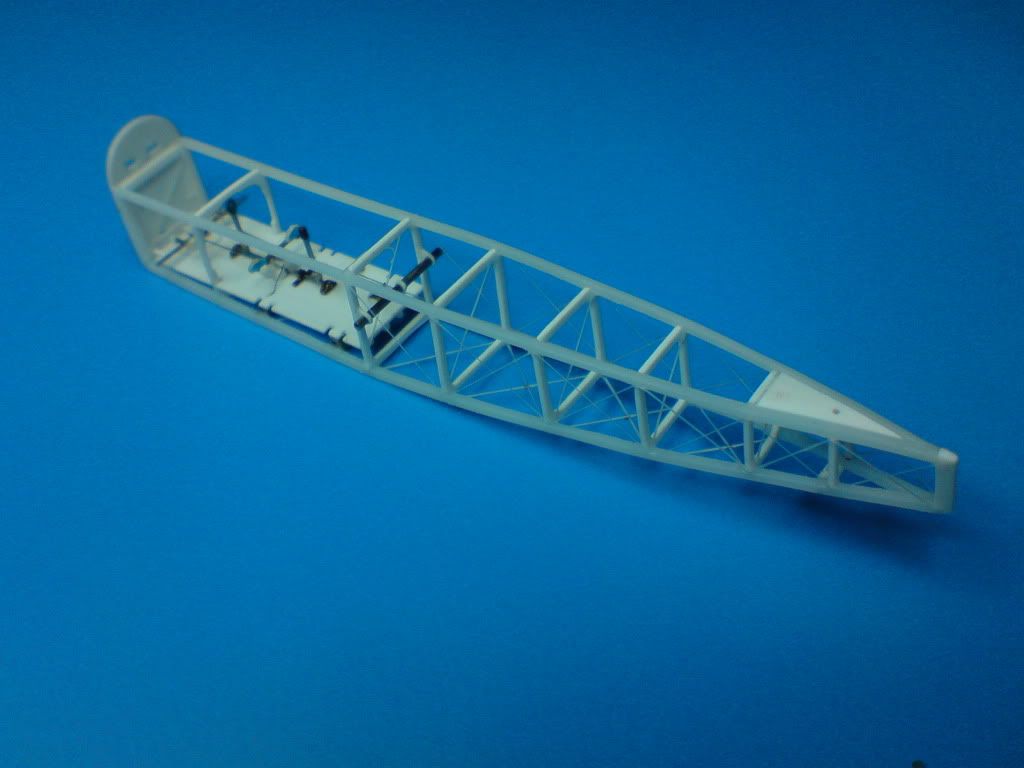
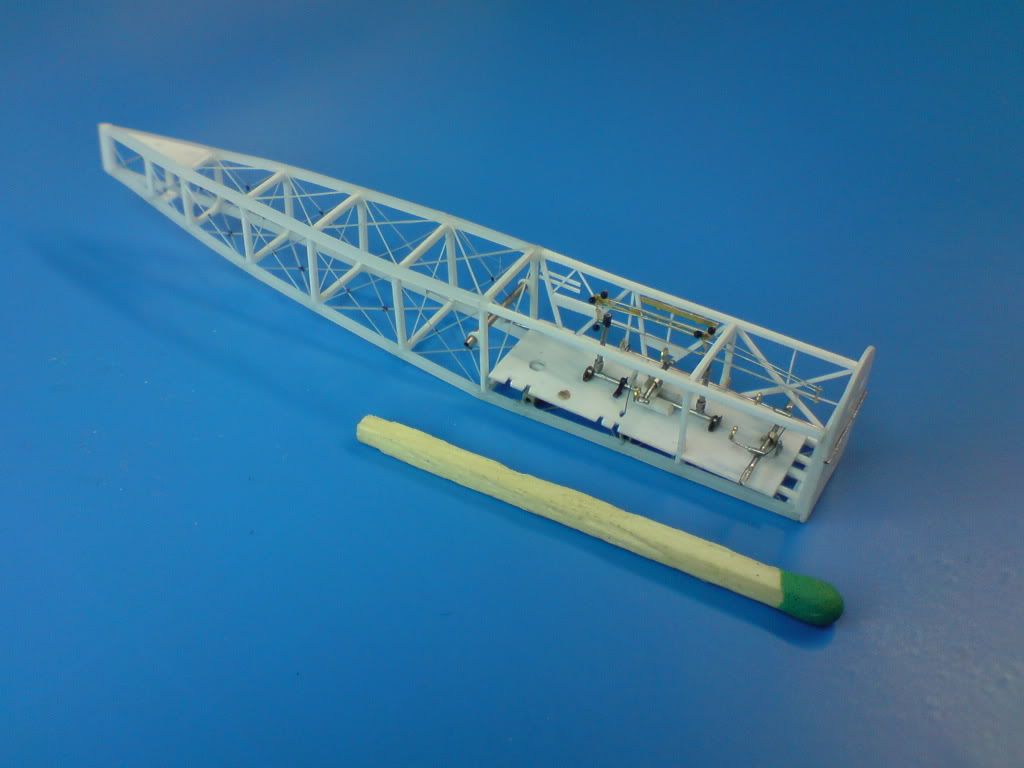
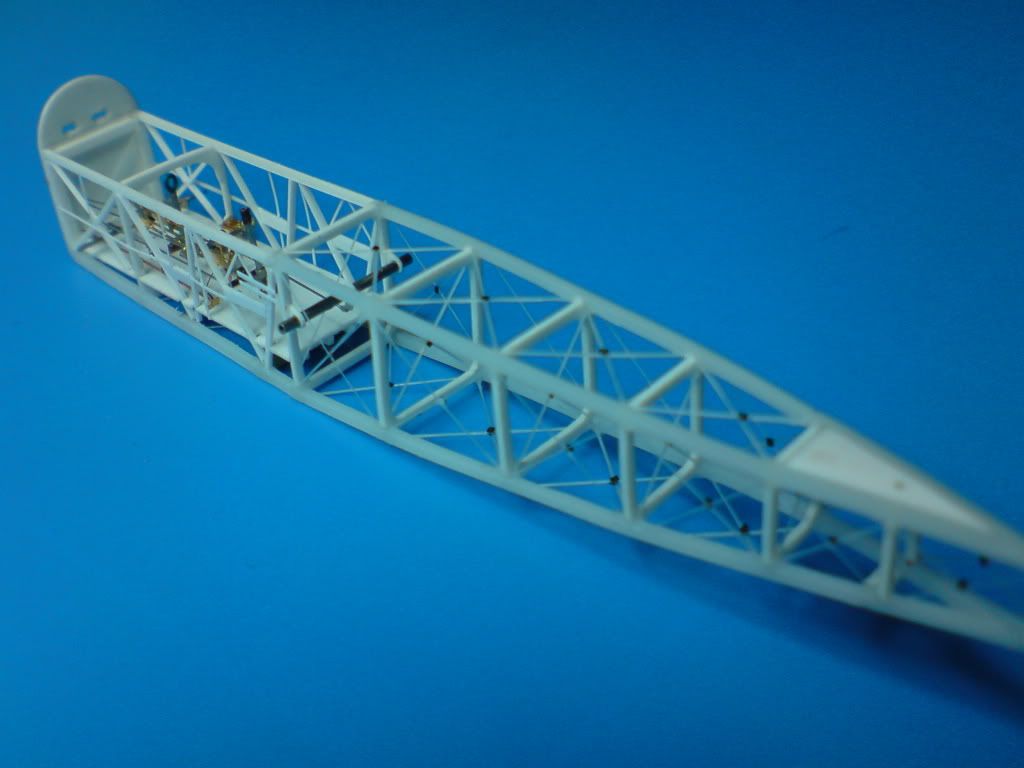
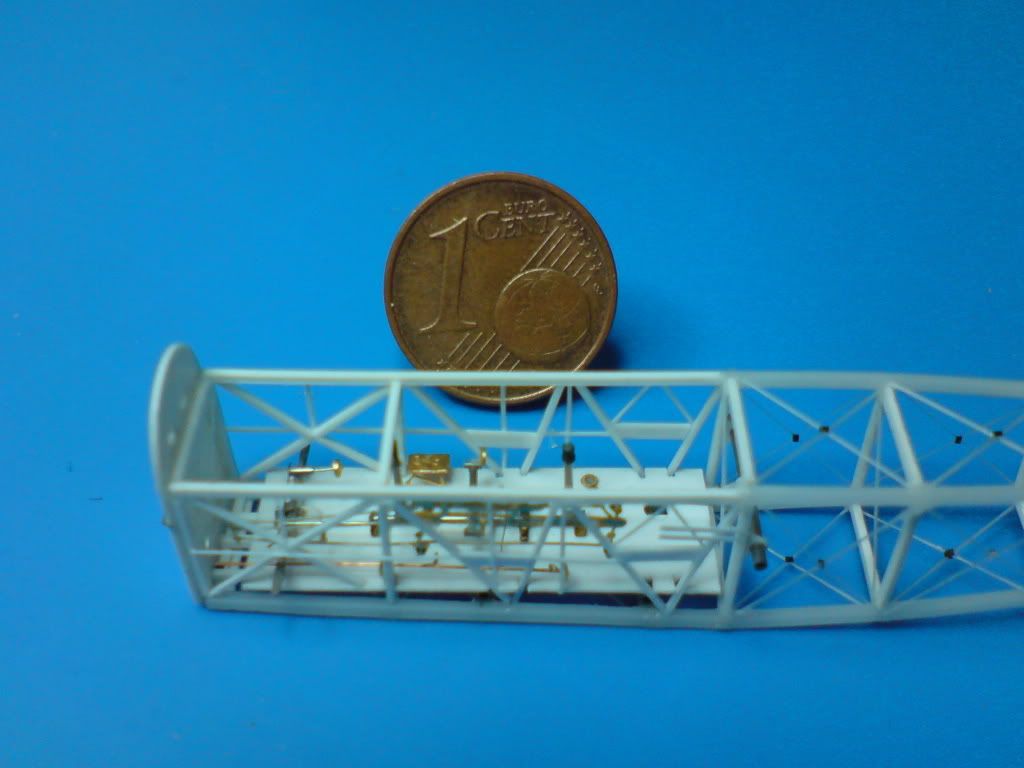
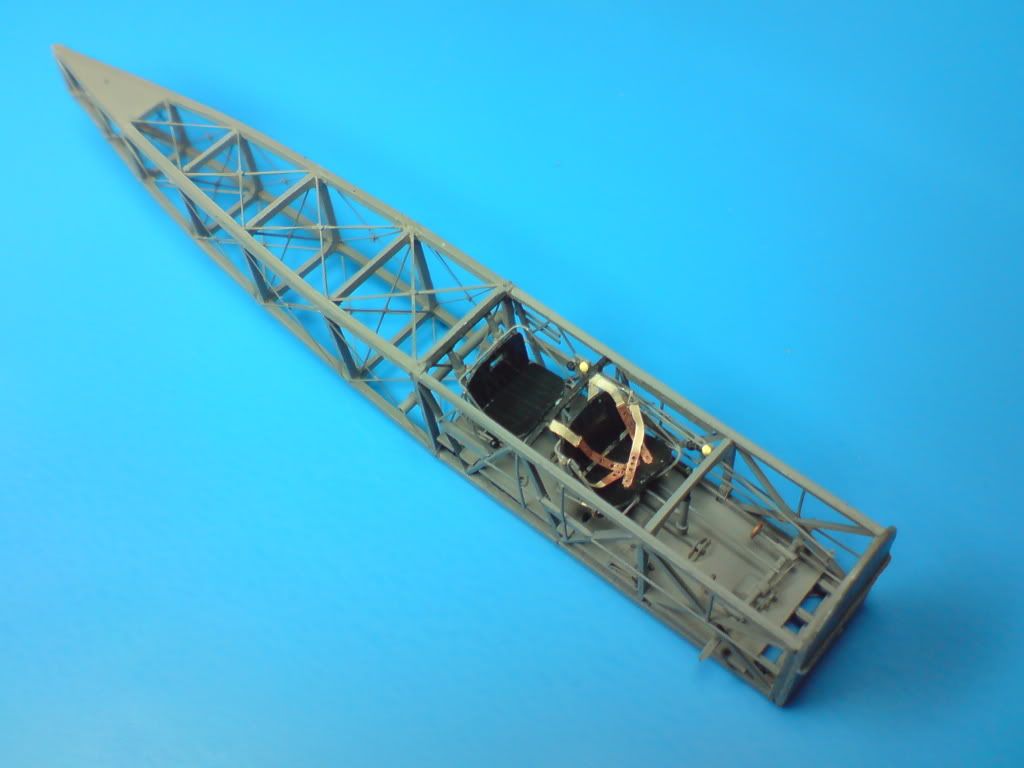
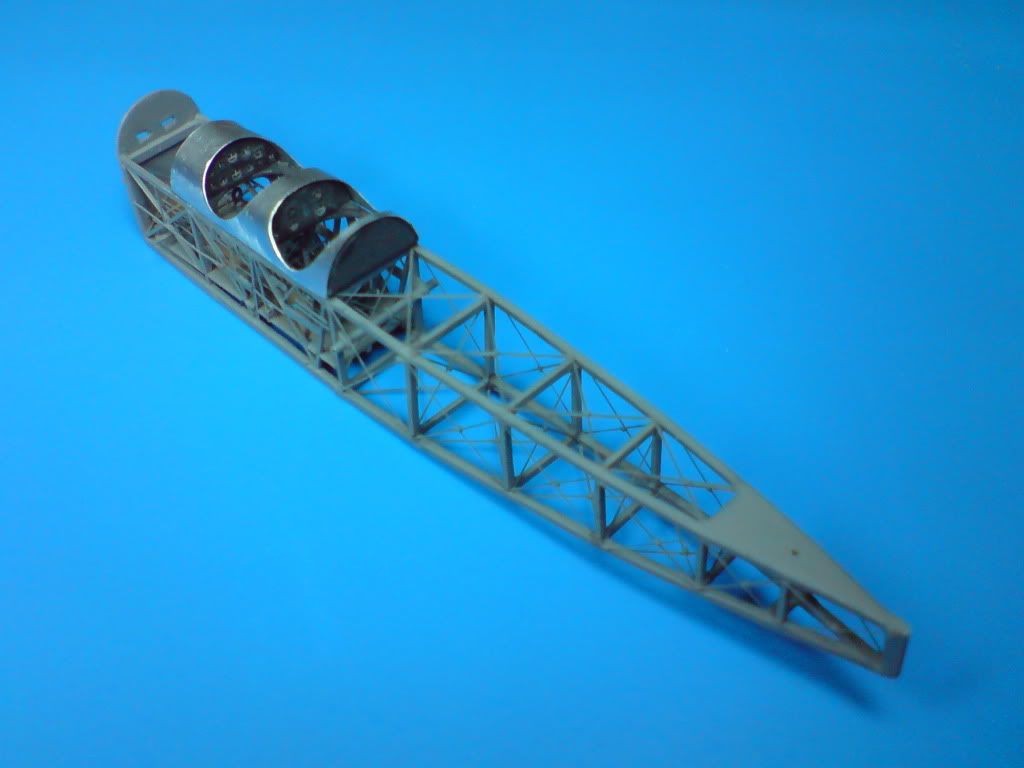
The works on this project have advanced and now the structure of the rear fuselage is completed. The fuselage rigging additionally strengthened this part of assembly. Initially I did not make the spinal rigging, trusting that this would allow access to the fuselage chamber and ease mounting the trimmer lines. However after careful study of reference materials and confronting it with the opinion of experts it turned out that the particular aircraft did not have any trimmers.
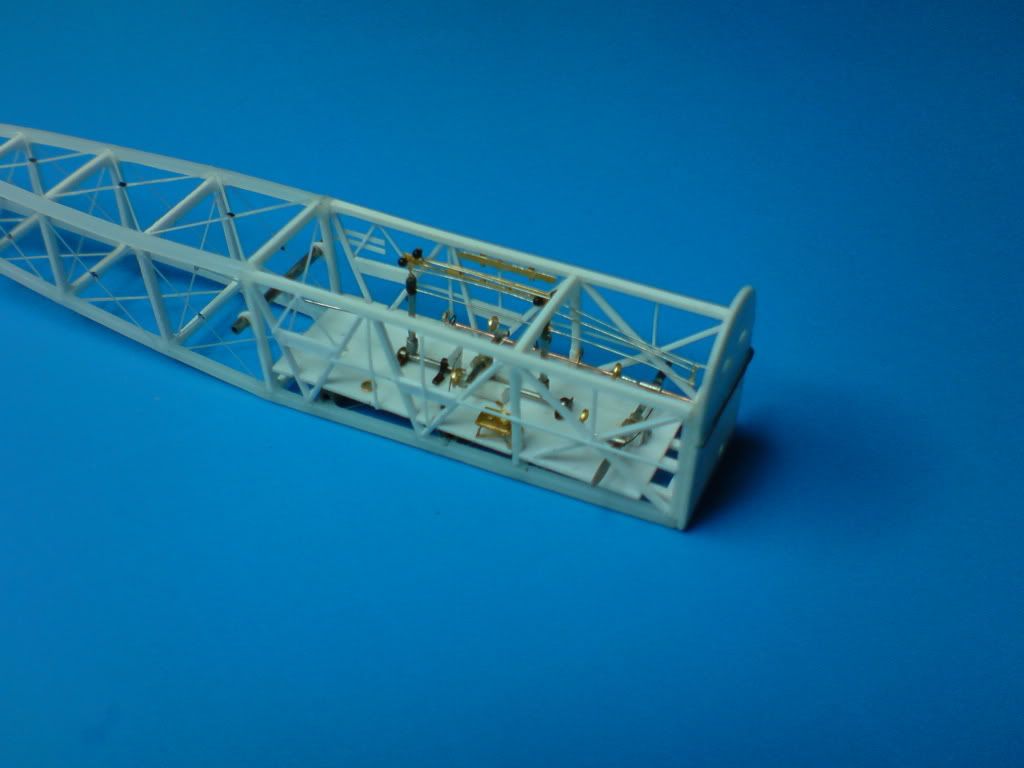
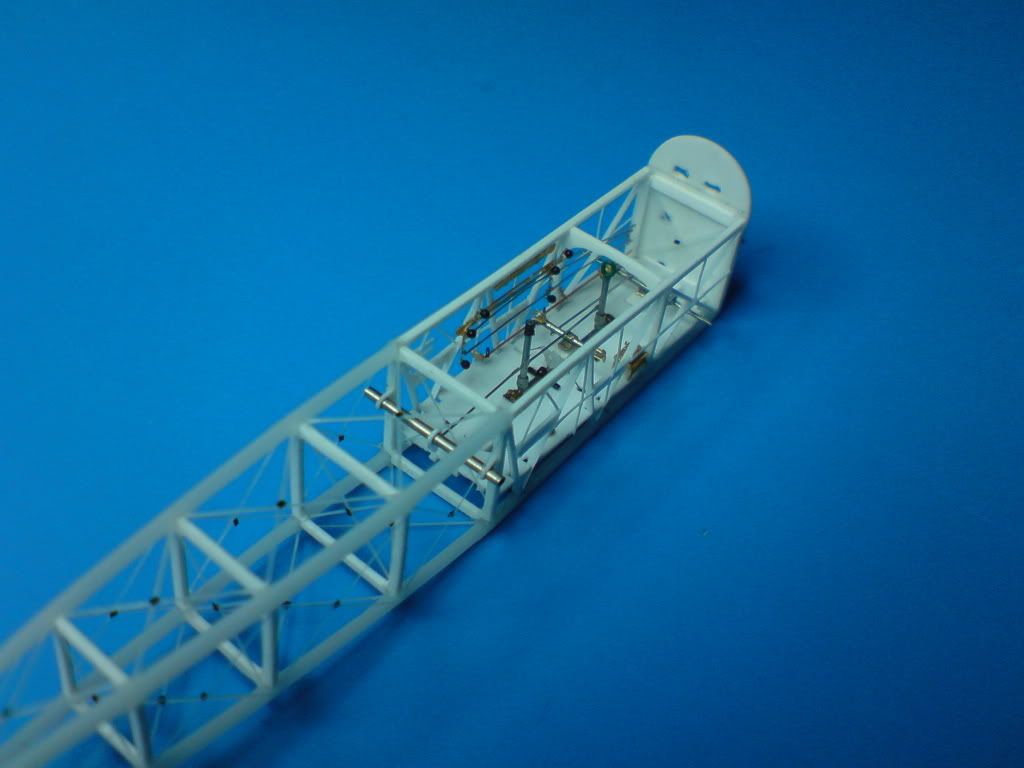
Next I dealt with fuselage structure of the fuel tank and cockpit compartments. Initially I thought I would use the PE parts. In concern of proper dimensions the PE fret contains doubled framework parts. Gluing them together should give the accurate thickness. Unfortunately comparing it to the drawing showed unacceptable difference. So I have no other choice than to make it from scratch. I have started from left side as this part of cockpit requires more details. This way I have access through right side which I will leave open till the left side is finished.
Before I took care of right side of the cockpit I decided to replace rudder pedals with more “delicate” ones – made up to the freshest idea. Then the right side framework was completed similarly to the left side.
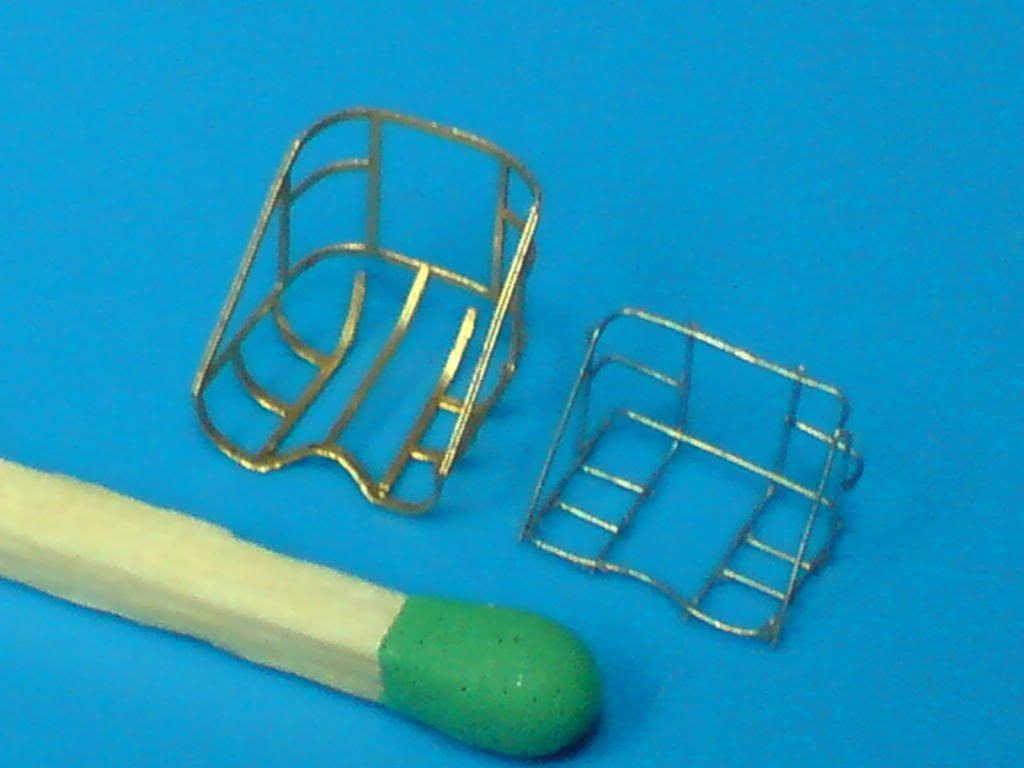
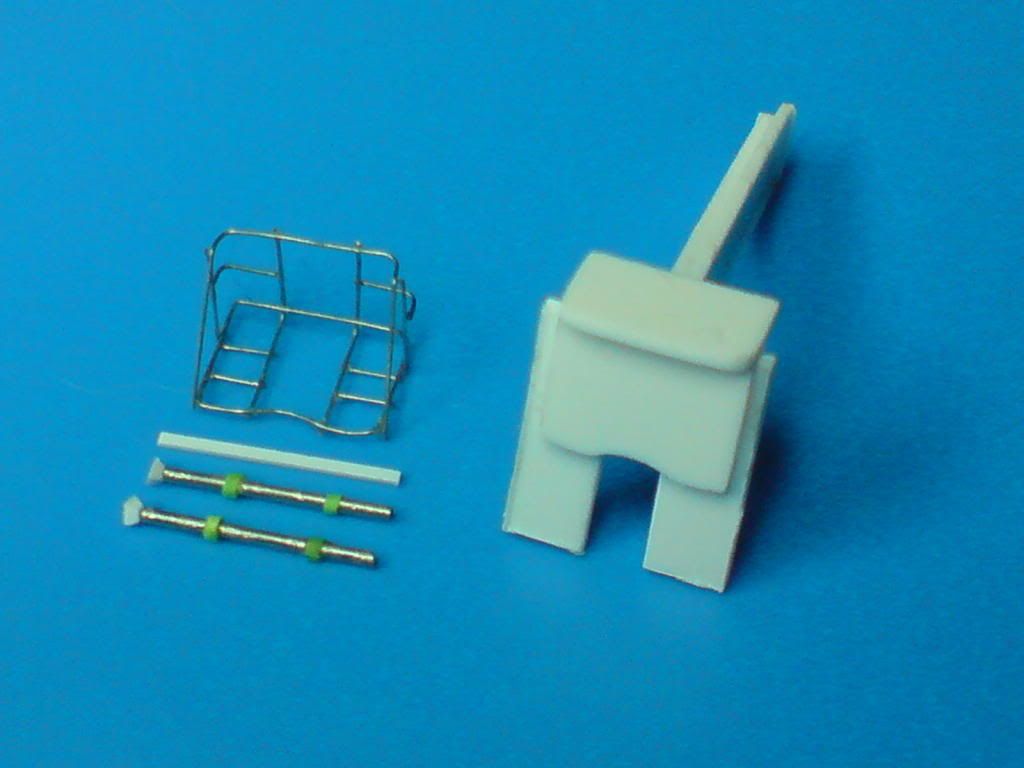
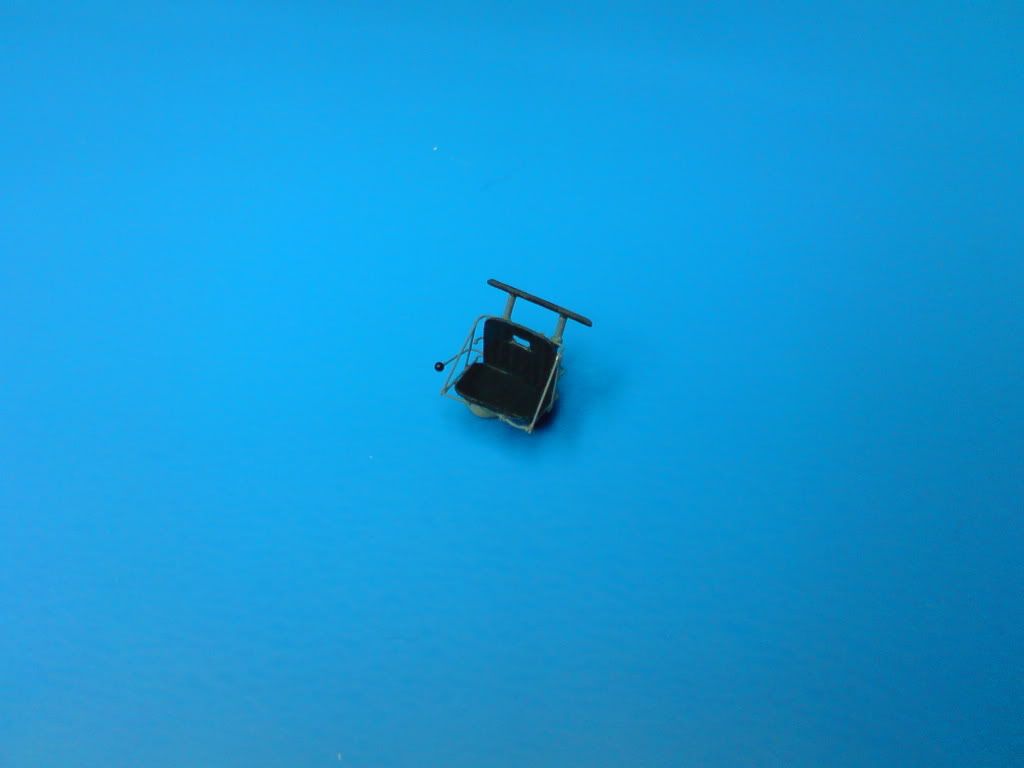
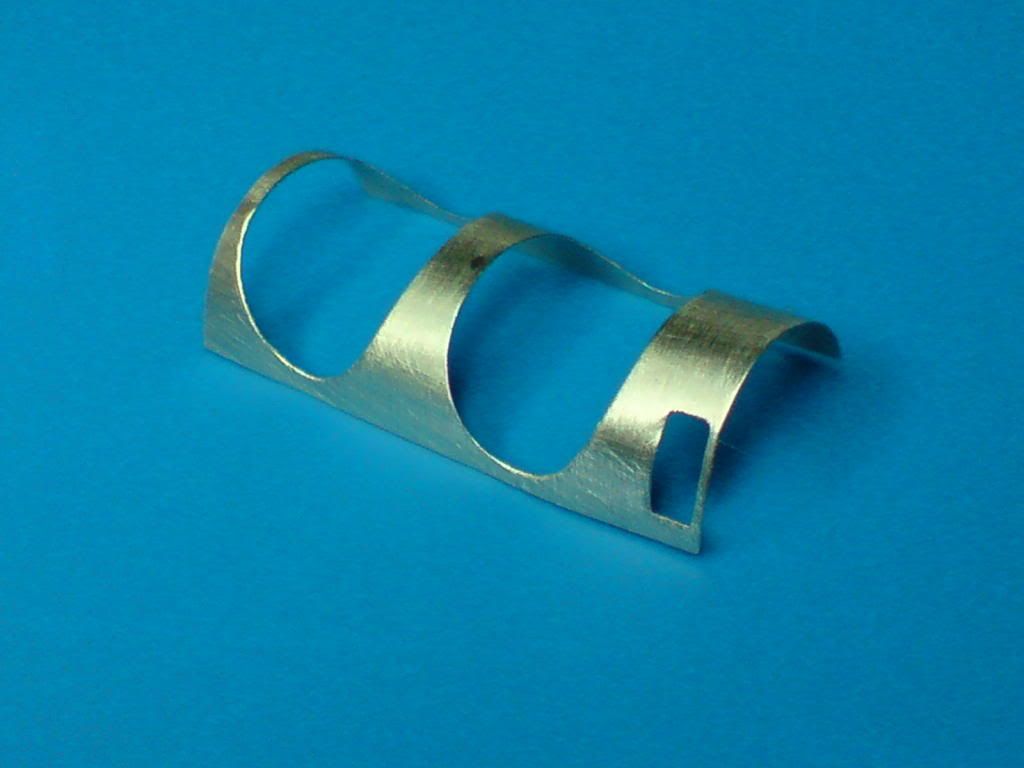
The seat baskets are ready. Now I only have to make the seats add harnesses and put it inside cockpit. By the way, have you got any pictures showing the front seat – I think it differs from the rear seat (the back support) but have no reference… Here you can compare my piece with PART PE piece.
That's a good question, and your Polish is very good as well. But I promised to write in English so everyone can easly translate my posts. I wish I knew russian - it would be much easier... Anyway, the seat baskets are made from single wire of some cable. I bent it on the template so both seats look the same. Then glued the wires with CA glue.
I showed the photoetched piece just to compare how much it differs from the original seat basket. Mine is made correctly to the drawing.
Нечаев For me you are a hero because I can't solder even big parts. I still remember how difficult it was to solder the sidecar frame in my 1:9 Harley.
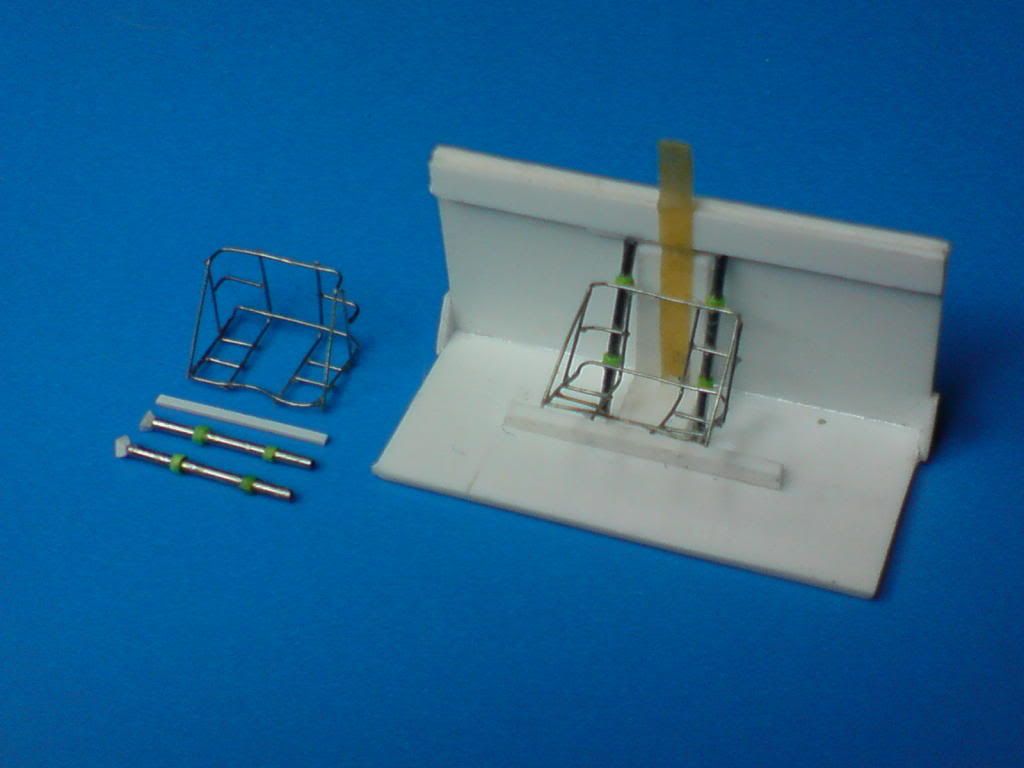
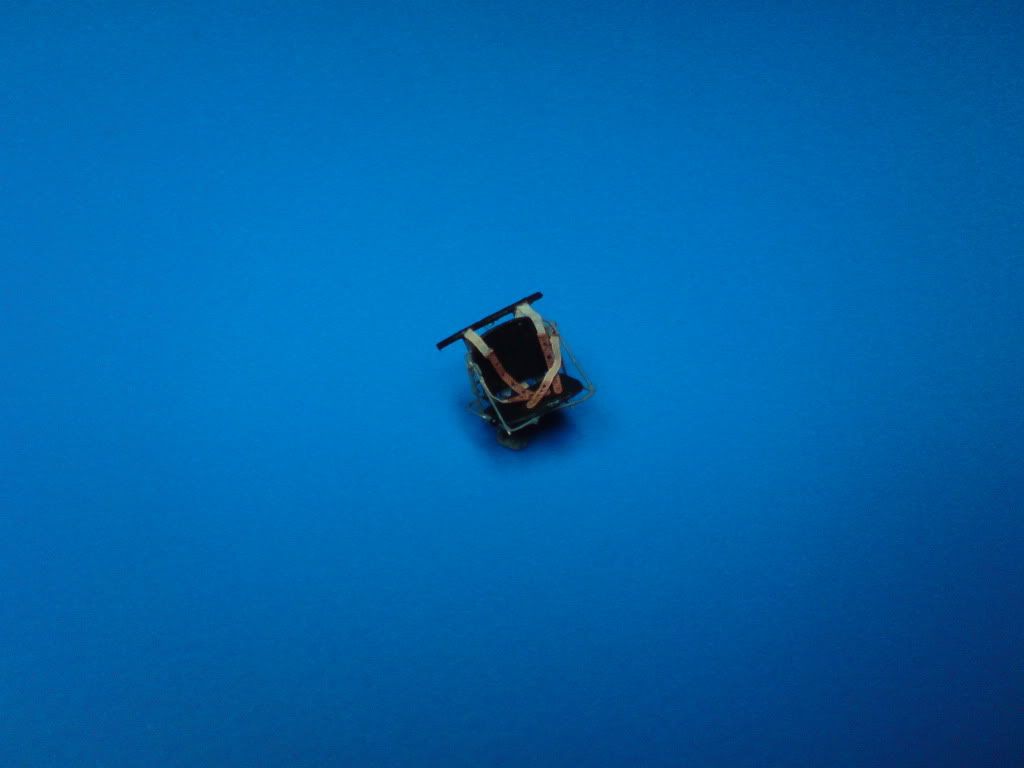
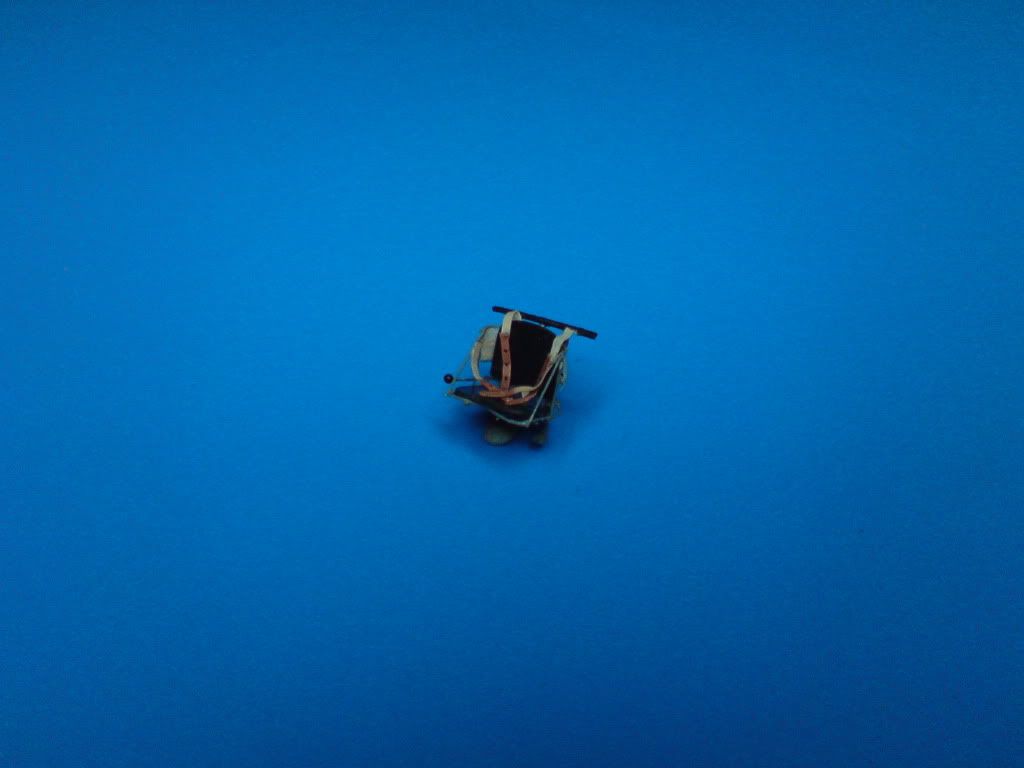
There's been a little progress in my project. As I thought the back of rear seat differes from front seat. It has got a hole through which the harness is threaded. The harness of the front seat is a bit different. Here are some new pictures:
Rear seat (still without few pieces).
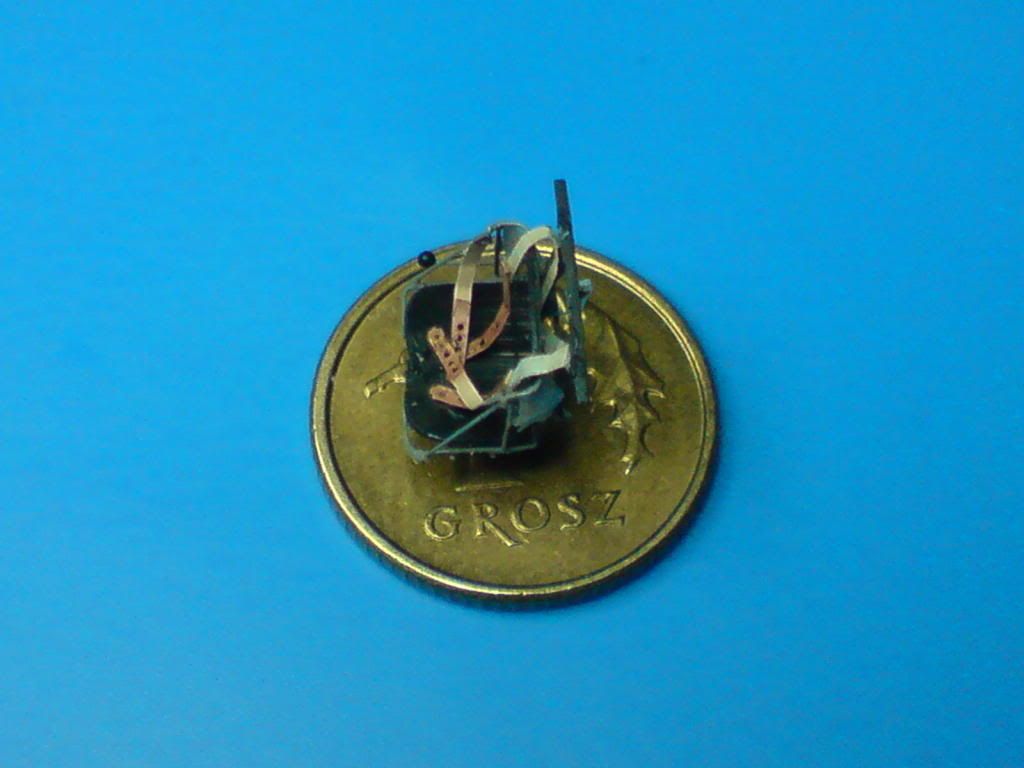
Front seat:
Front seat with smallest Polish coin to compare the size:
I bet the machine gun bay in your Condor will be even better I regret I didn't know this forum when I was building my KOR-1. But on the other hand who said I can't makie it again from scratch
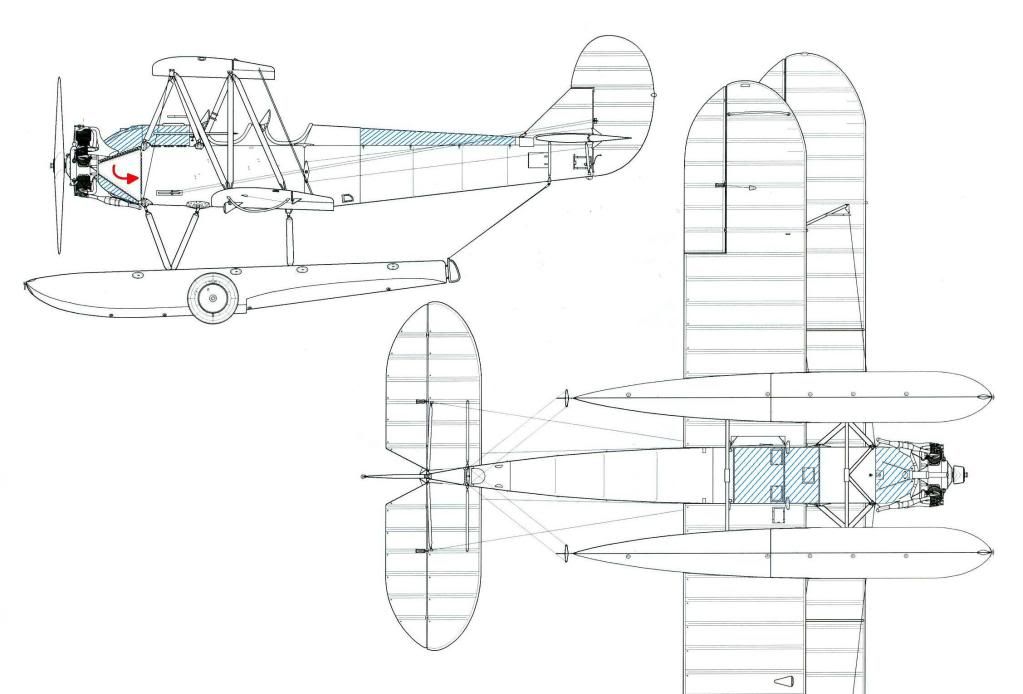
Hi! I thought you might be interested in what I actually plan to do.
The panels that I intend to leave open are marked with blue lines. Red arrow shows the "door like" hatch that will be left open as well (on both sides). I also changed my mind regarding material for spine covering. Initially I thought to use PVC film, but then realized that it might be too fragile and decided to use "post-beer scrap".
Вы не можете начинать темы Вы не можете отвечать на сообщения Вы не можете редактировать свои сообщения Вы не можете удалять свои сообщения Вы не можете голосовать в опросах Вы не можете вкладывать файлы Вы не можете скачивать файлы