Although I am new to this forum, you might have seen some of my little projects. Now, thanks to kind help of Vyacheslav I can log on and share my builds with you. At the moment I’m building two Harleys in 1:72. For the first time I cast the parts in resin, so I can almost open a production line . I’ve used Tamiya 1:35 model to measure and scale it down to 1:72, but mostly I am relying on Italeri 1:9 kit (because it’s more detailed).
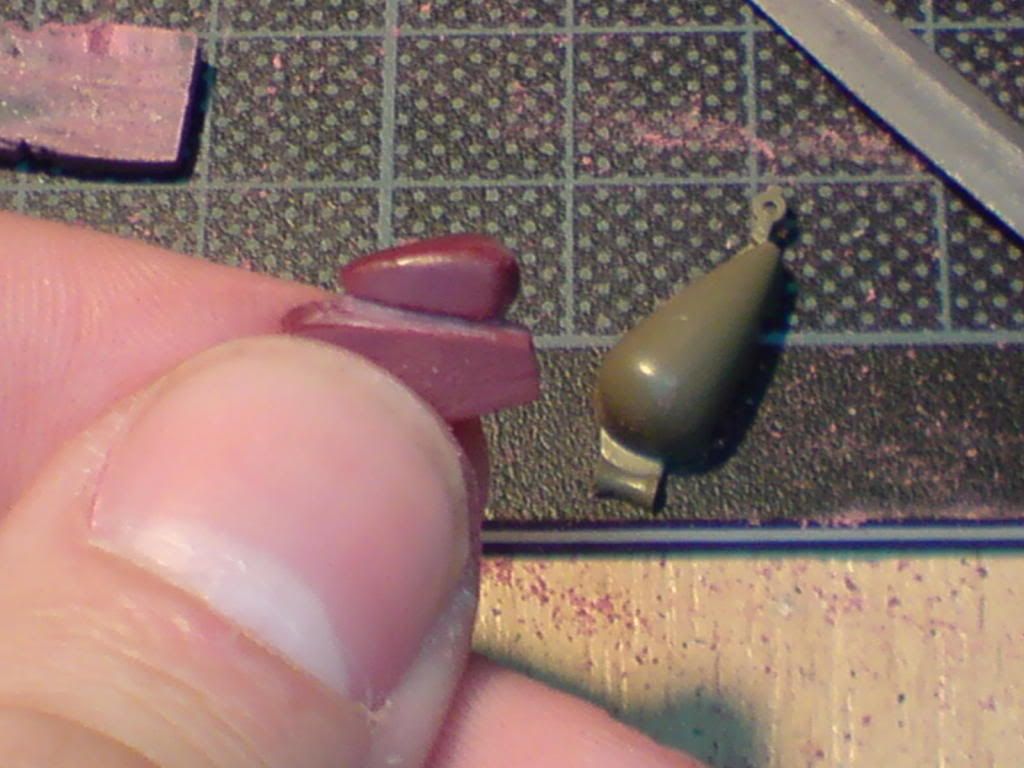
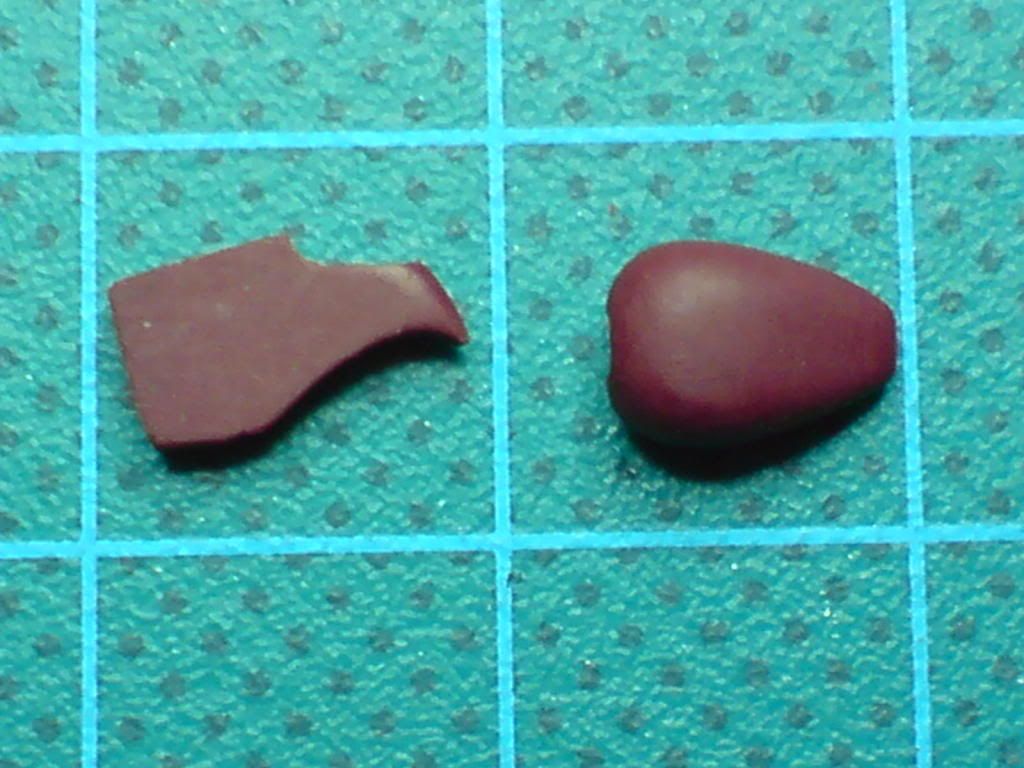
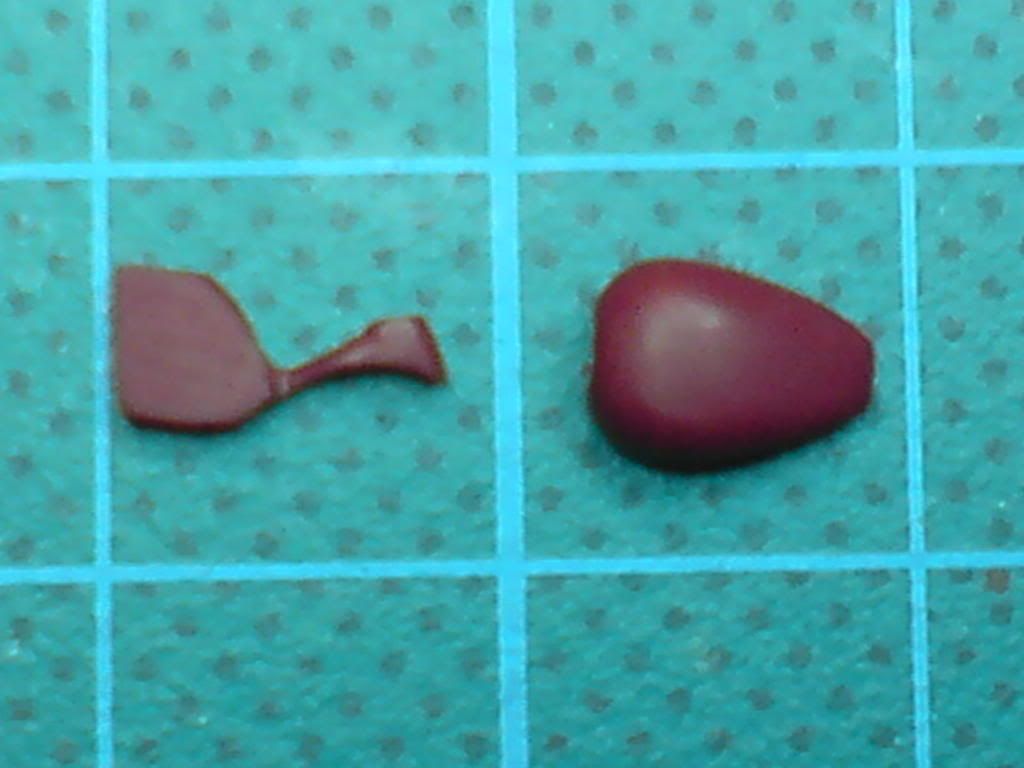
I’ve started with fuel and oil tanks. I use very hard plastic to carve the most complicated shapes.
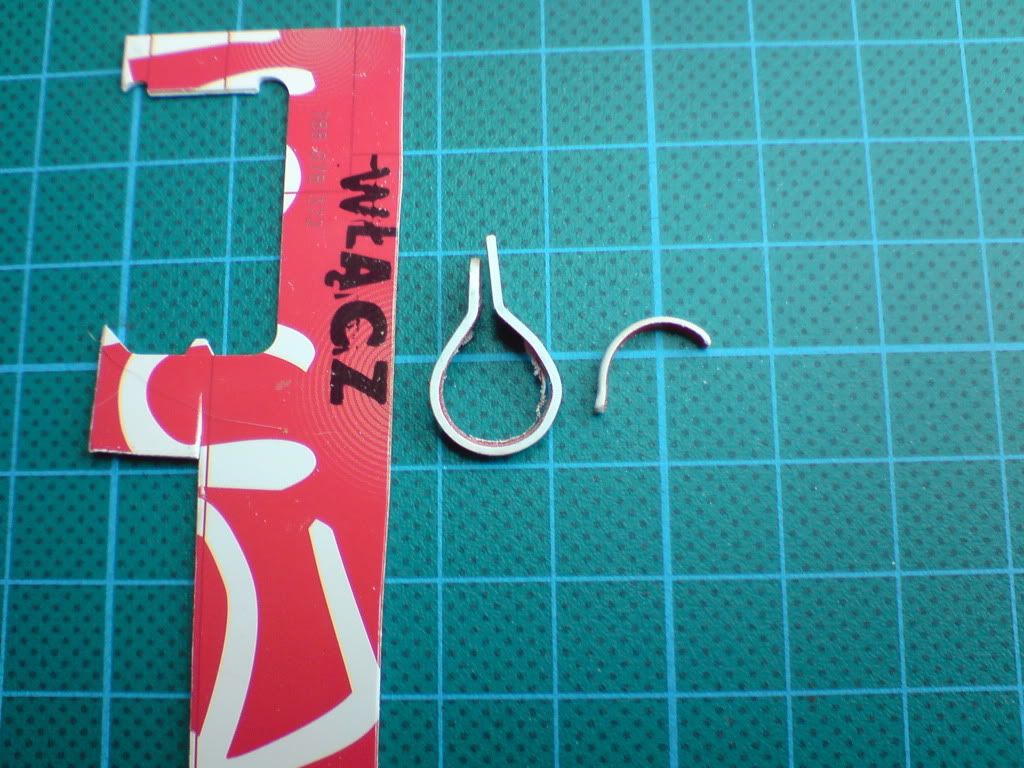
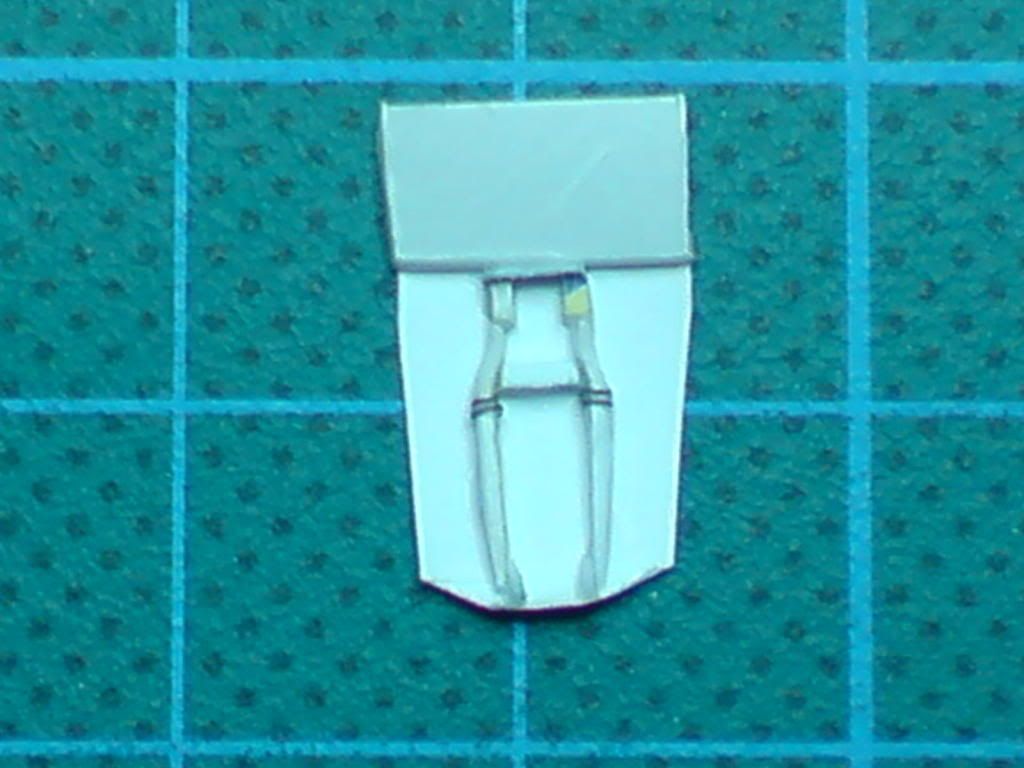
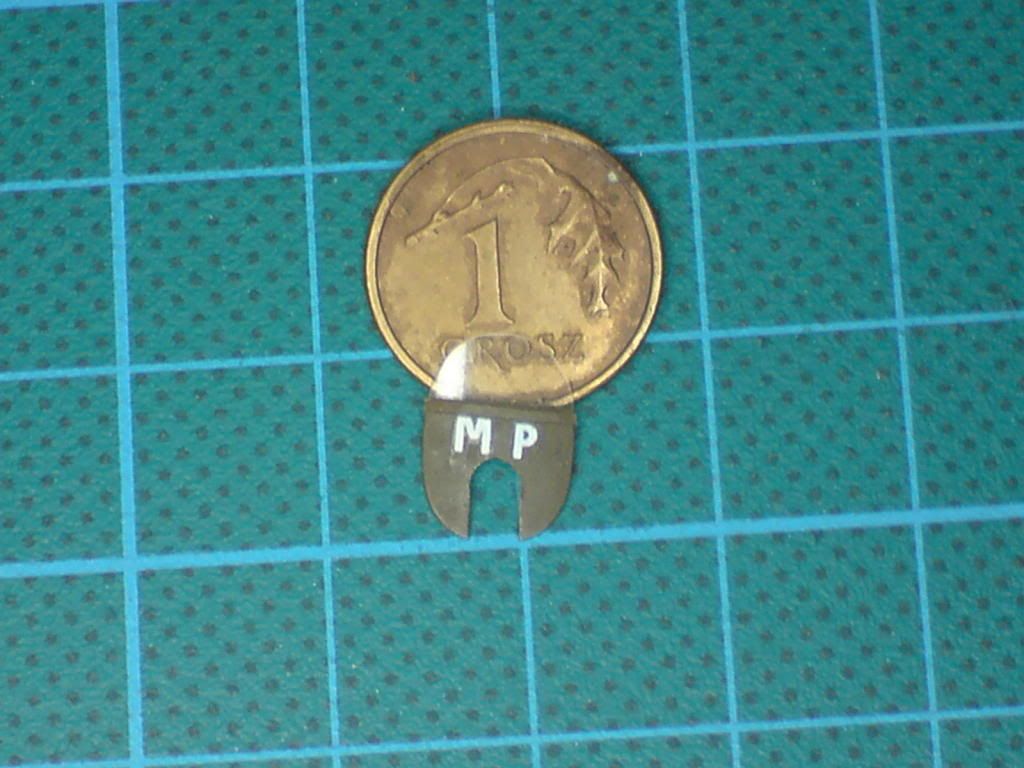
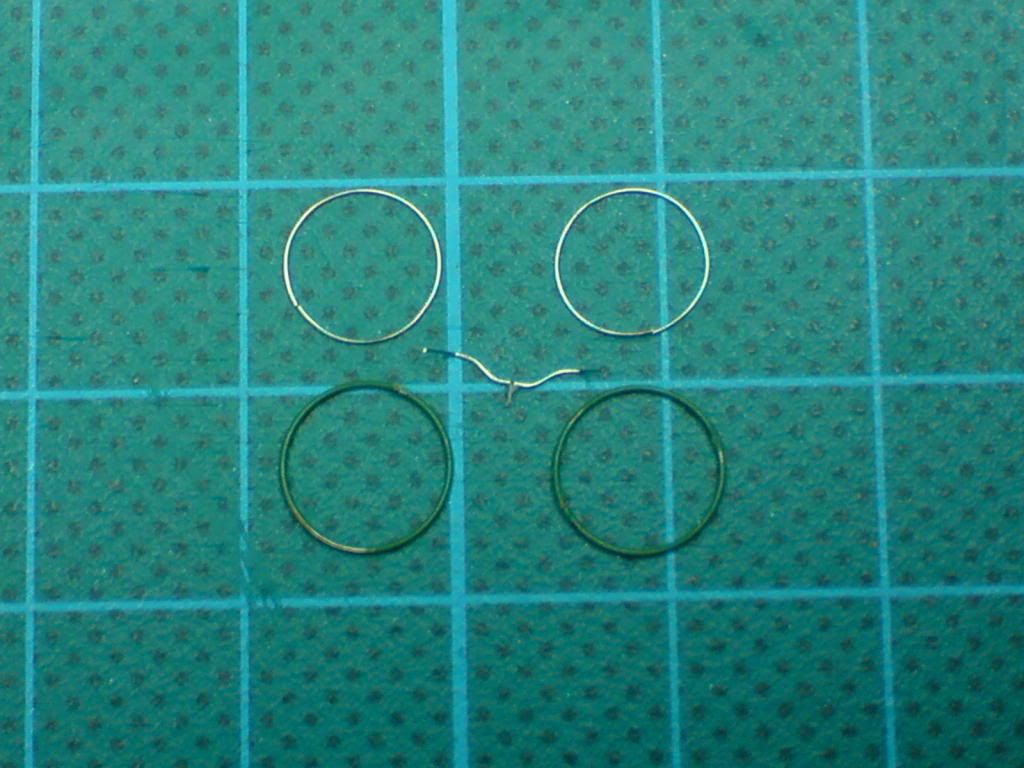
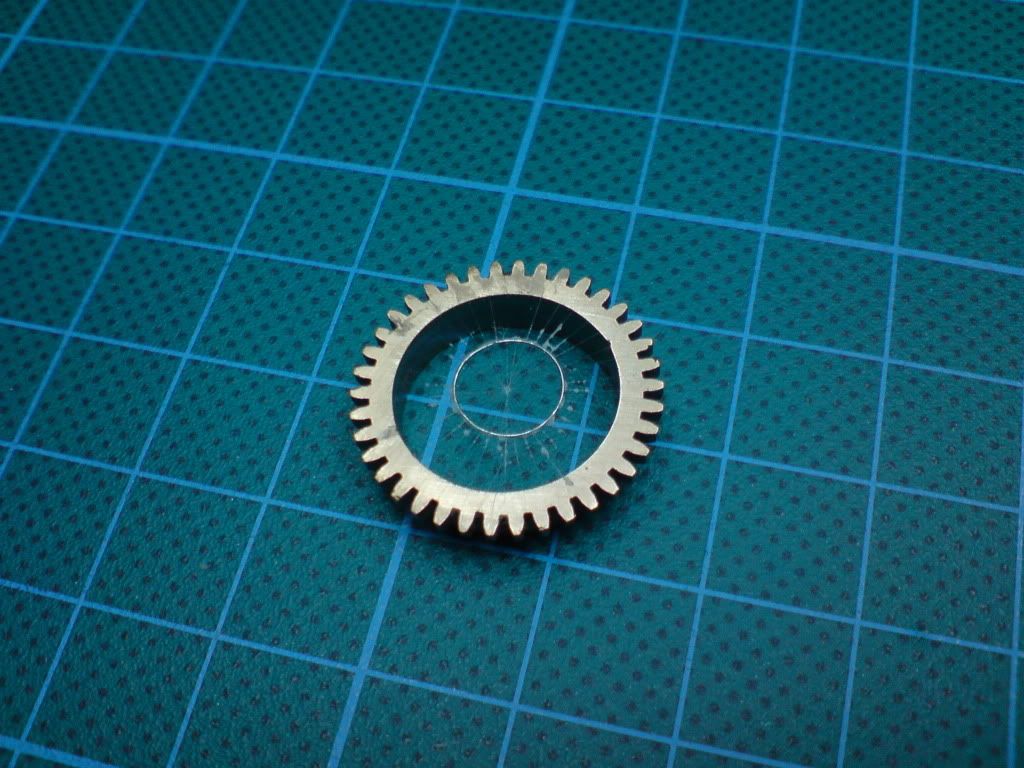
Then I’ve prepared elements of the frame and mud guards. They’re made of stripes cut from SIM card holder and shaped over a flame.
Jako miłośnik motocykli będzie oglądał z zainteresowaniem pracy Vasko. W tamii wymiary nie są dokładne. W 1 / 35 orient najlepiej Harley z Miniart. 1 / 72 jest bardzo poważna skalę. I nadal nie doszedł do tego etapu. W najbliższych planach Triumph 3 HW i Jawa Californian ale w 1 / 35. Jeśli są jakieś pytania dotyczące Harley - mów. Postaram się pomóc. Mam co dokumentacja na jej temat. Przepraszam za mój polski - przez długi czas nie mówił.
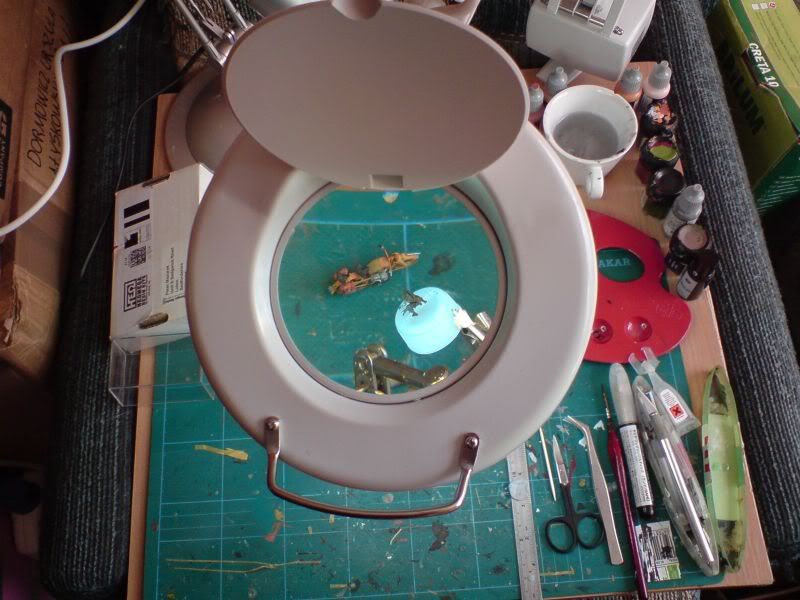
Minsk94 I've never used opti-visor, I prefer a lamp with magnifying glass. Here's my workshop when I built DKW NZ350.
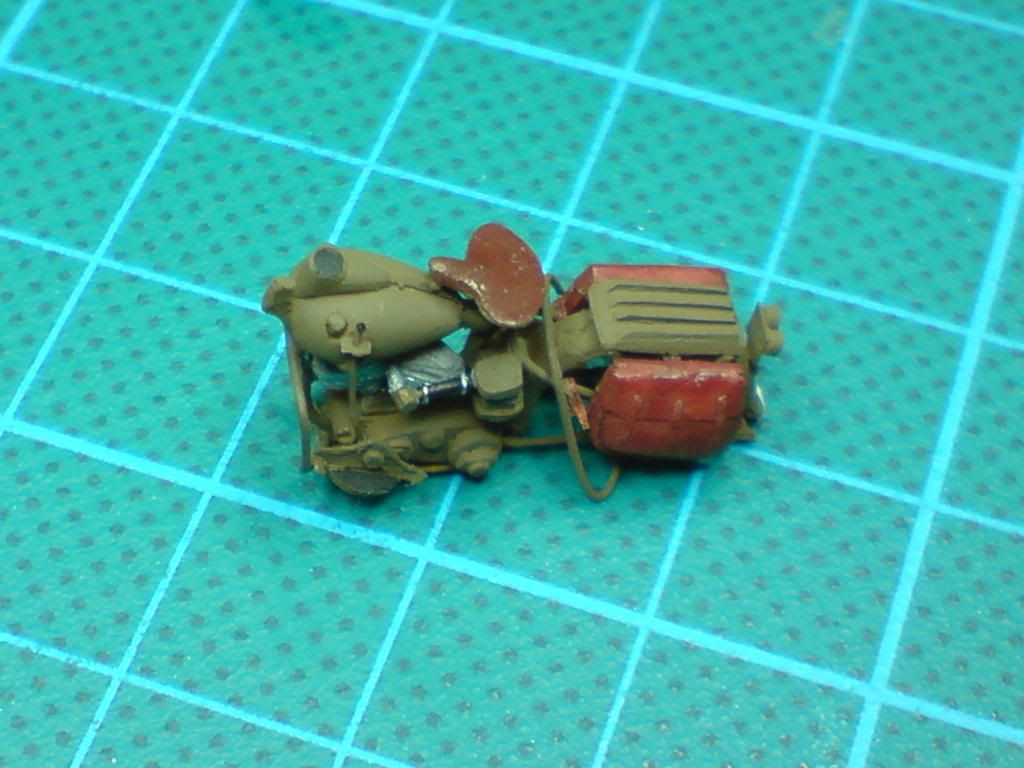
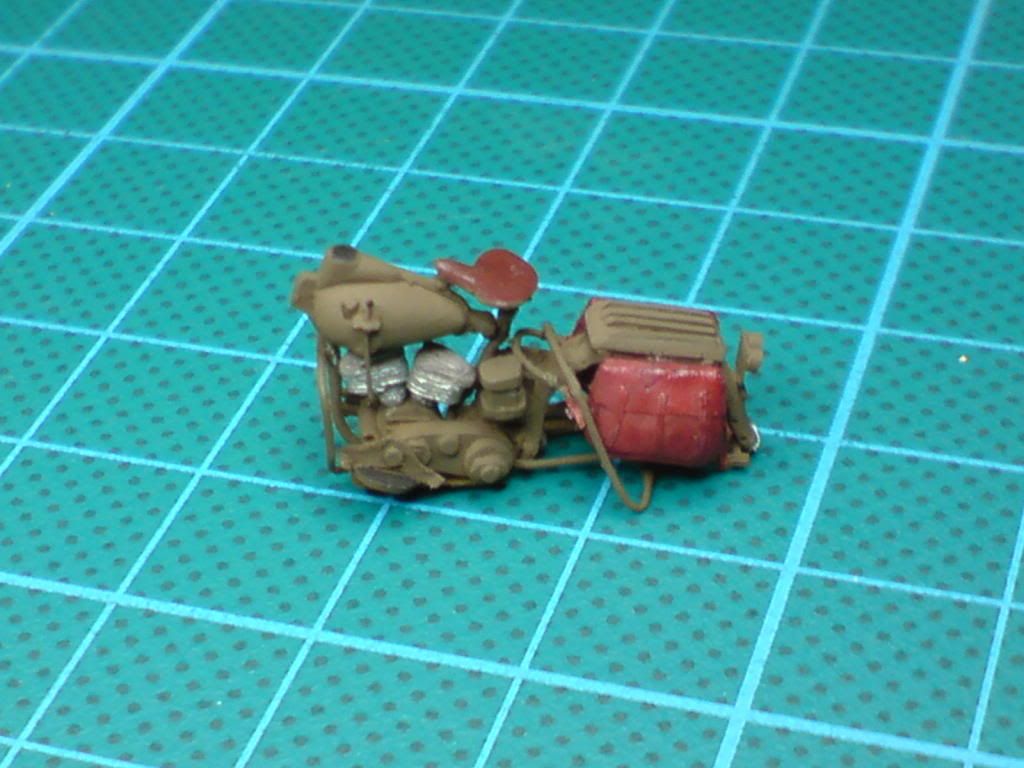
GFO I'm happy to meet another motorcycle enthusiast. I know that Tamiya’s model is not perfect and I don’t fully rely on it. Luckily I’ve got 1:9 model as well . I’ve gathered some information on WLA – I got the Harley WLA Soldiers in detail and scale pdf, and loads of pictures found on the web. Here are some useful links: The Liberator and o5m6.de. But I’m still looking for some more information on WLA in Red Army service. I have already started another WLA with red star on the fuel tank, and with mortar equipped sidecar. Do you know if that version on picture below is a prototype or was it used in the army?
P.S. Don't worry with the language I'm sure your Polish is a lot better than my Russian . I can send you that pdf if you don't have it yet.
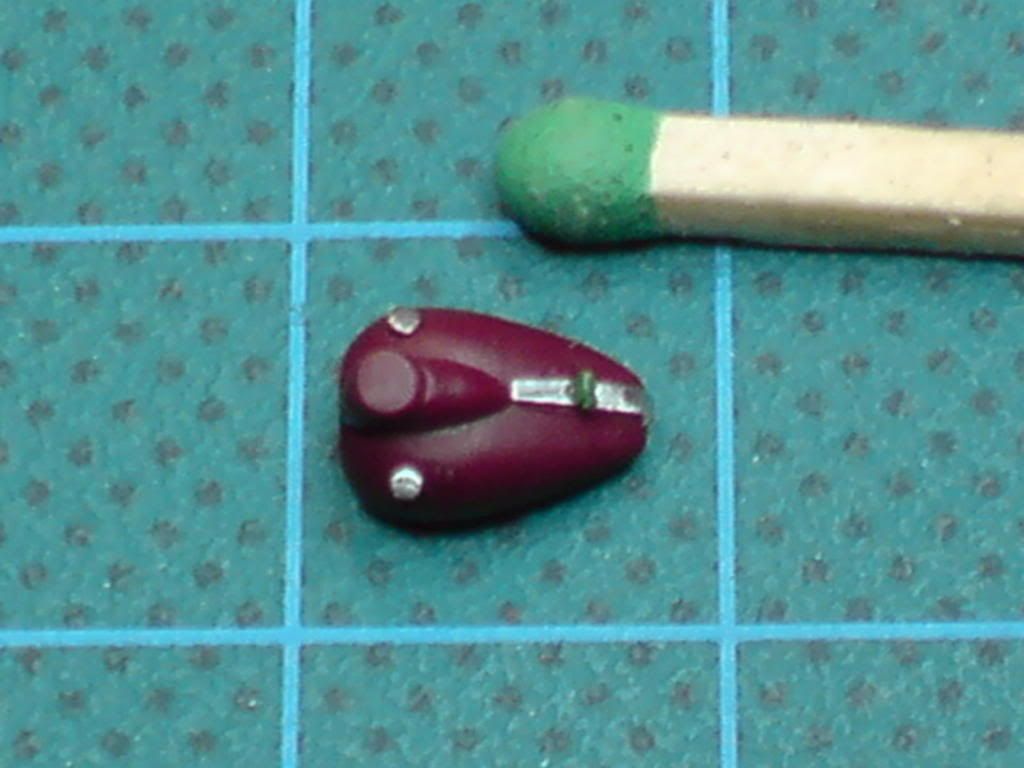
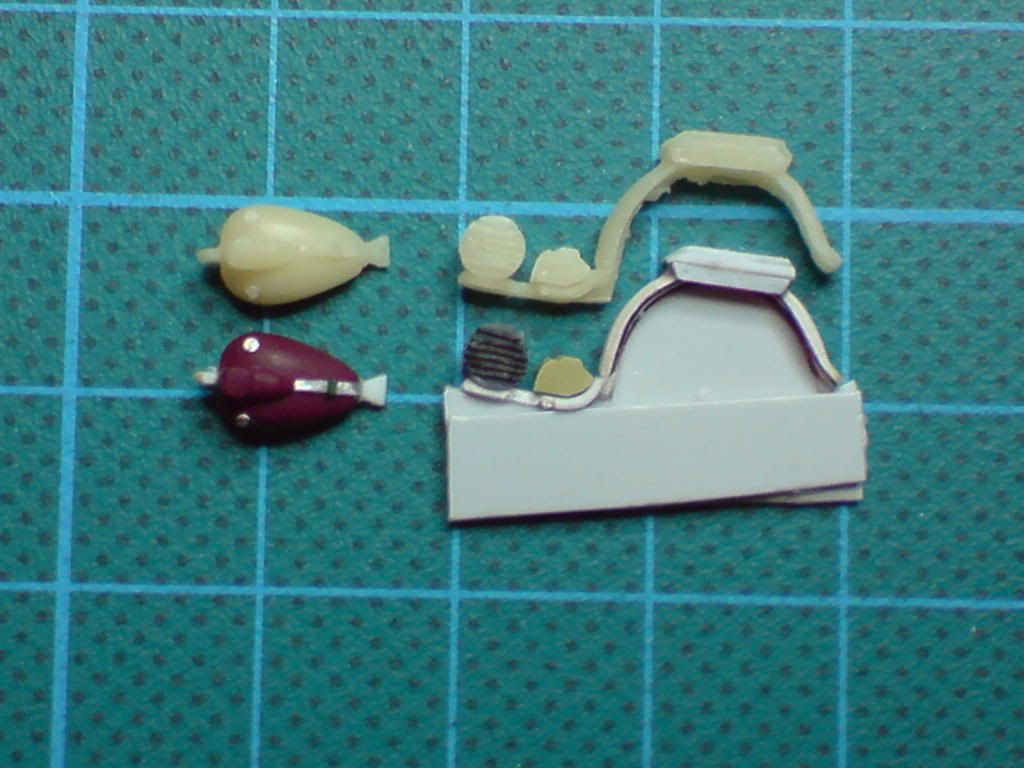
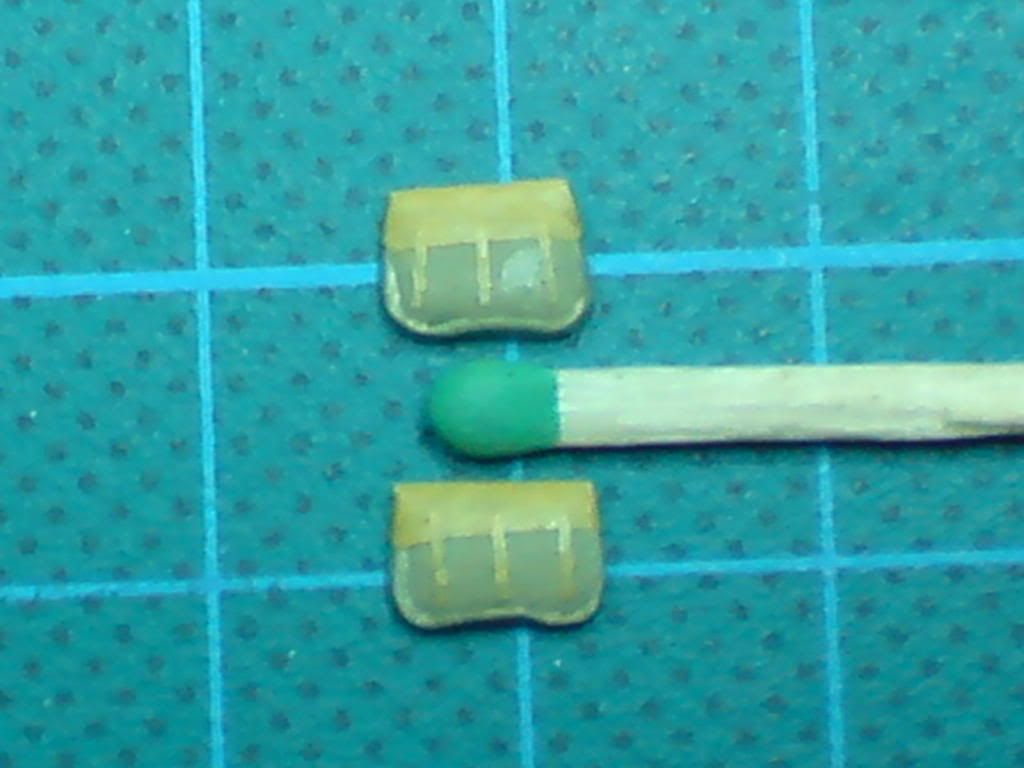
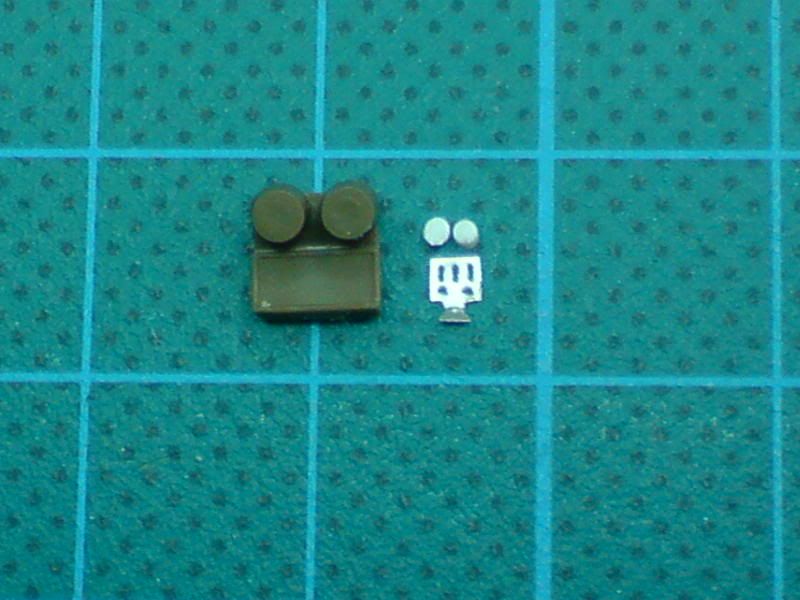
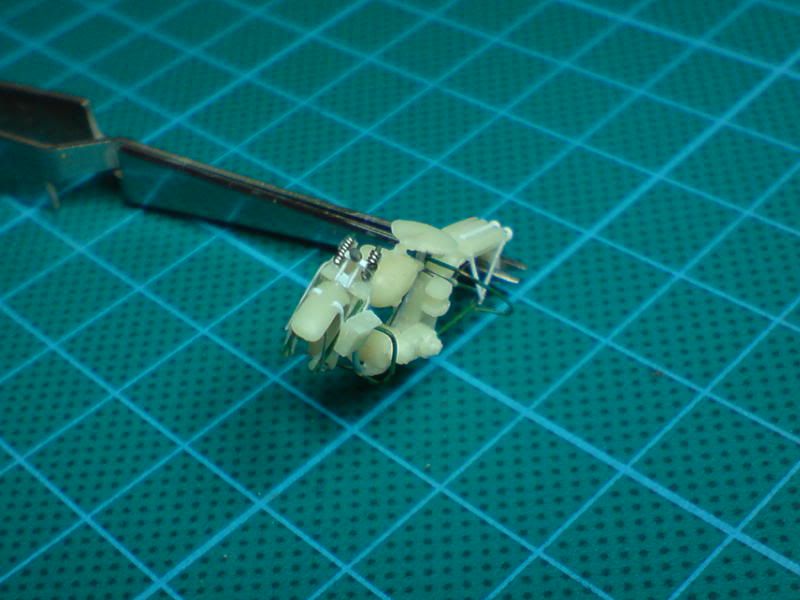
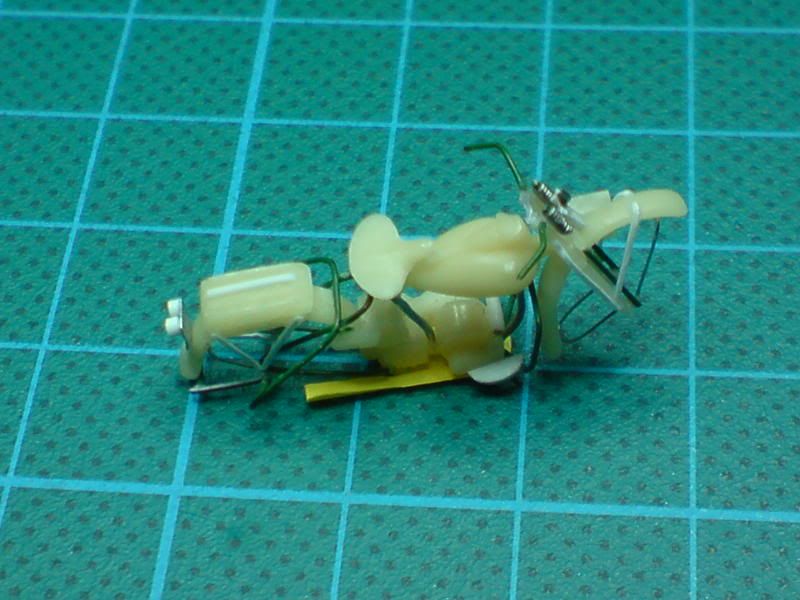
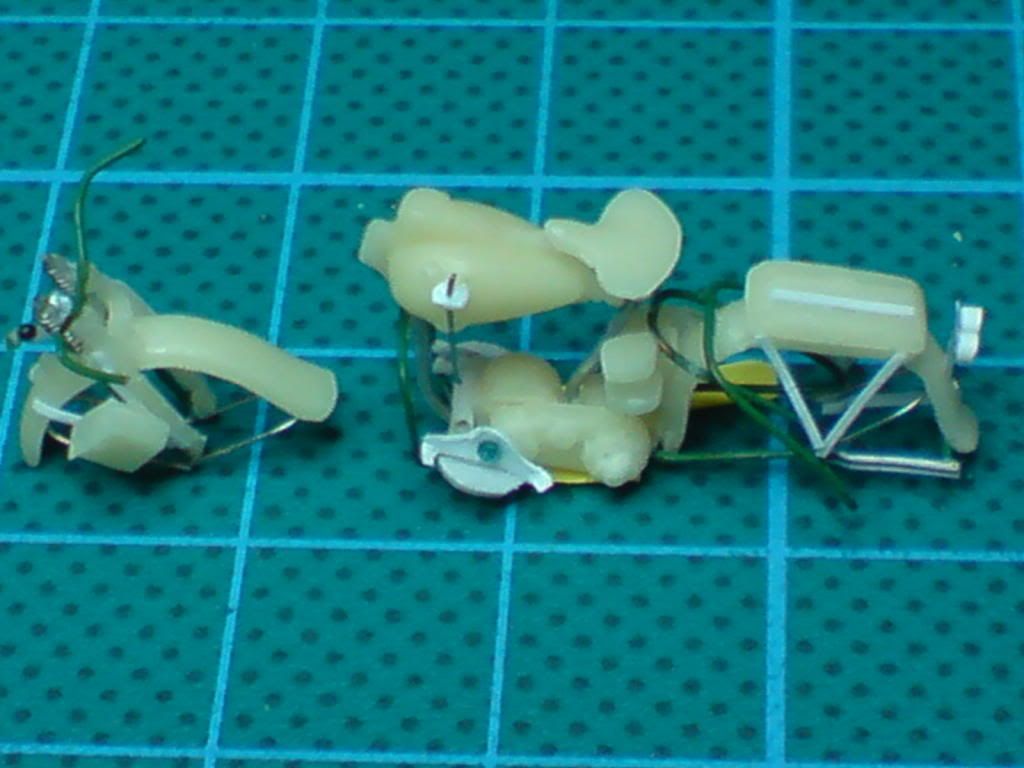
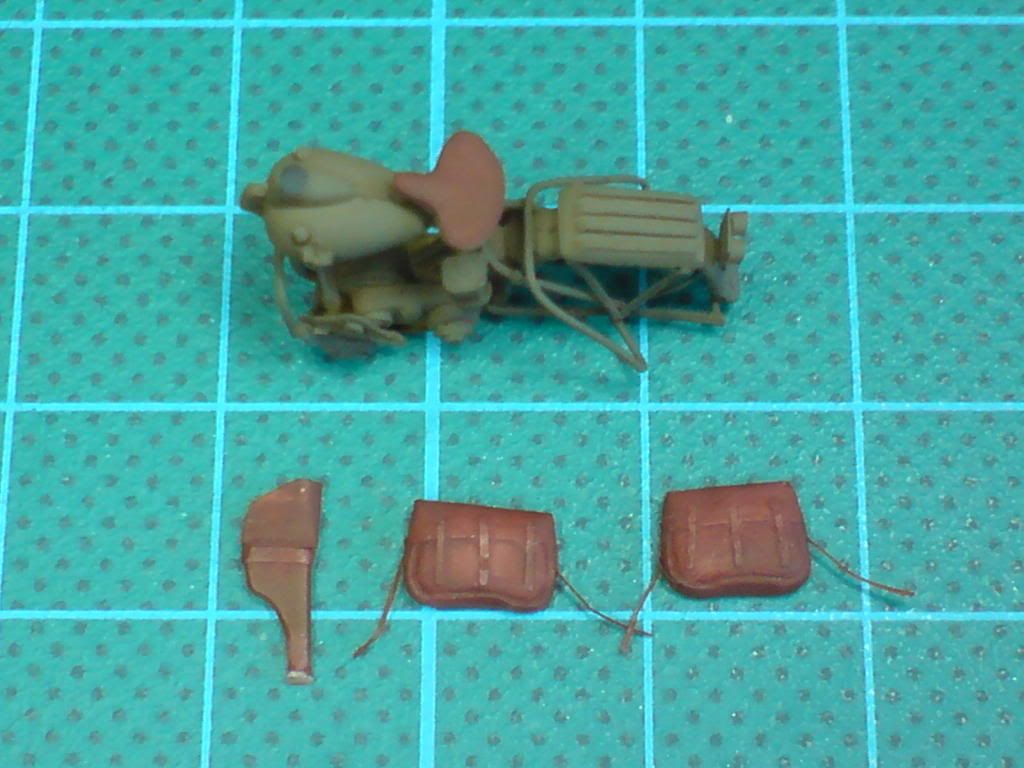
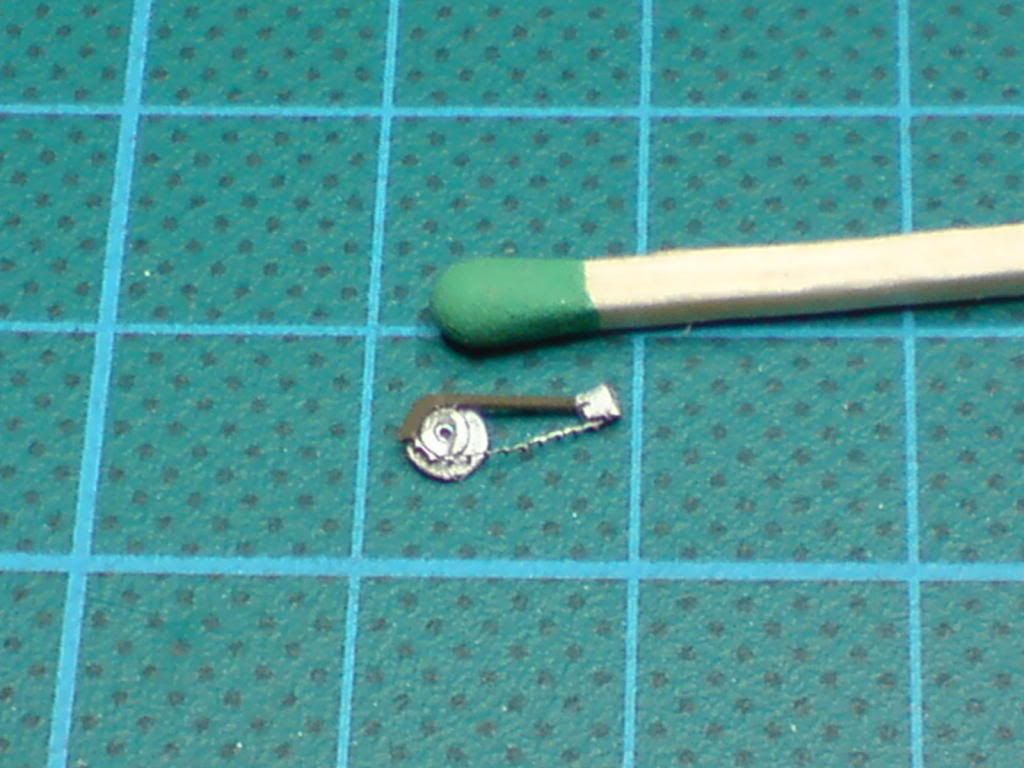
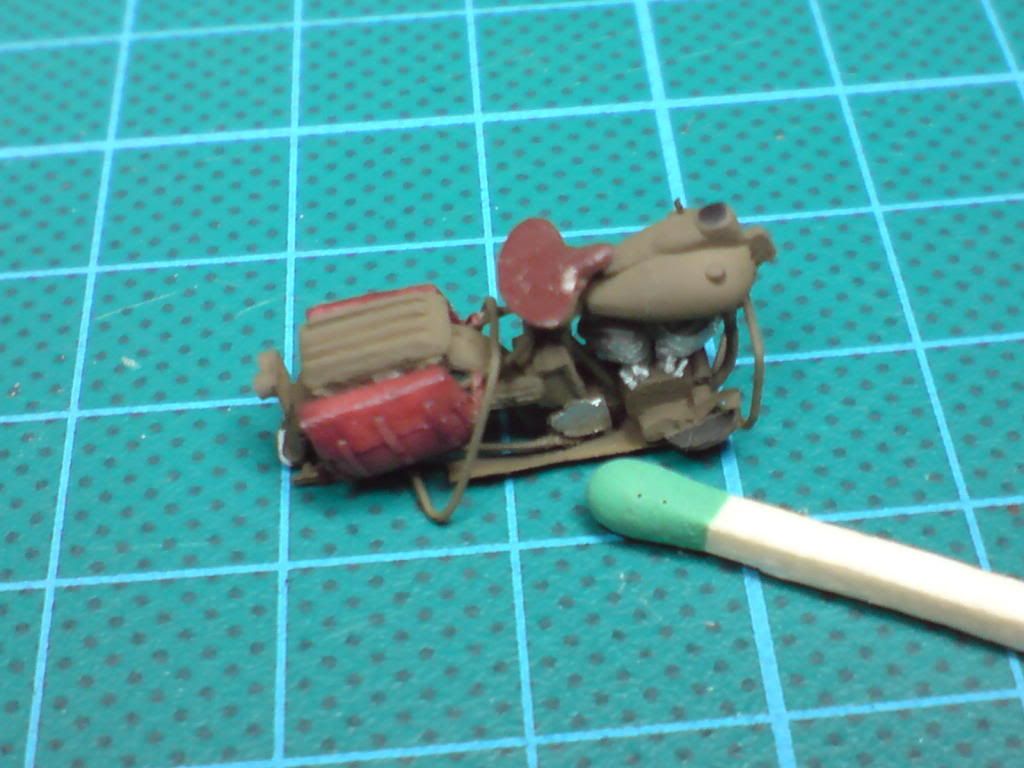
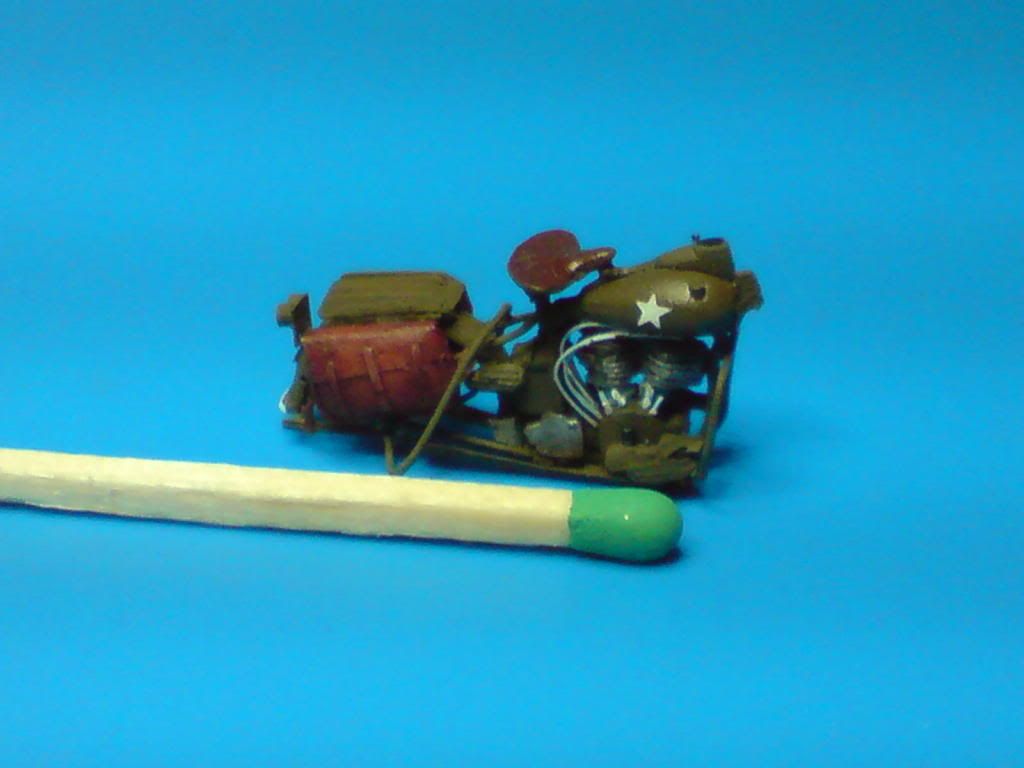
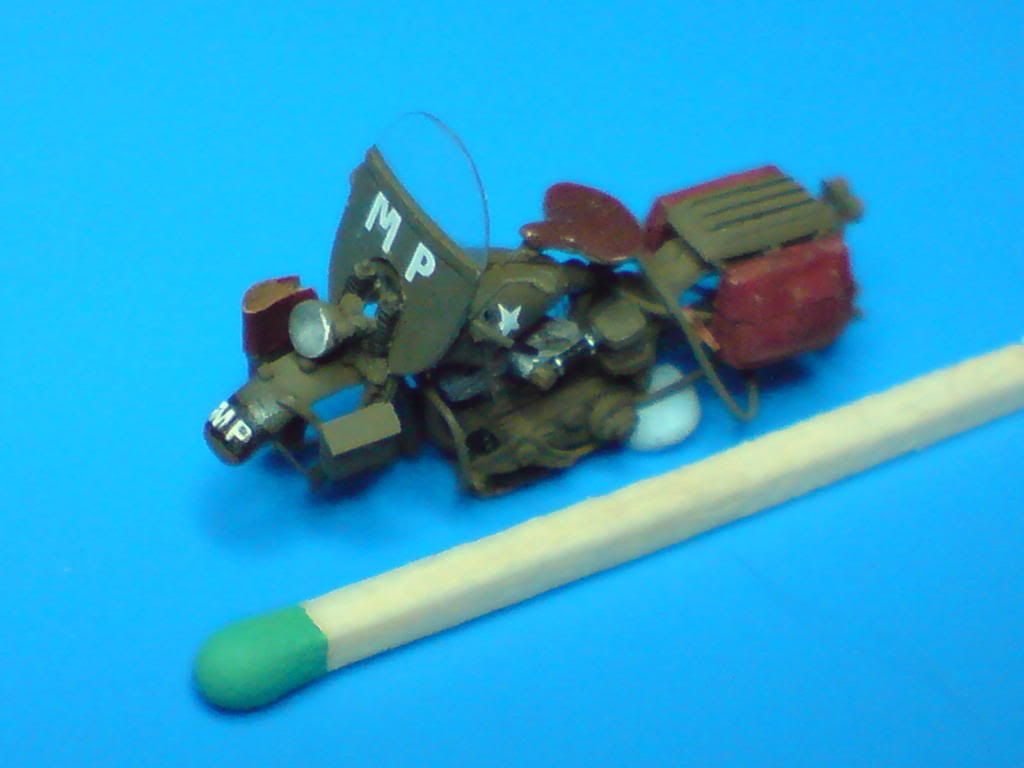
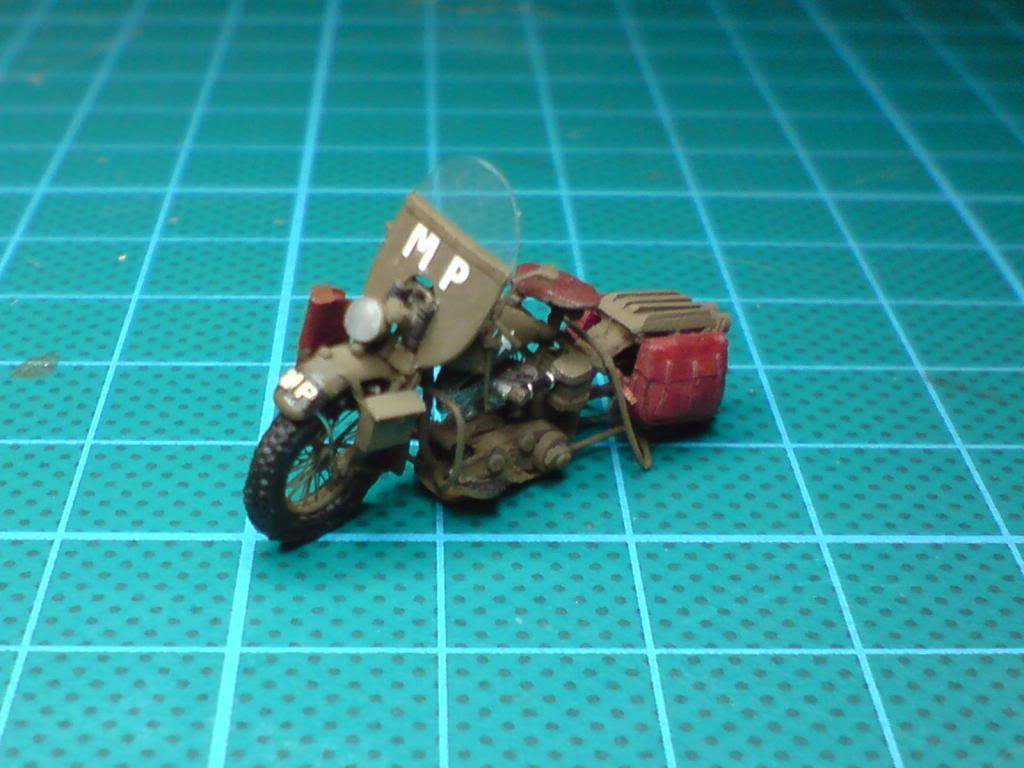
Coming back to my little mororcycle. As you can see The first resin castings weren't perfet, but after a few trials I managed to obtain some decent parts. On the picture with ruler there are: engine block part, air filter, battery, cylinders, tool box, front for piece, gun holster, front fork, and side bags.
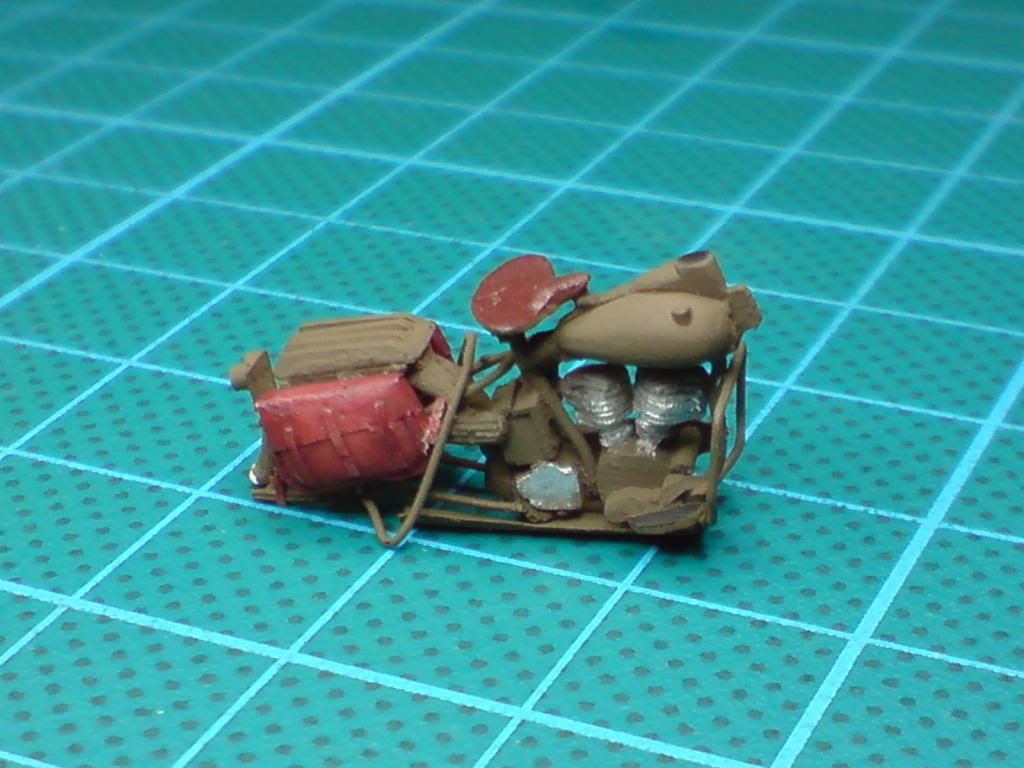
Marudek_PL This is radio-bike. Postwar. The photo was taken after 1953. The license plate is 4 digits and 2 letters. Such license plates were taken in the USSR in 1953. By this time, nearly all Harley were removed from the Red Army and handed over to road patrol and geologists. The coloring is clearly not the road patrol. Hence - a geologist. Former army motorcycle, it is clear from the plate tactical mark on the sidecar mud shield.
Thanks GFO for the explanation. But if this is geologist's bike, then why it has a cannon on the sidecar frame? Do you know any other interesting versions of Harley in Red Army service?
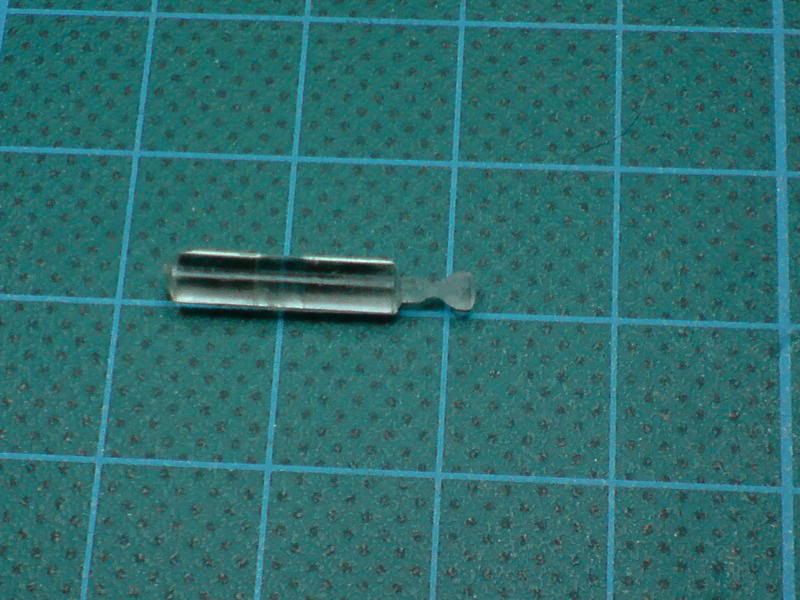
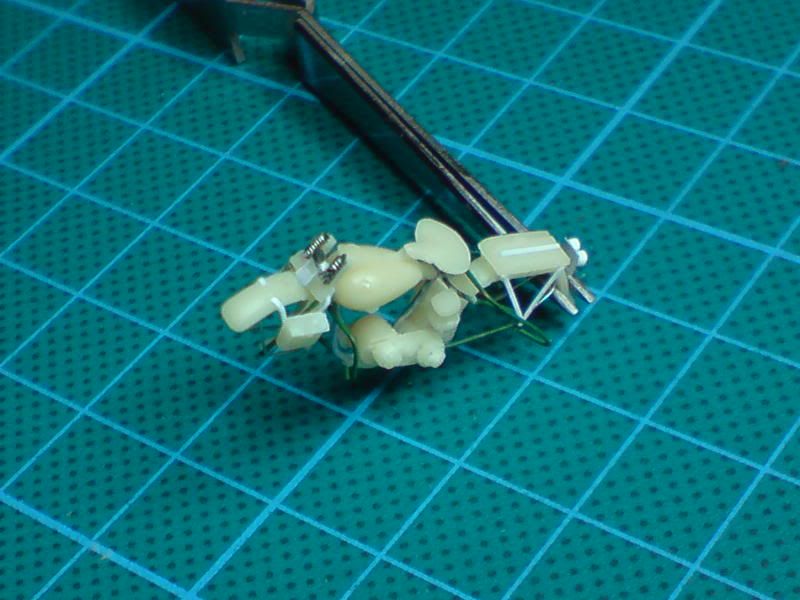
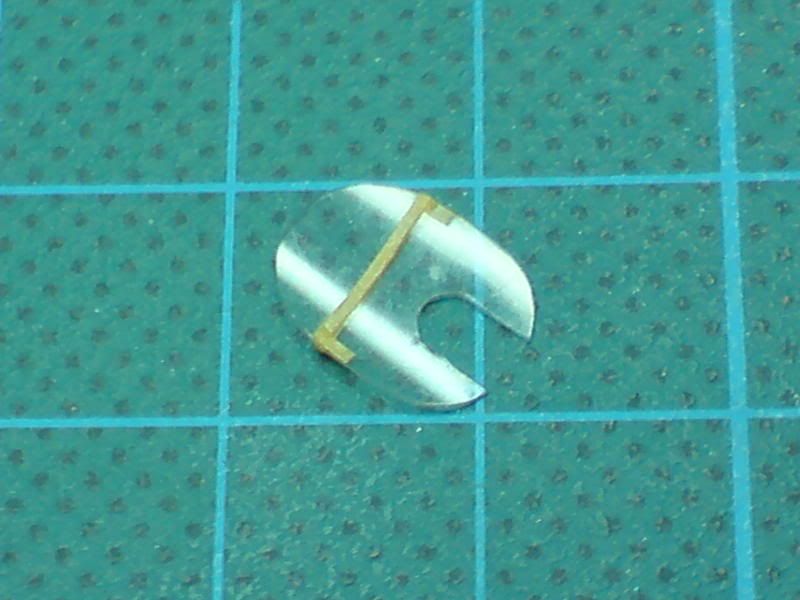
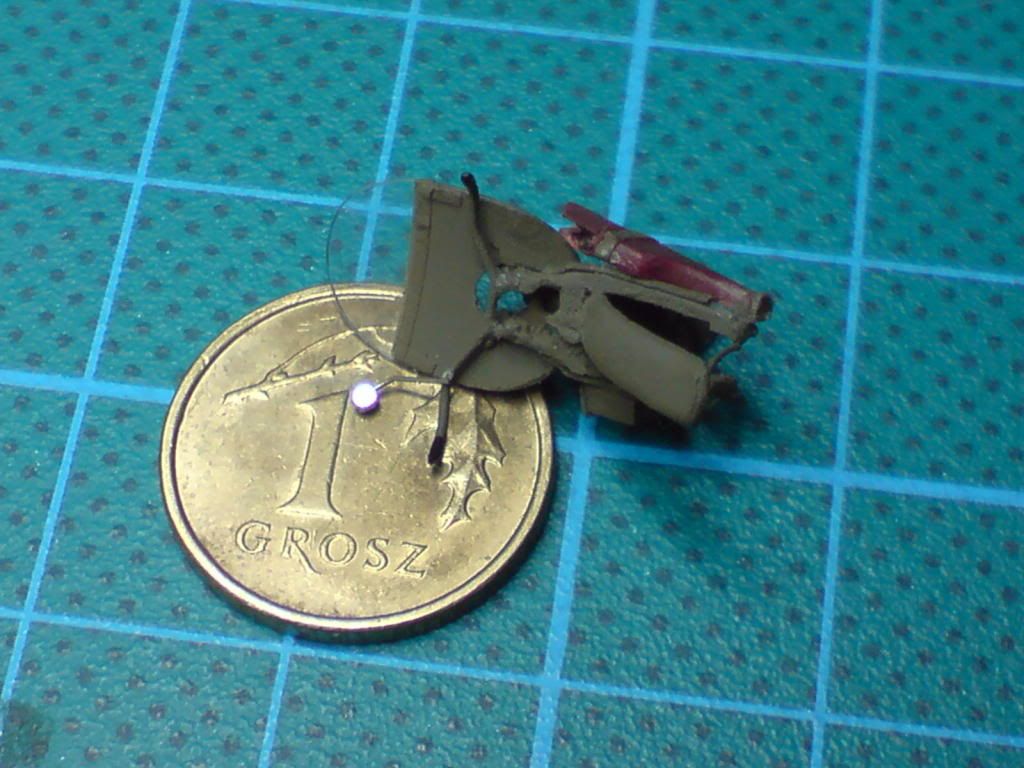
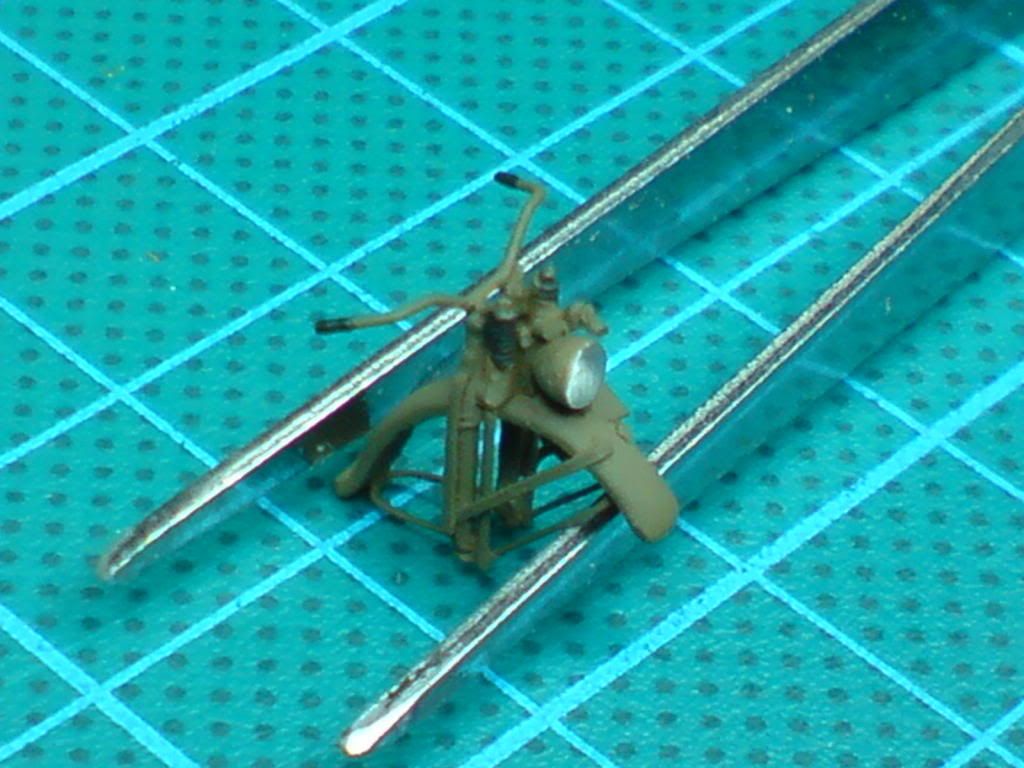
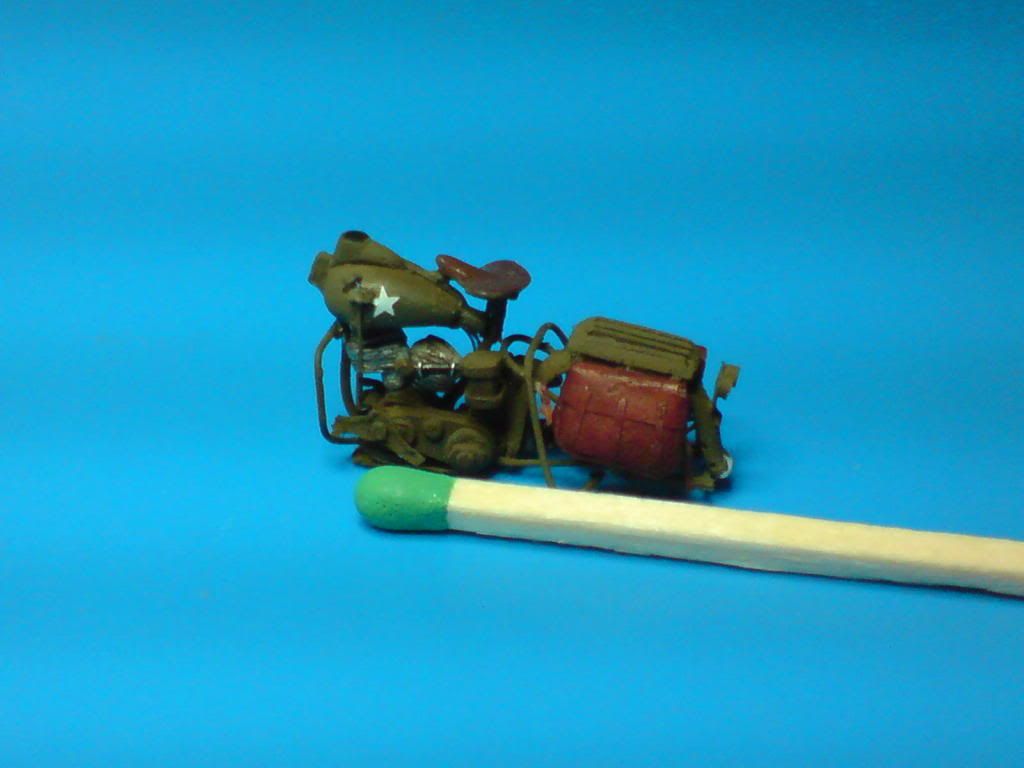
And here are some more pictures from my workshop. As you can see I‘ve added a couple of details. I’m quite happy with the rear lights bracket. I made it of small piece of aluminium sheet taken from a drink can. I think it looks even better than Tamiya’s 1:35 part. The front light is made of a piece of transparent sprue. Later on I will paint it silver (to imitate the inside mirror) and then olive green.
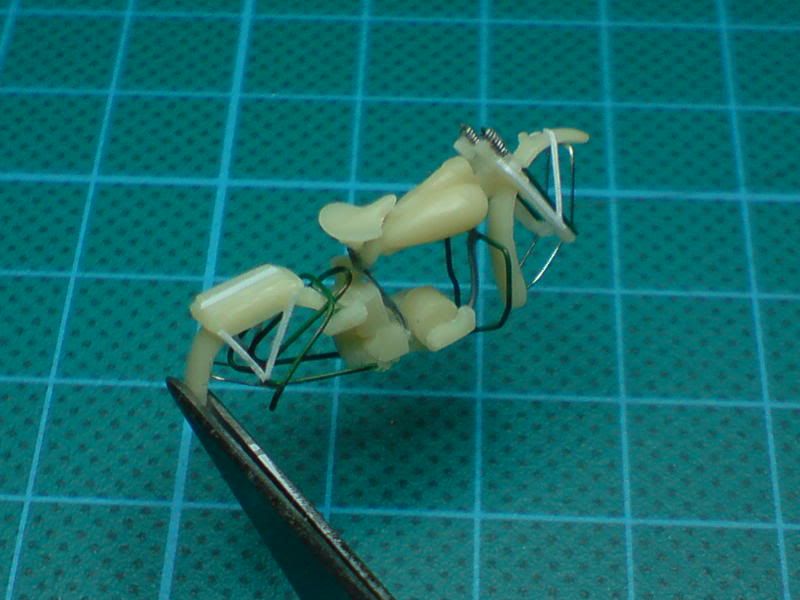
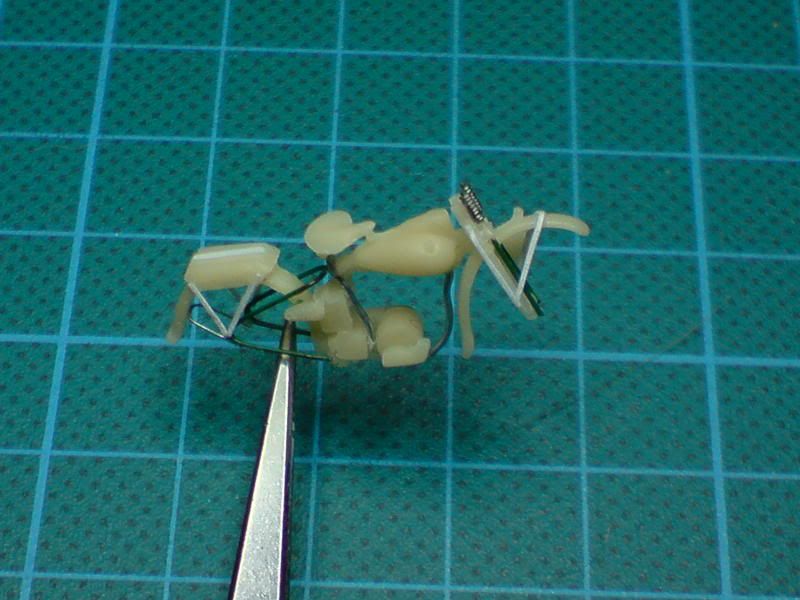
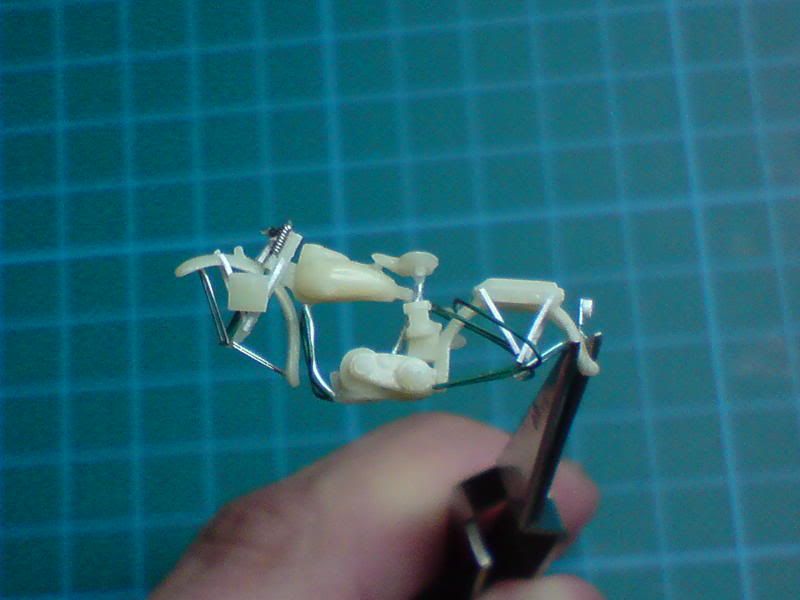
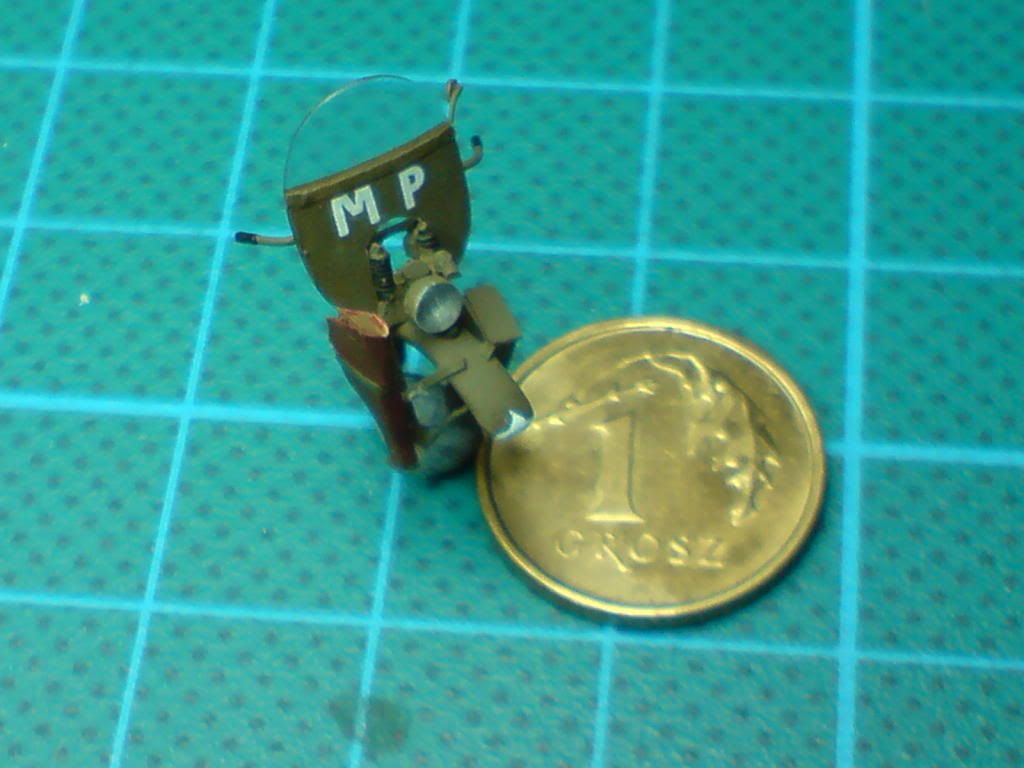
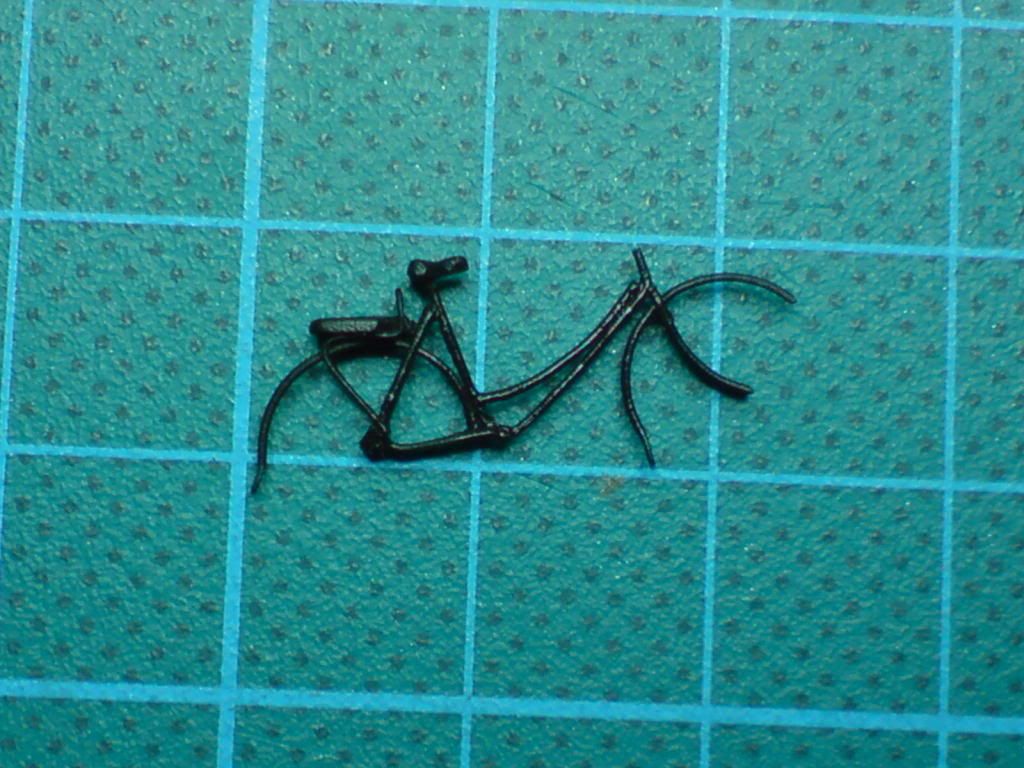
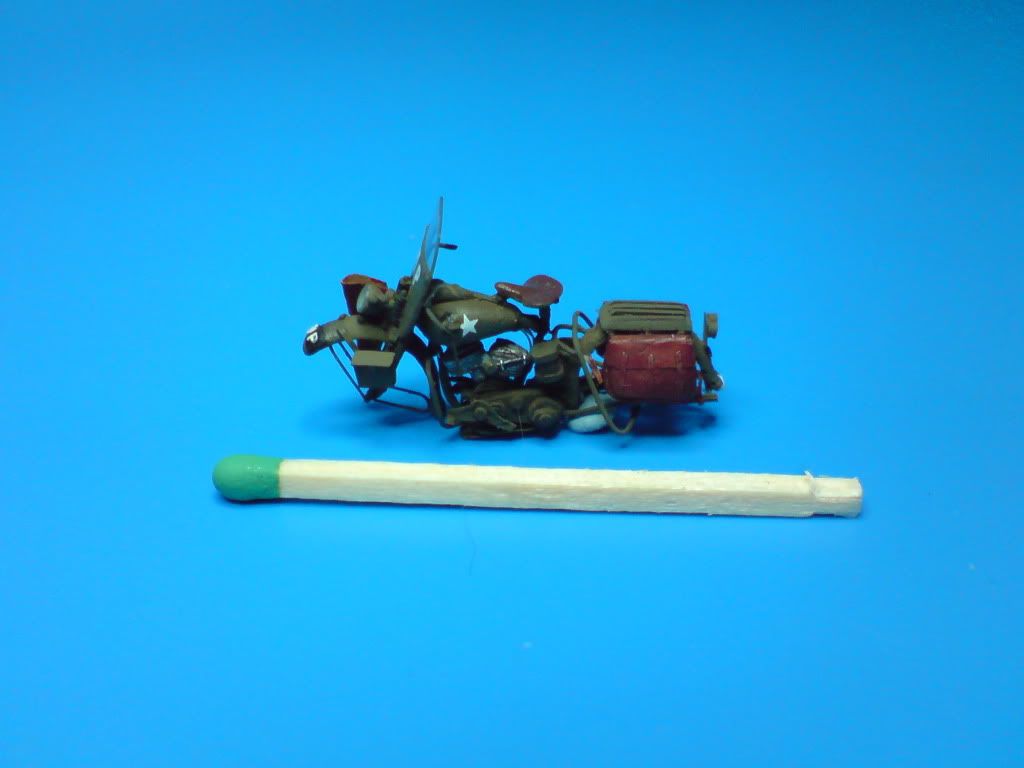
There is a little progress in the construction. Here you can see almost completed frame with two piece handlebars. Later I have replaced it with one piece part (previous version was to fragile and I broke it several times).
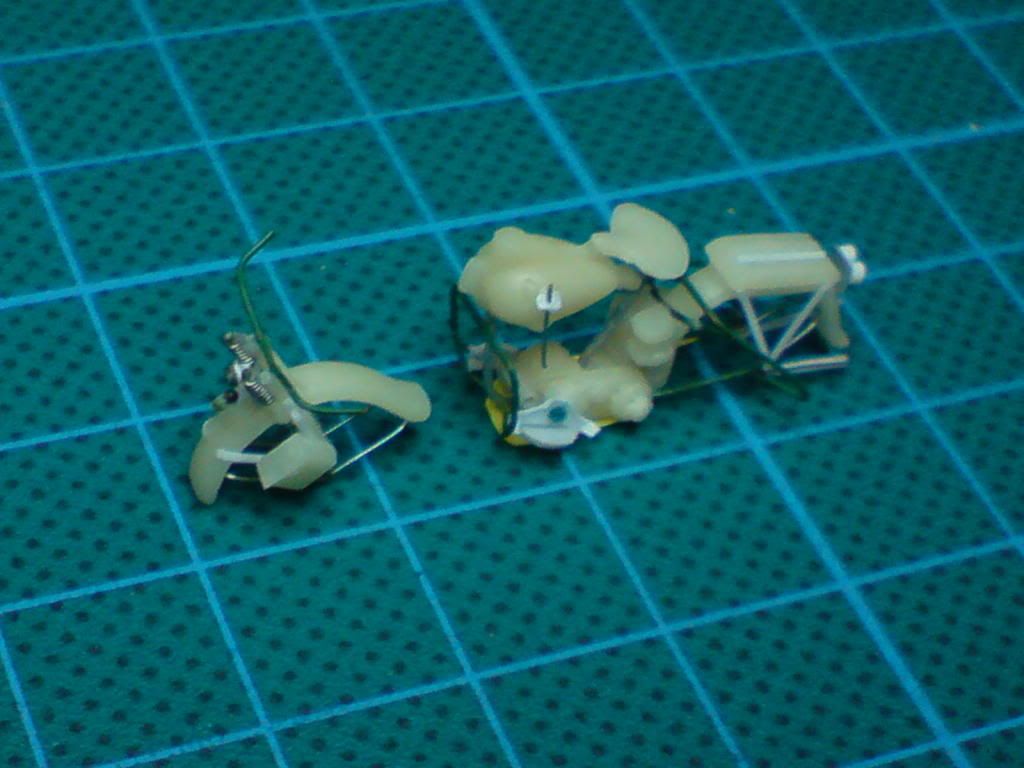
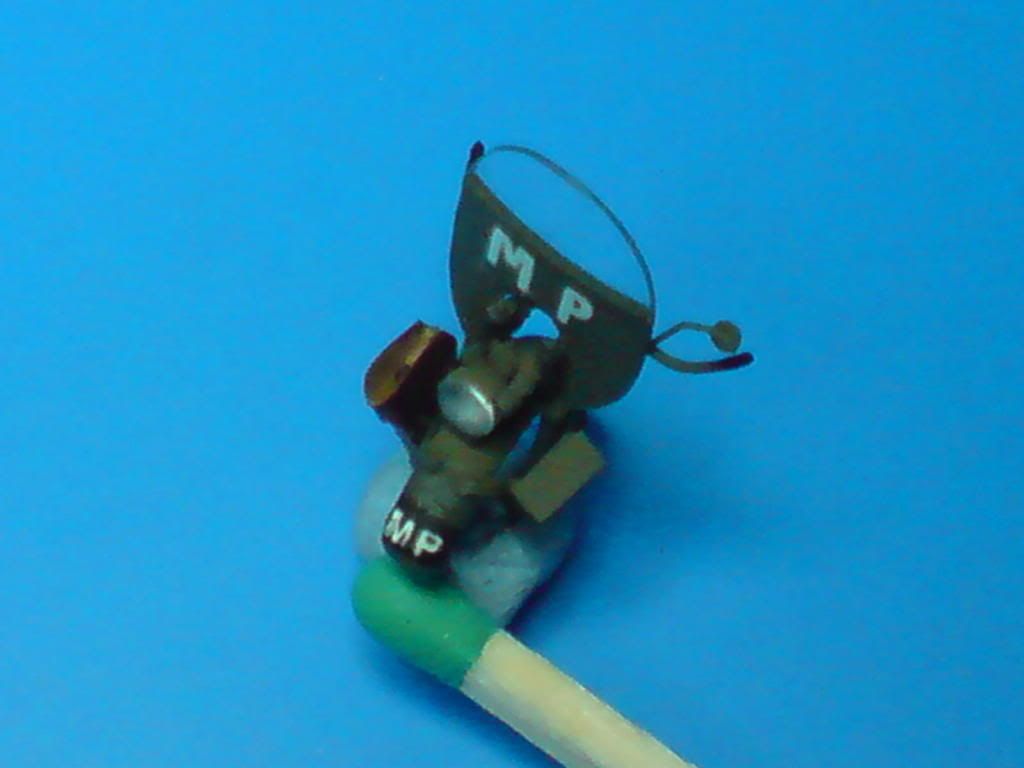
Here you can see the MP motorbike with its twin brother. The other one will be with sidecar.
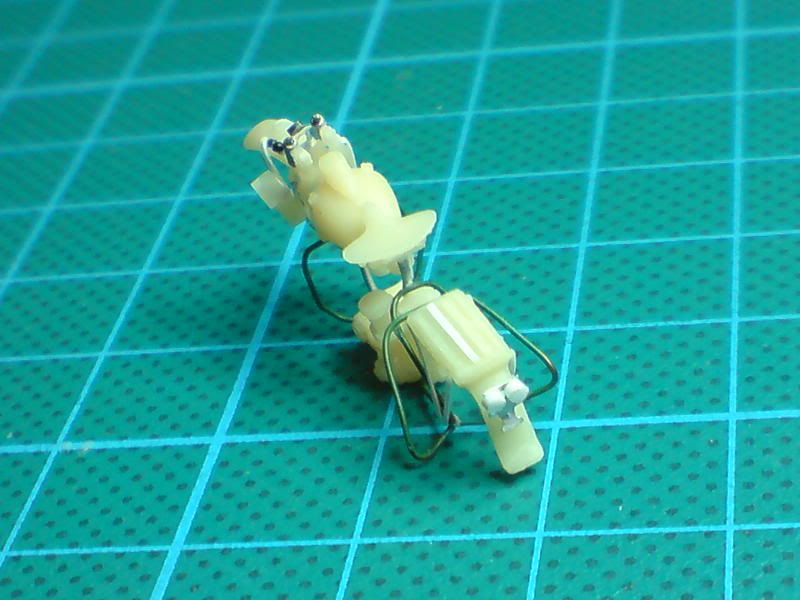
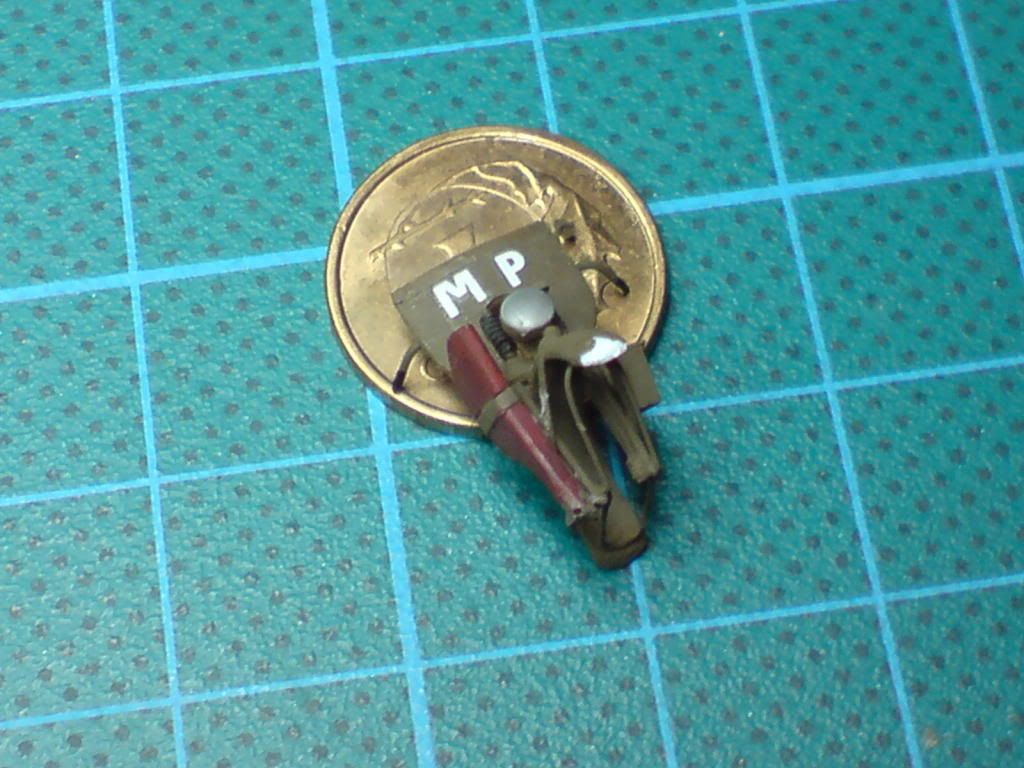
I had to separate the front suspension to ease applying decals on the fuel tank later on (I’m still waiting for that white stars to be laser-cut from a piece of white decal paper).
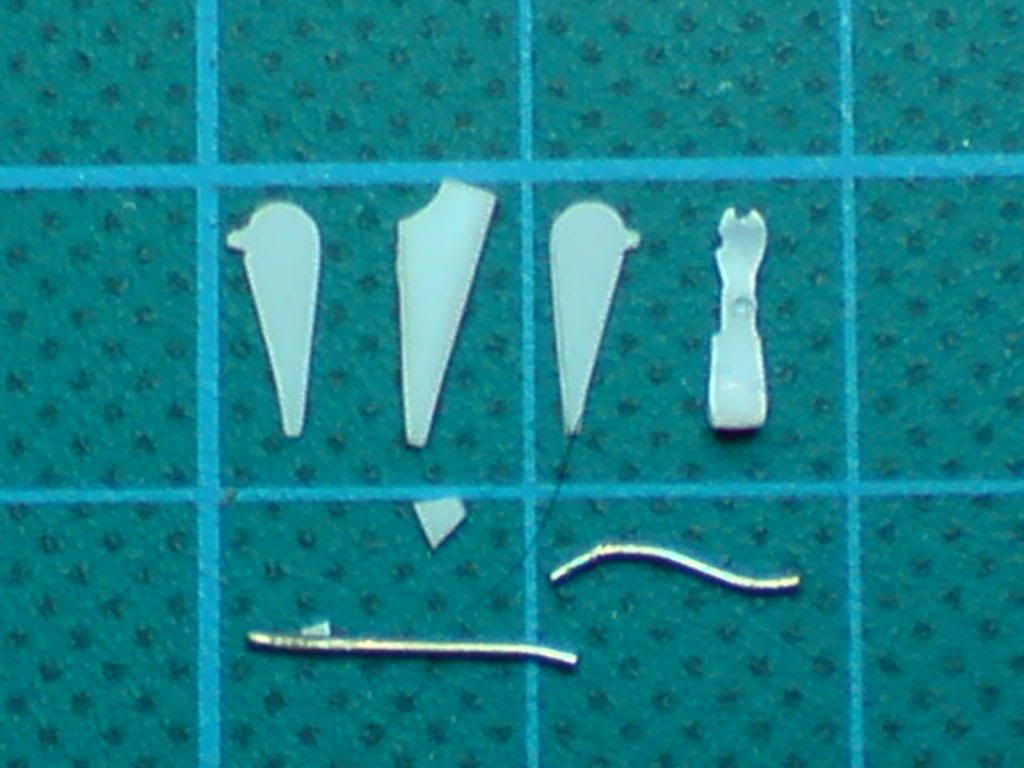
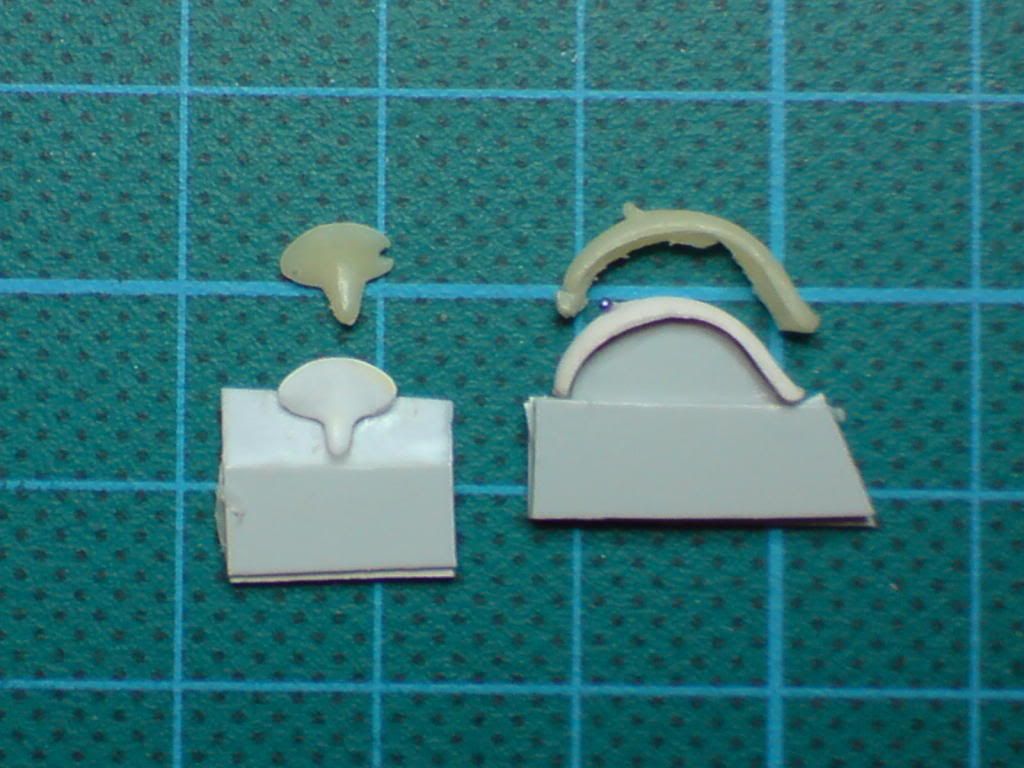
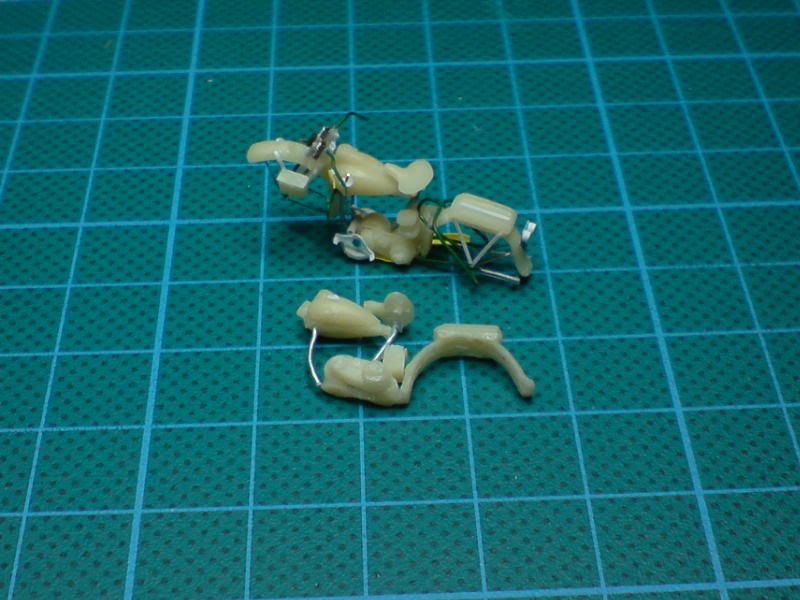
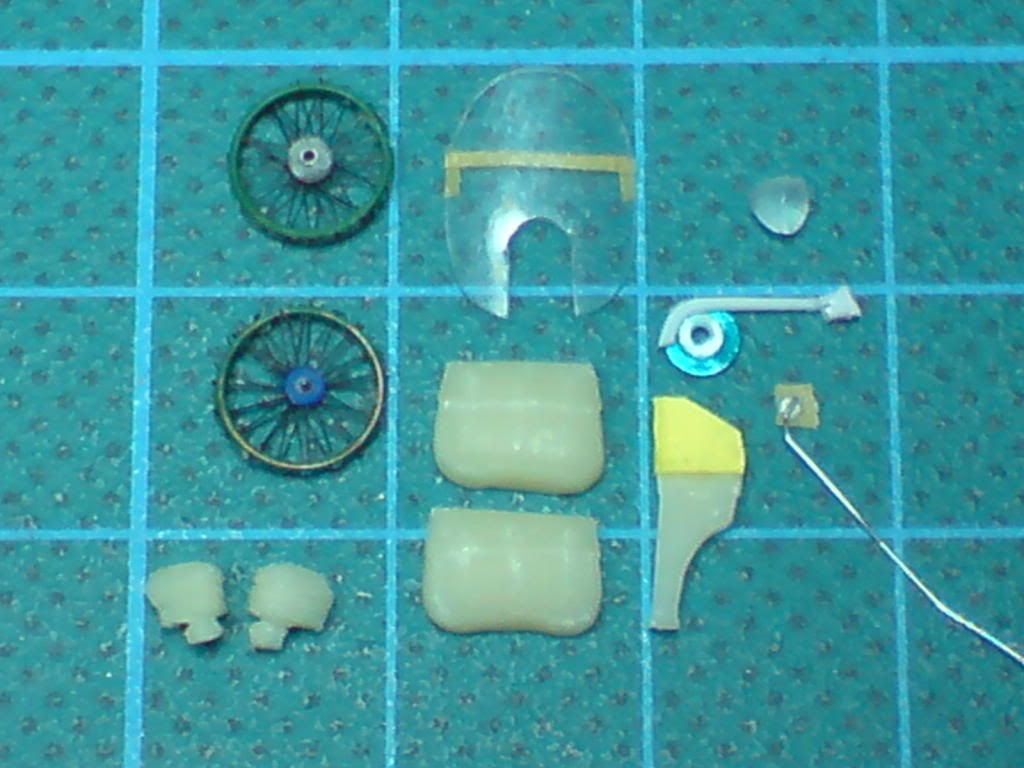
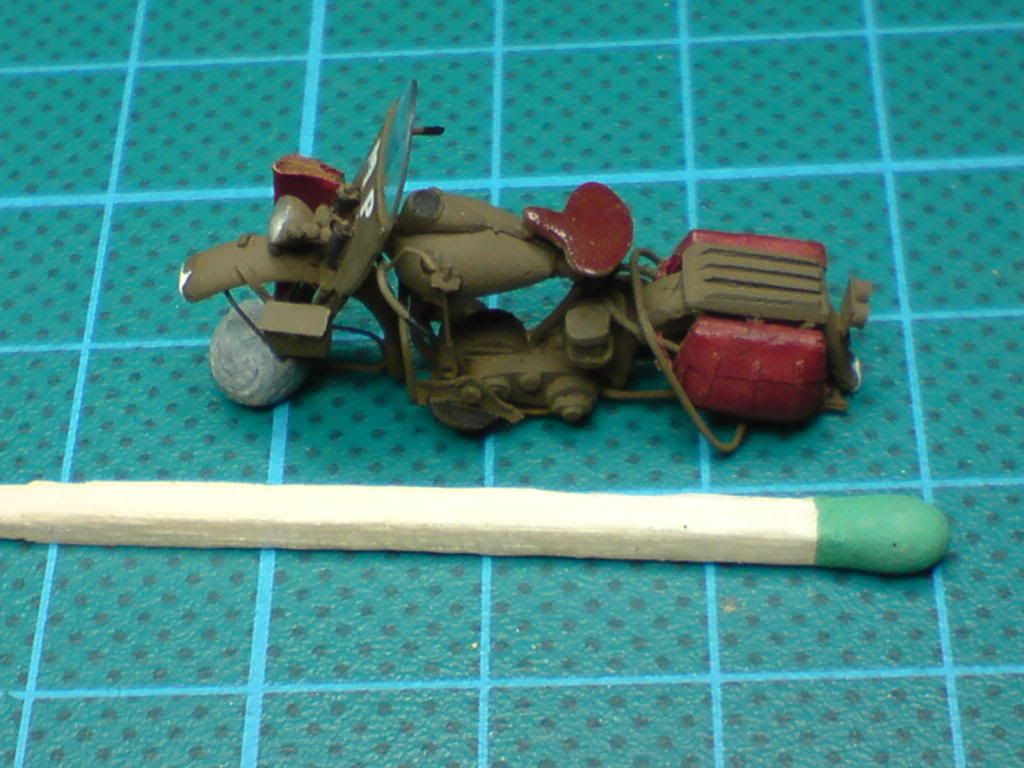
Here you can see almost all parts prepared for painting. Wheel rims, windscreen, headlight, cylinders, side-bags, gun holster, rear mirror and chain drive fender:
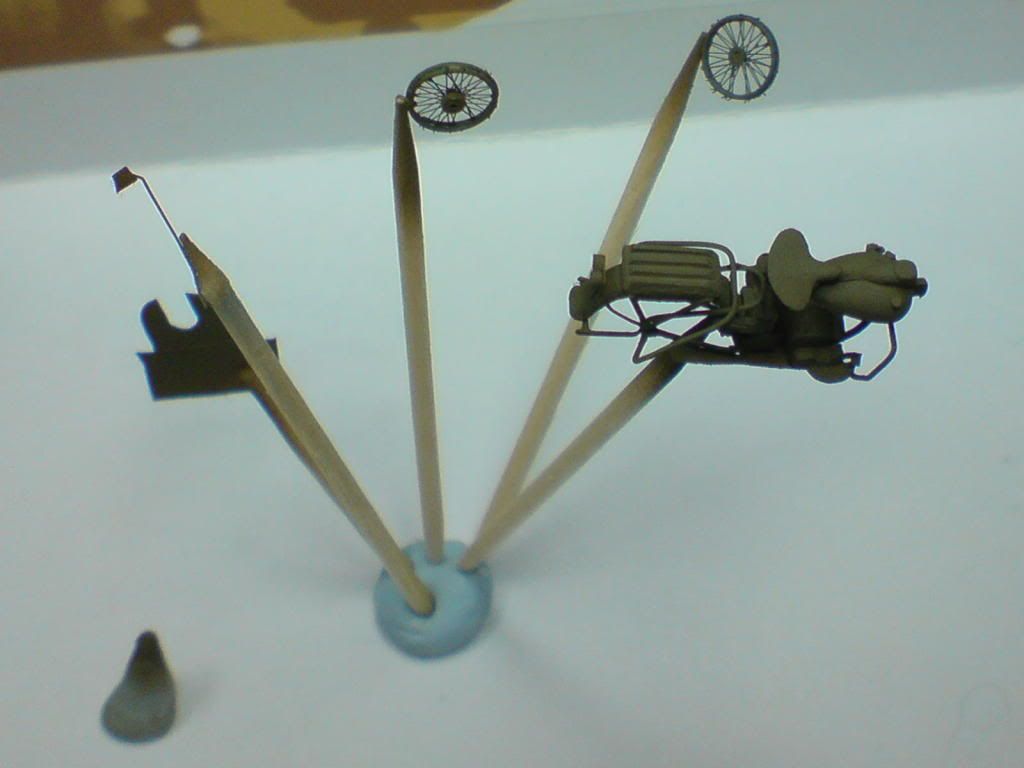
Parts painted and prepared for drying. Letters on the windscreen are made of pieces of decals from my stock.
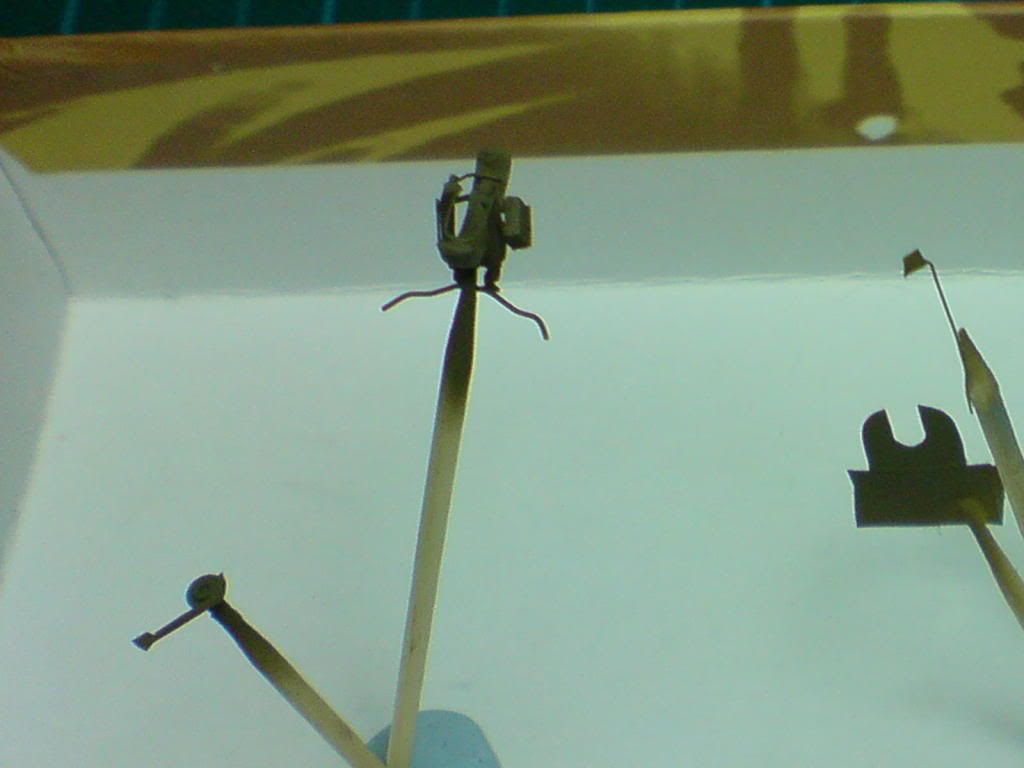
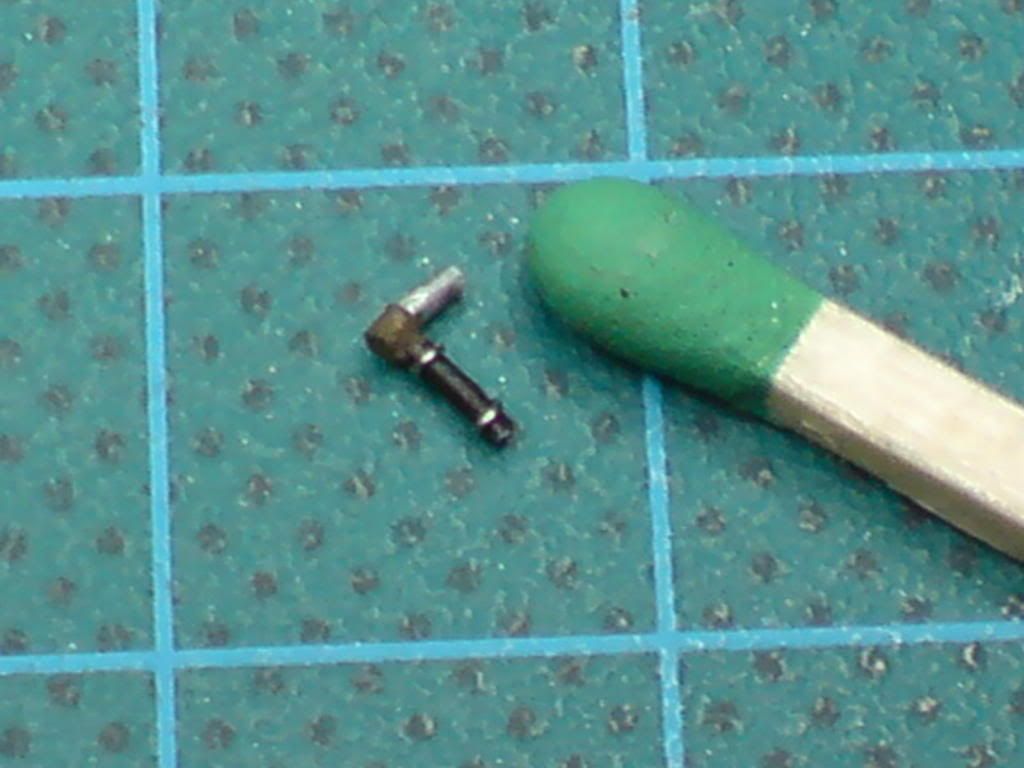
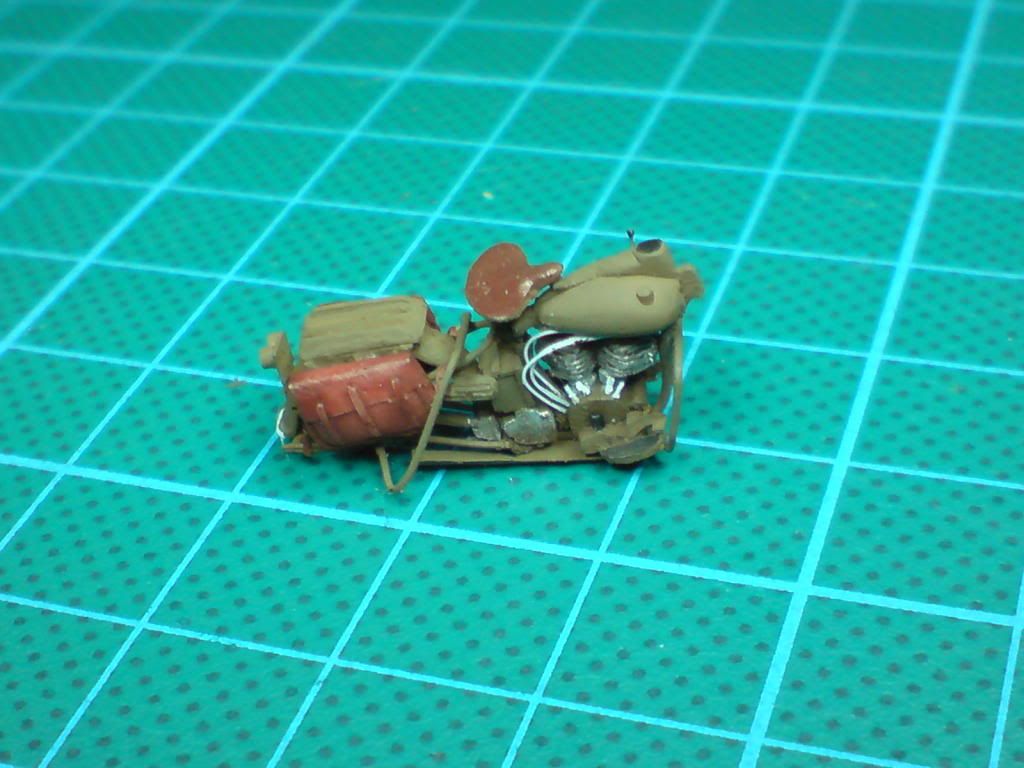
In this short update I will show some more details I've added to my engine - air filter pipe, spark plugs, chain drive, fuel and oil pipes:
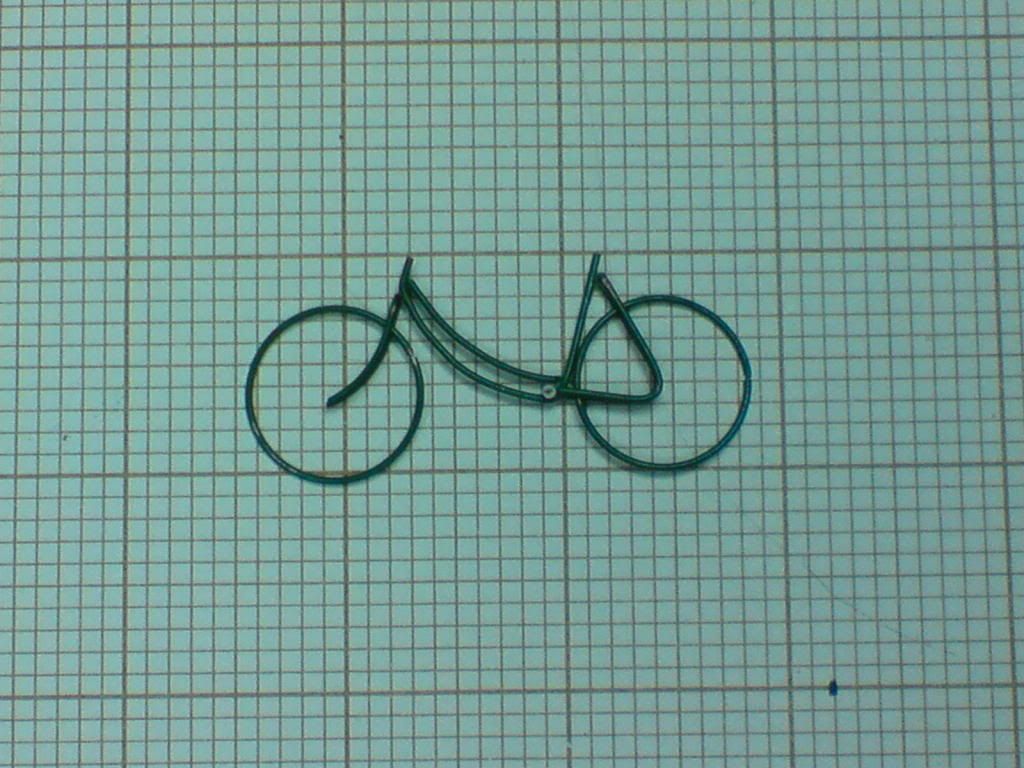
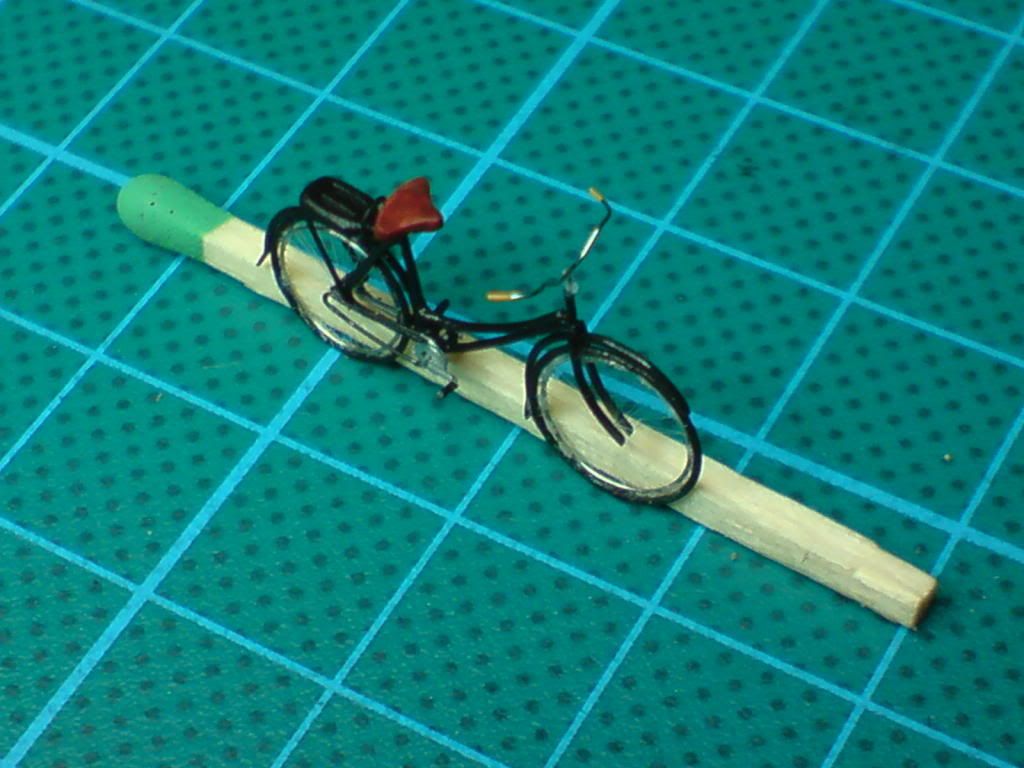
And here is the picture of the scene I eventually plan to make. It's a MP checking some Belgian refugee papers. I'm still waiting for the white star decals to be lasercut and I can't put everything together until I apply the decals on the fuel tank (later on it might bo too difficult). So in the meanwhile I've started to make 1/72 scale bicycle.
Thank you guys for your kind words. I really appreciate your feedbacks. Optic - unfortunately motorcycles are not available in such small scale. Hat released Zunndapp and BMW, but all you get is just one blob of rubbery plastic. If you want a decent model in this scale - you have to do it yourself
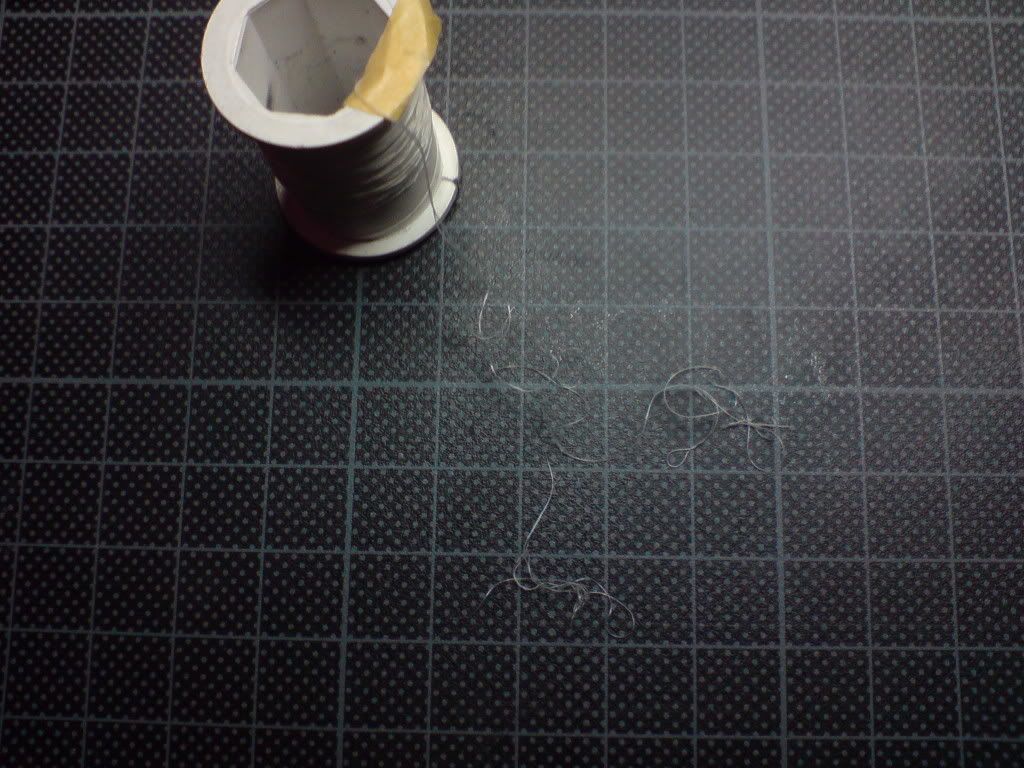
Anyway - awaiting those lasercut pieces I have started assembly of the bicycle. At last I have found proper thread to make the bicycle spokes. But let me show everything from the begining.
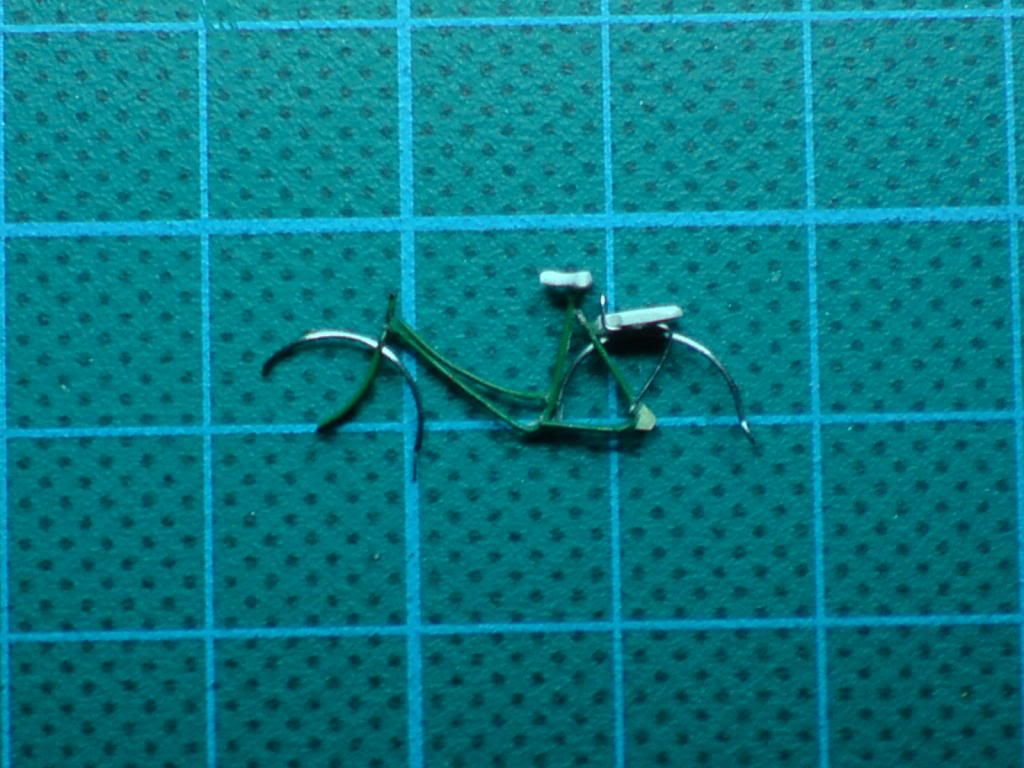
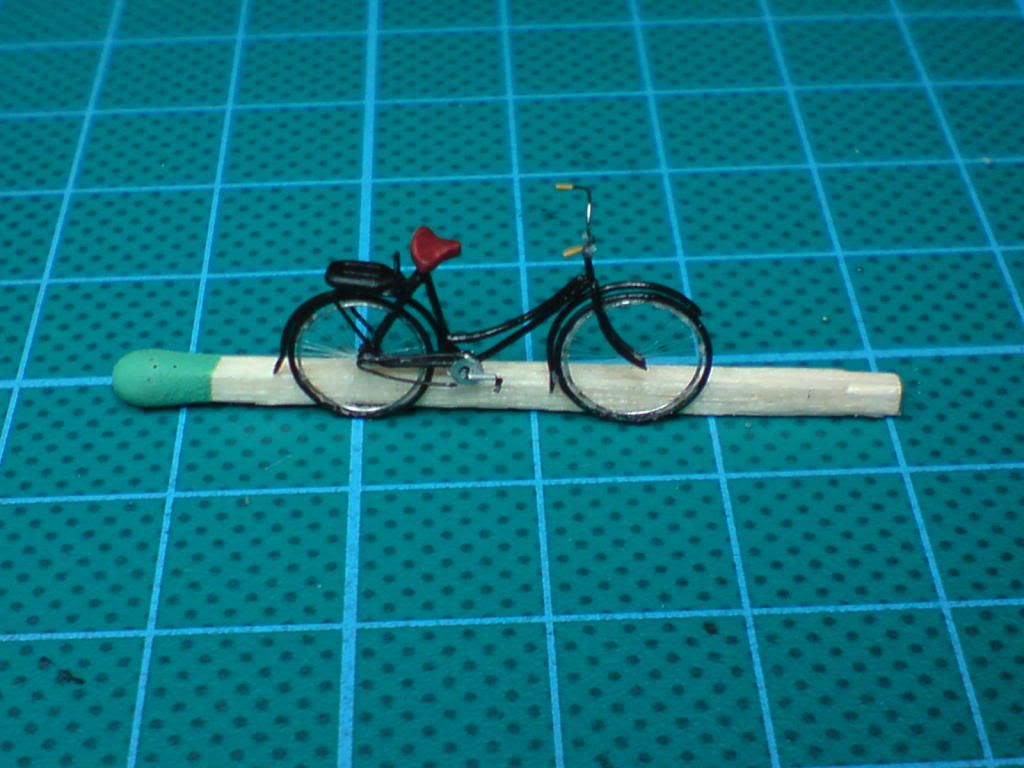
Thank you guys for your silent cheer. To be honest I don't like the gaps between wheel rims and tyres, but I couldn't do it any better. That silver wire which I used for wheel rims is so elastic that I couldn't make it tightly fit inside the tyre. It's the matter of using proper materials. I wish I had less elastic wire in this thickness. Anyway - I'm sure my next bicycle will be even better.
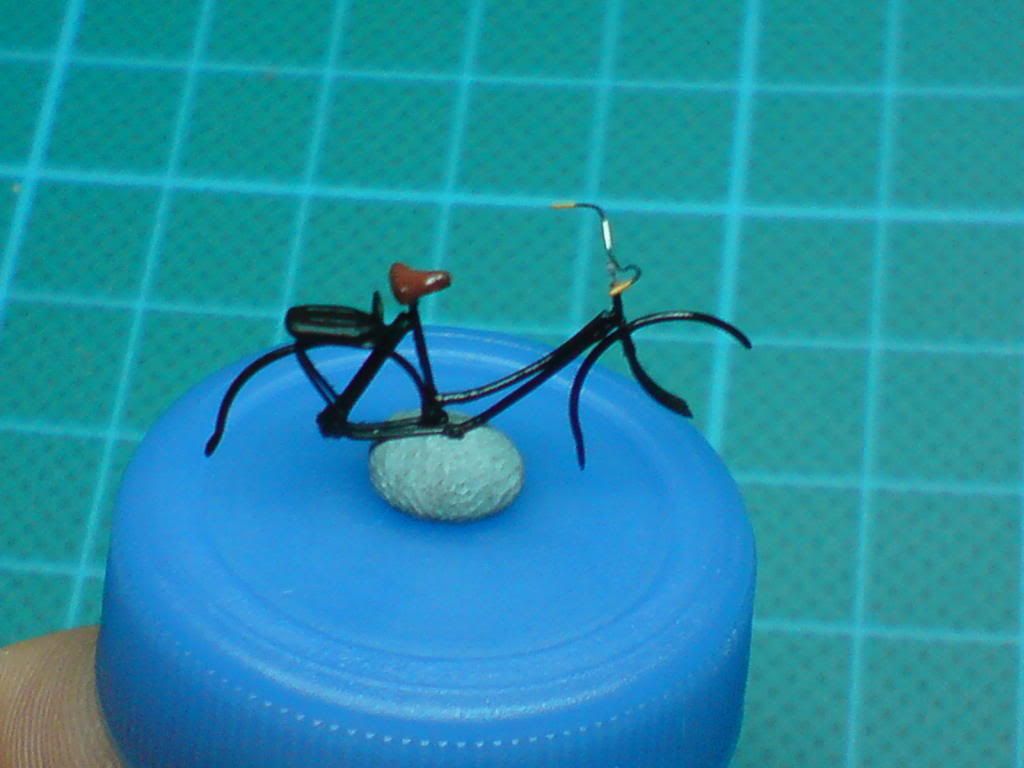
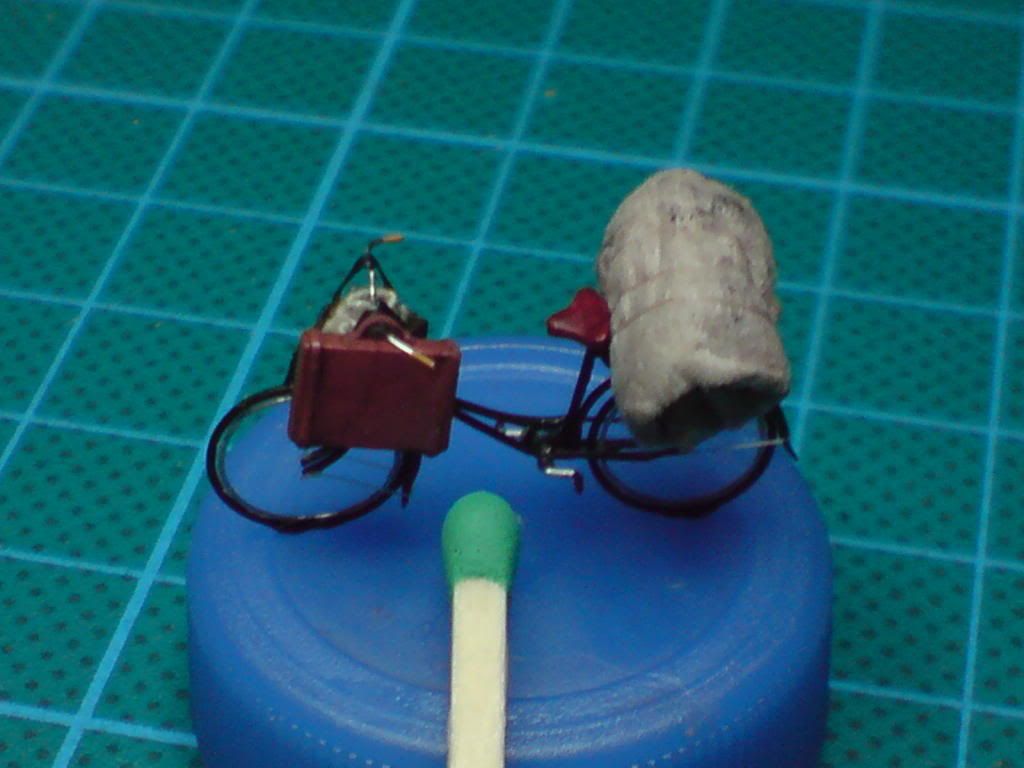
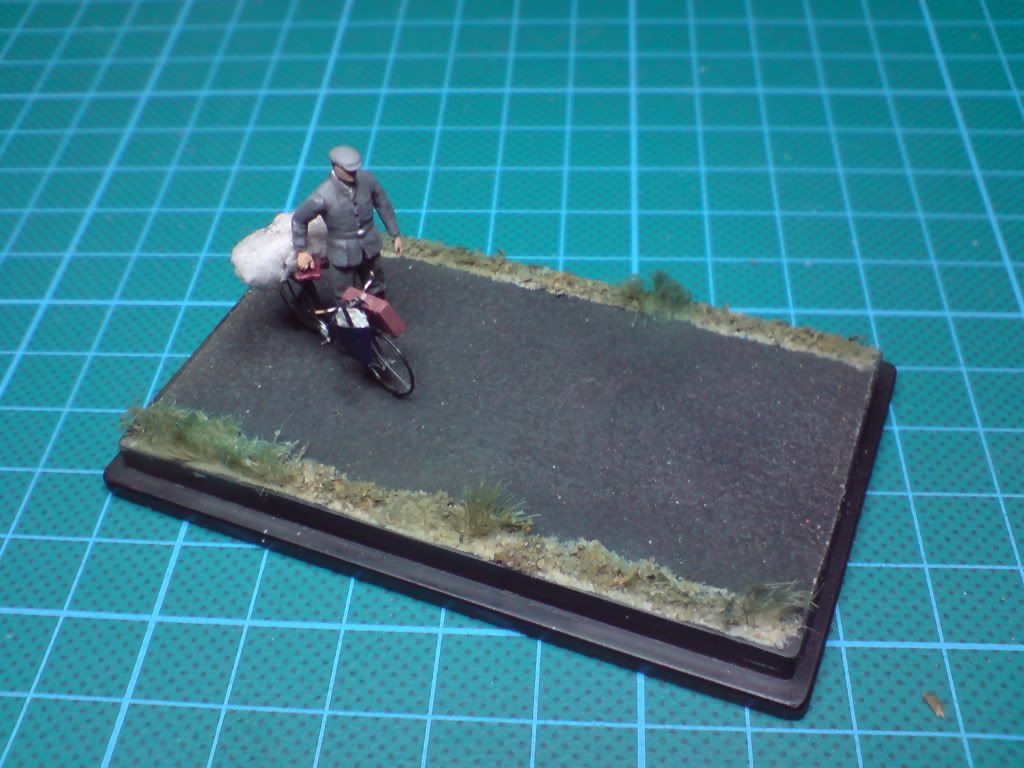
After correcting the length of front mudguard and adding some packs - the bicycle is finished.
После коррекции длины передних крыльев и добавить некоторые пакеты - велосипед завершен
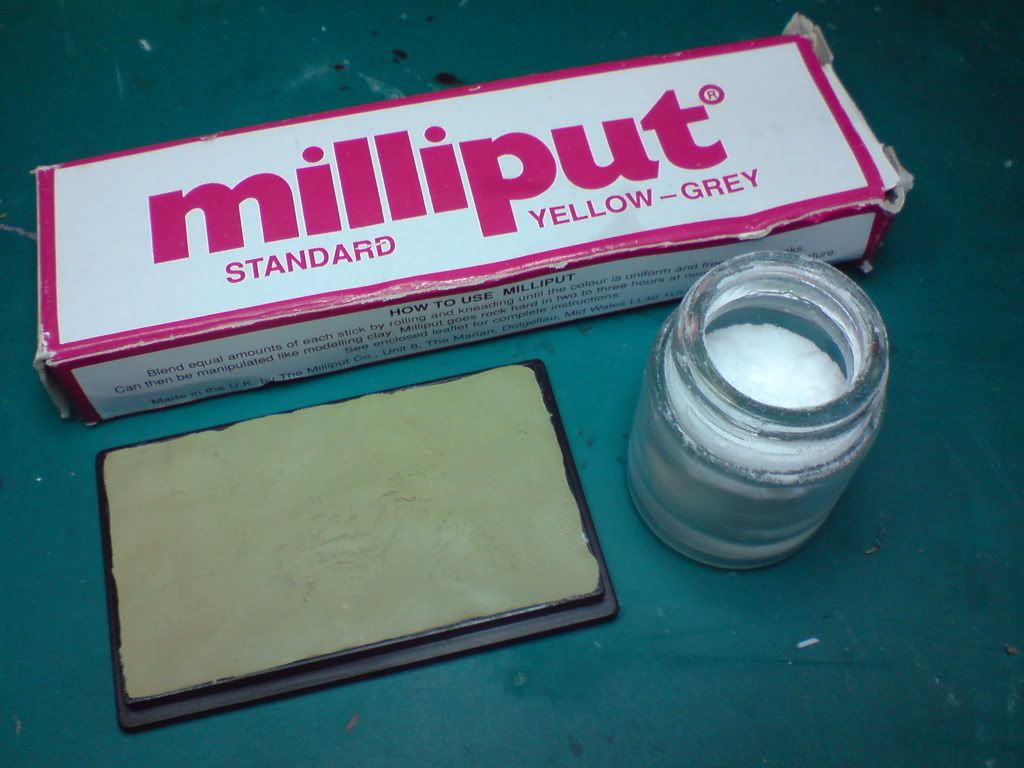
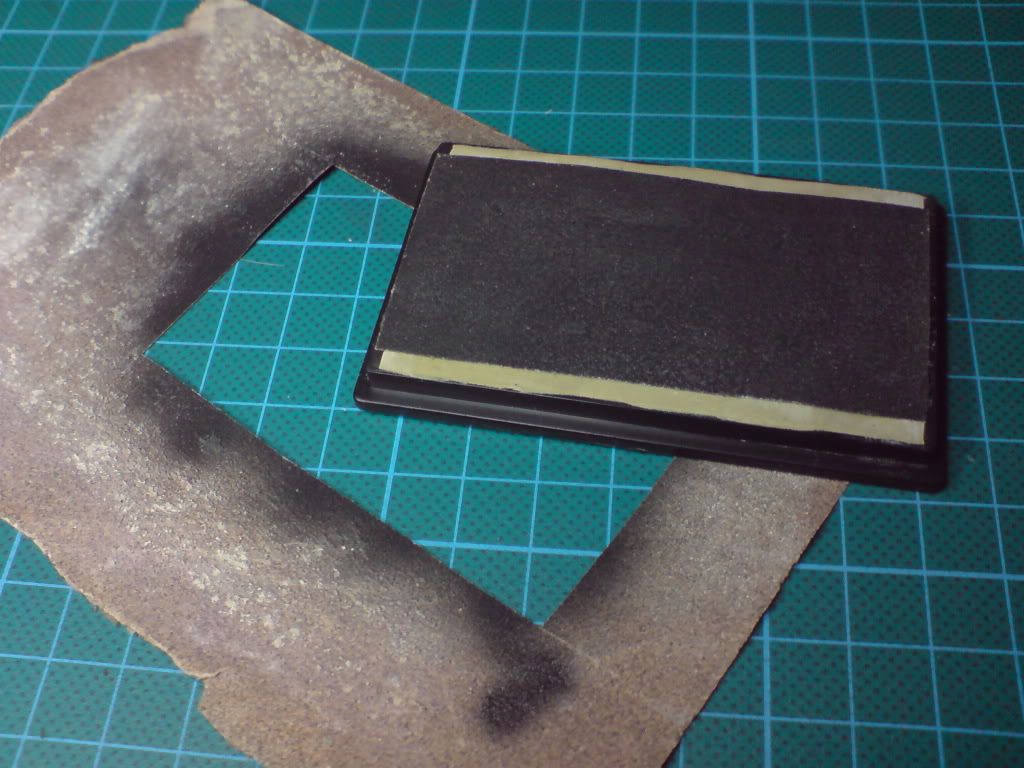
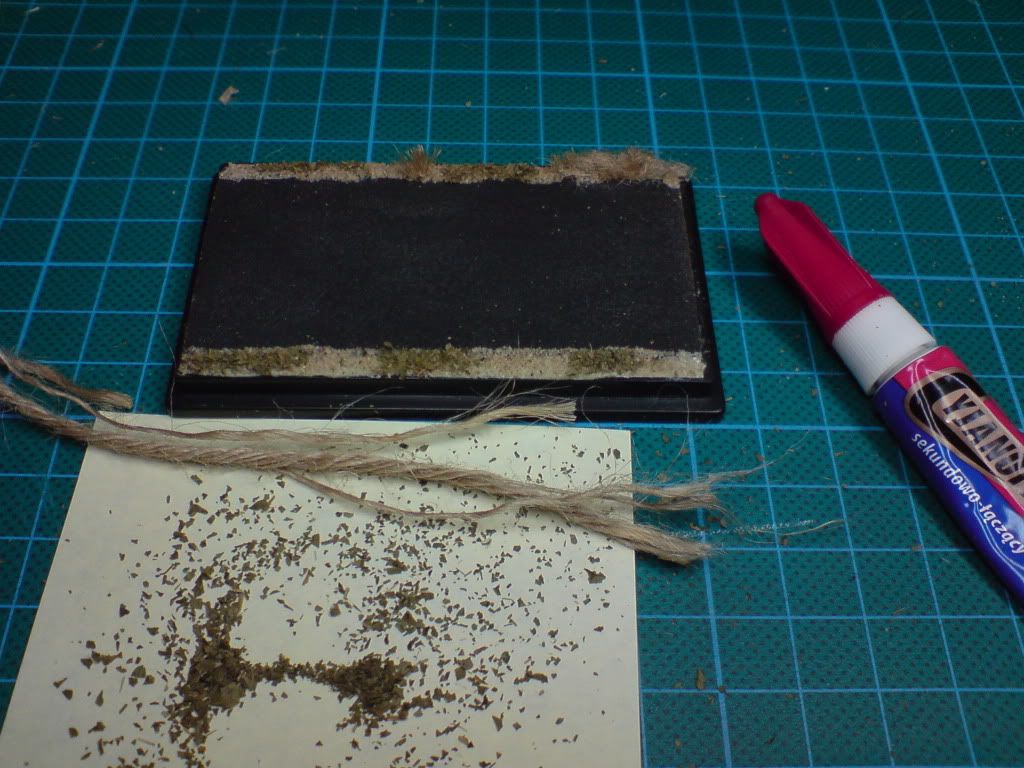
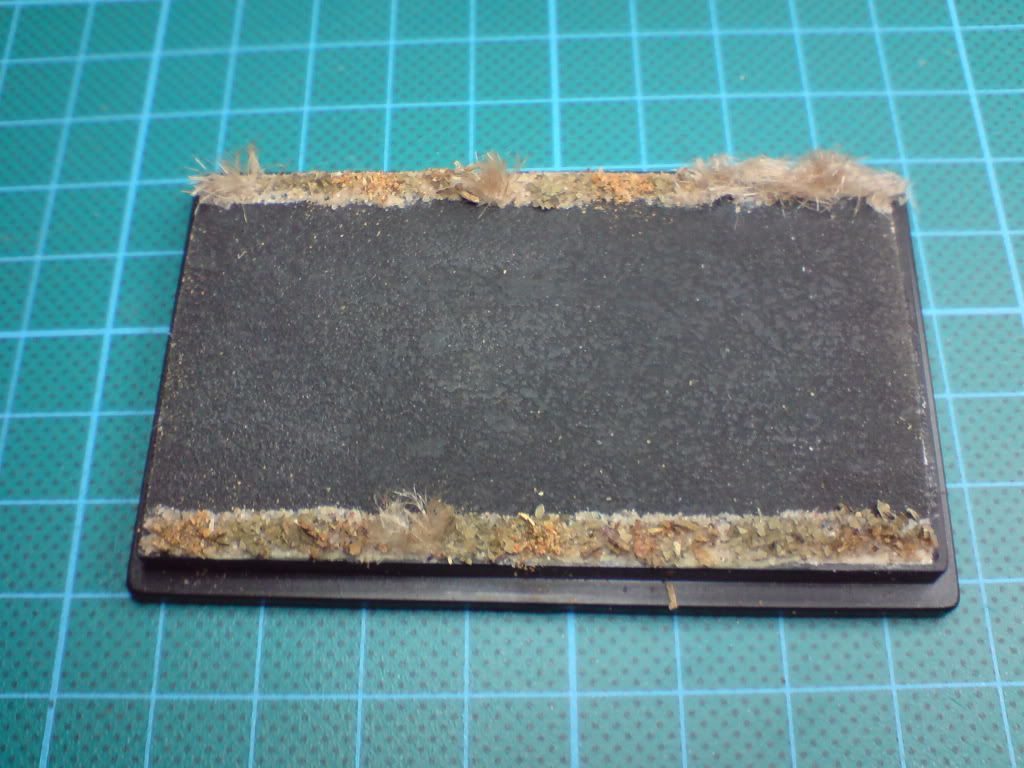
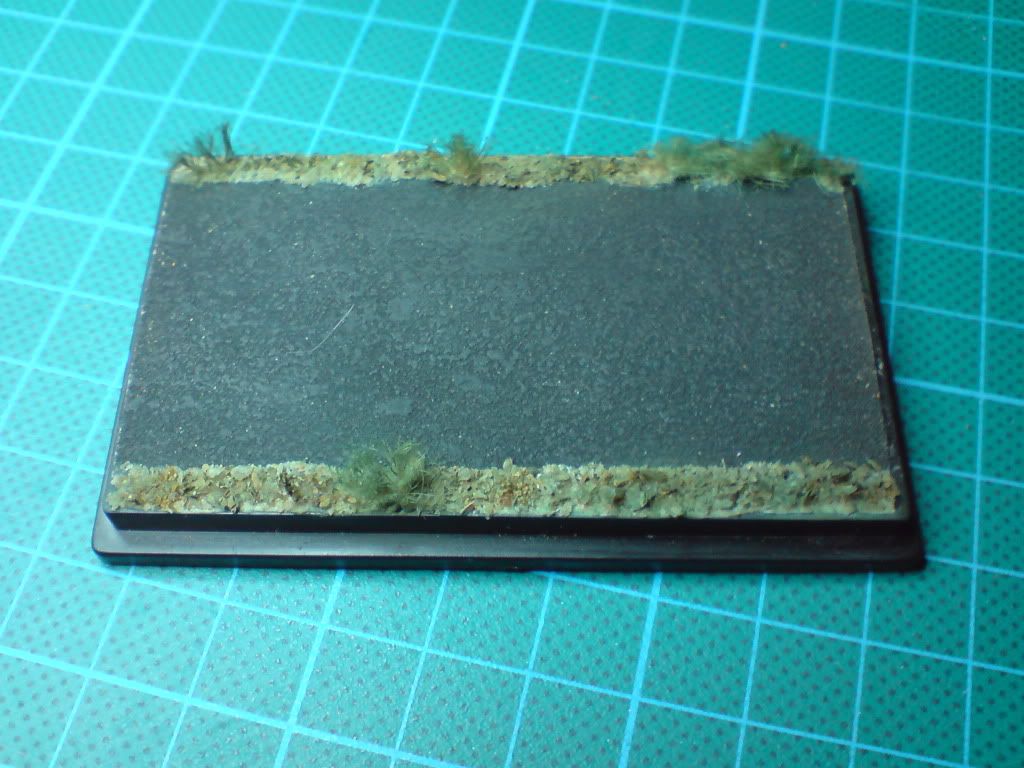
Next I've focused on the base. As usual I used Schuco model car display case. I've cut out the central piece of the base and filled it with Milliput. Some used sanding paper imitate the road surface. A piece of string and some seasoning from my kitchen made the green road sides.
Затем я сфокусировать все внимание на базу. Как обычно, я использовал Schuco модели автомобиля витрине. Я вырезал центральной части основания и наполнил ее Milliput. Некоторые использовали шлифовальной бумаги imitatese дорожного покрытия. Веревочку и некоторые приправы из моей кухне сделал зеленый стороны дороги.
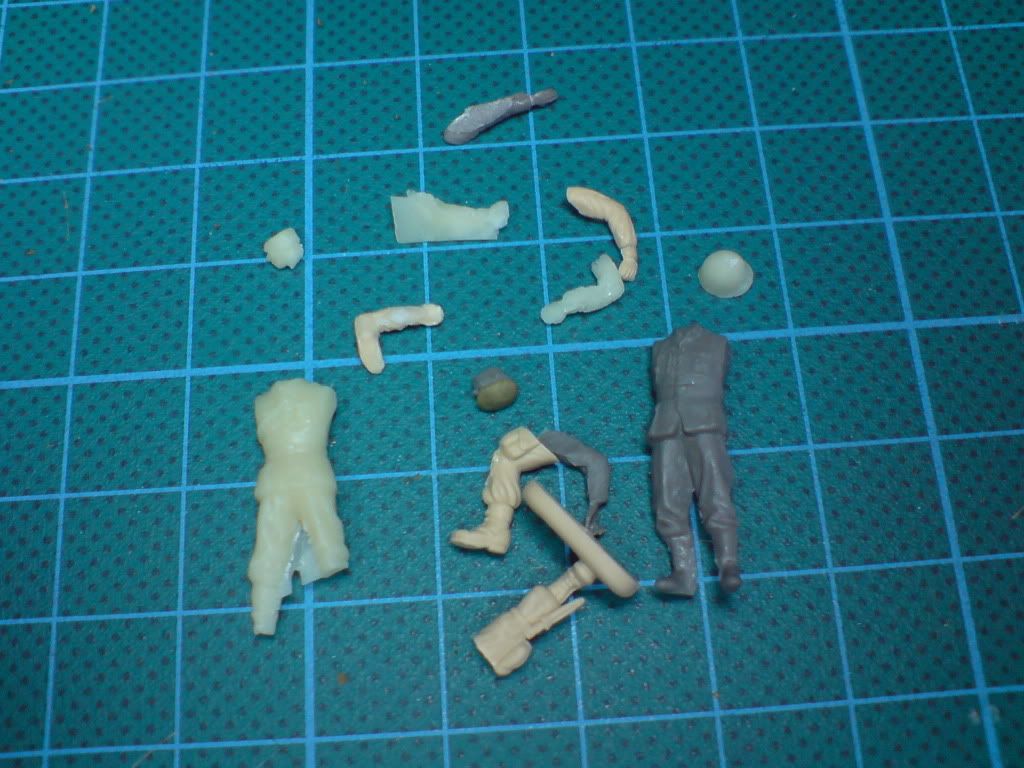
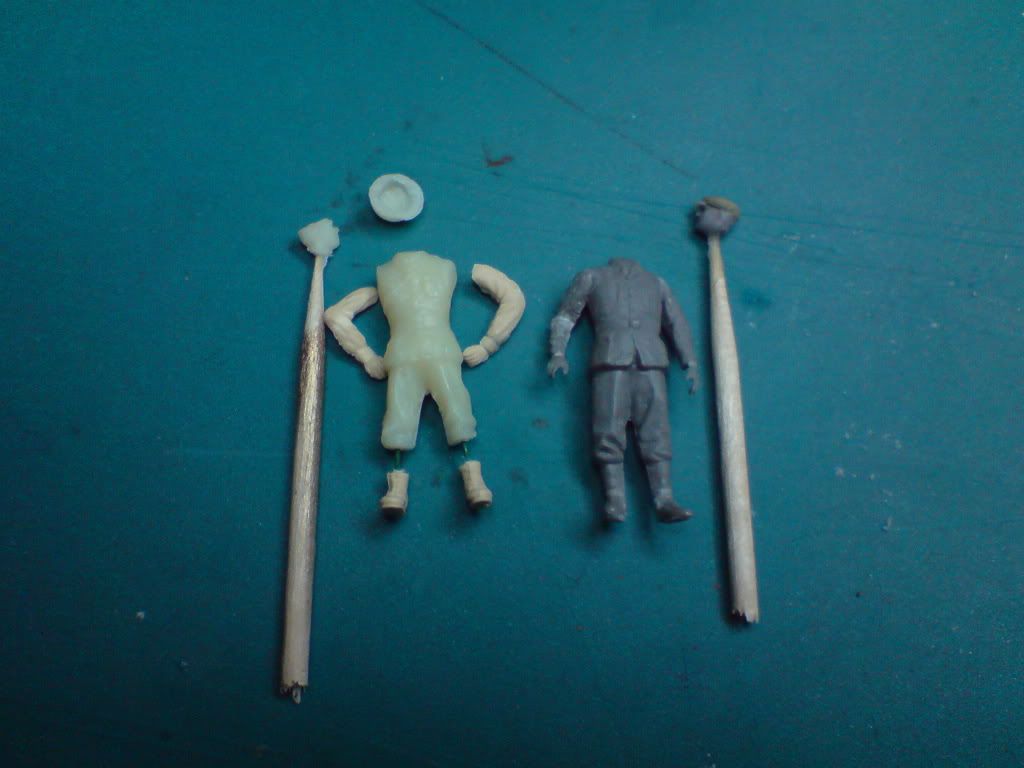
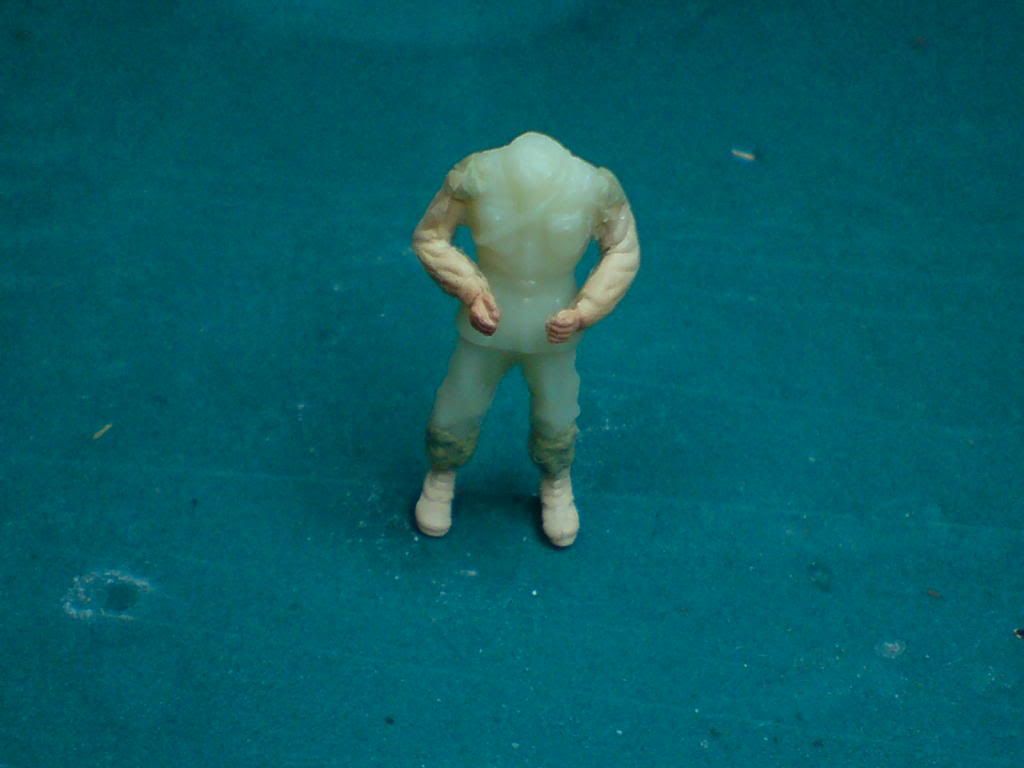
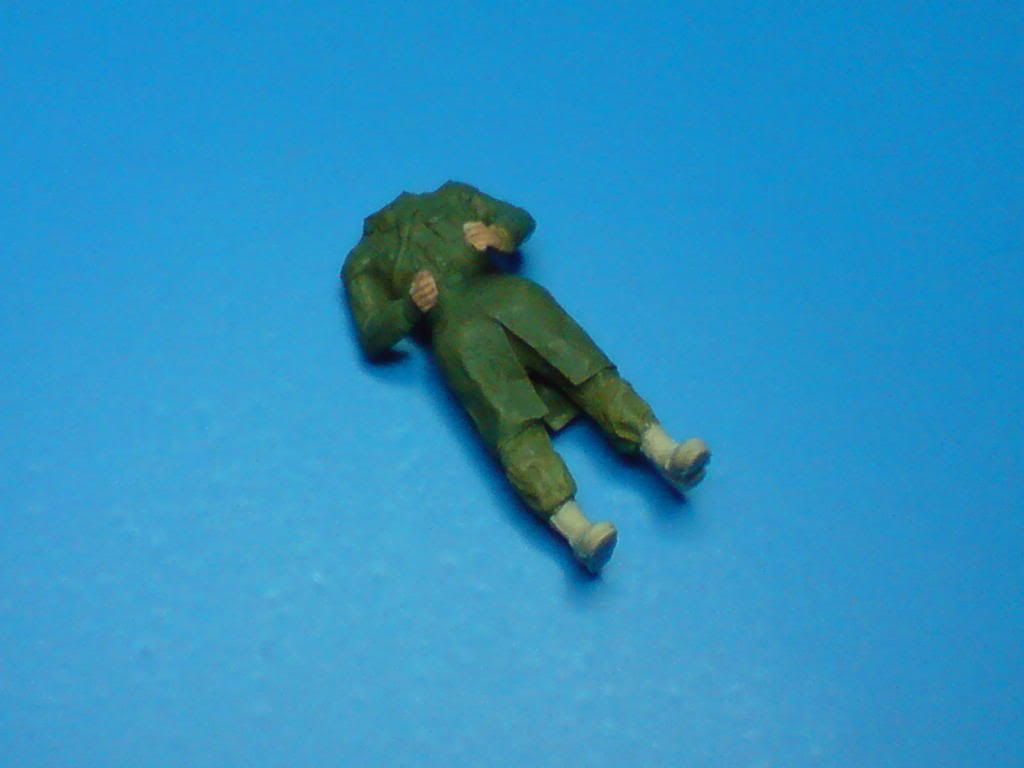
After that I started figures assembly - they are made of Prisener, Italeri and some resin castings. First I made the refugee, Making his hat of Milliput was a bit difficult.
После этого я начал монтаж цифры - они сделаны из Prisener, Italeri и некоторые смолы отливок. Сначала я сделал для беженцев, что делает его шляпу Milliput было немного сложно.
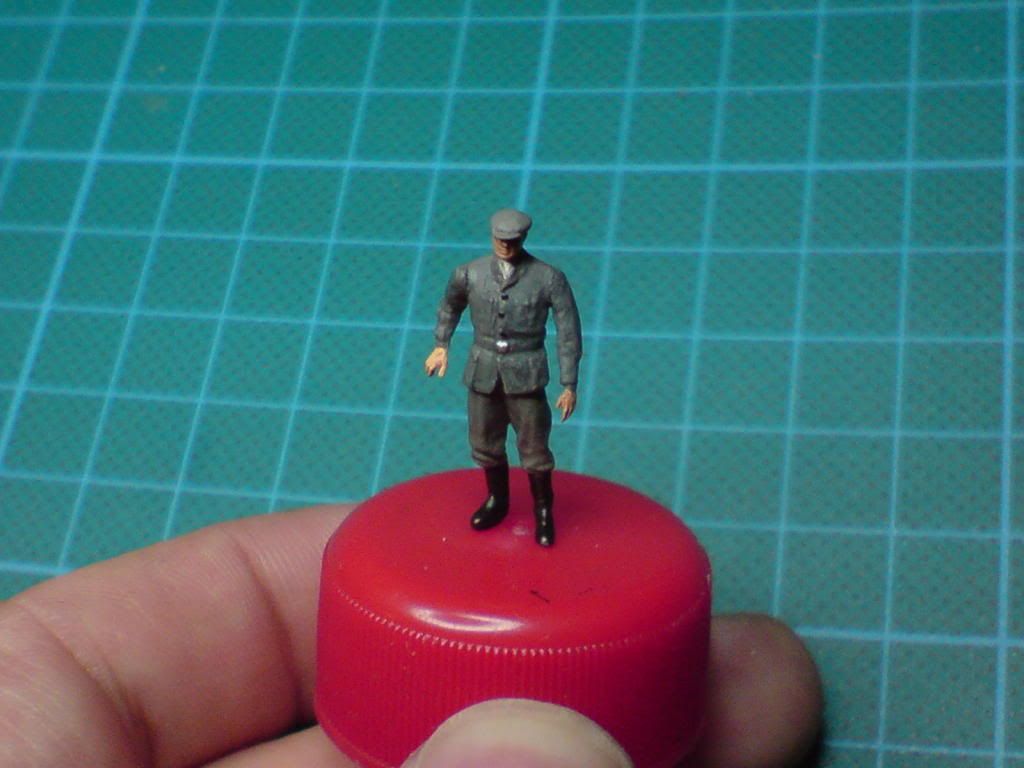
Here is how it looks next to his bike:
Вот как это выглядит рядом с велосипеда:
Now I'm working on the MP and it needs some serious rework:
Сейчас я работаю над МP и она нуждается в некоторой серьезной доработки:
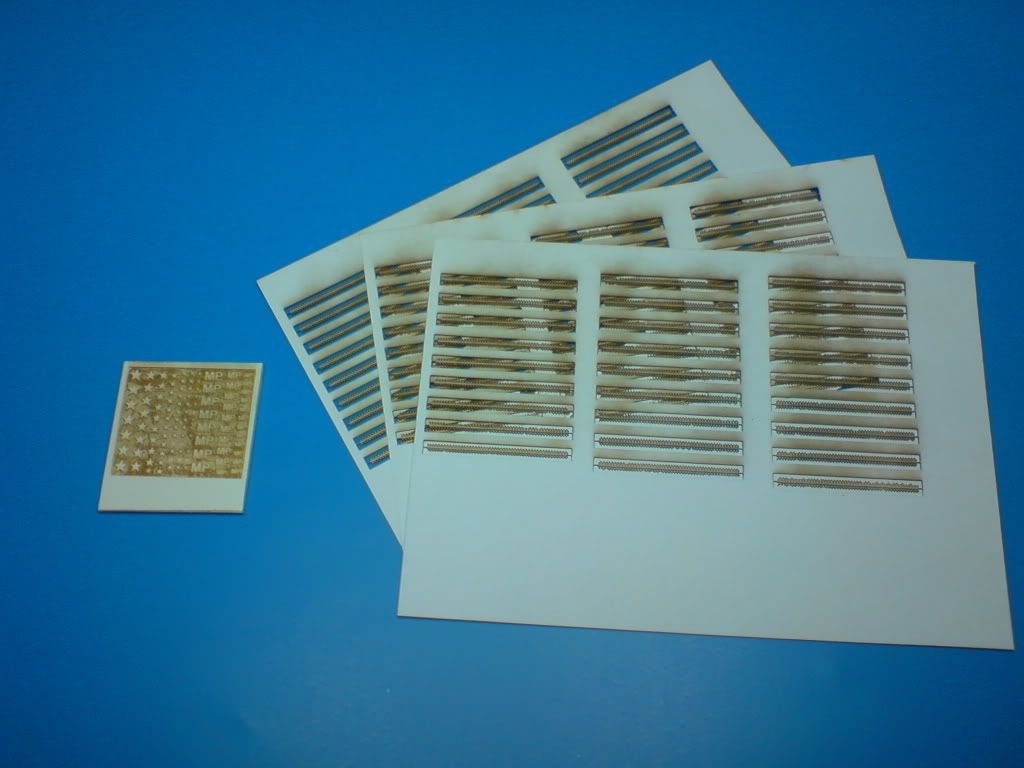
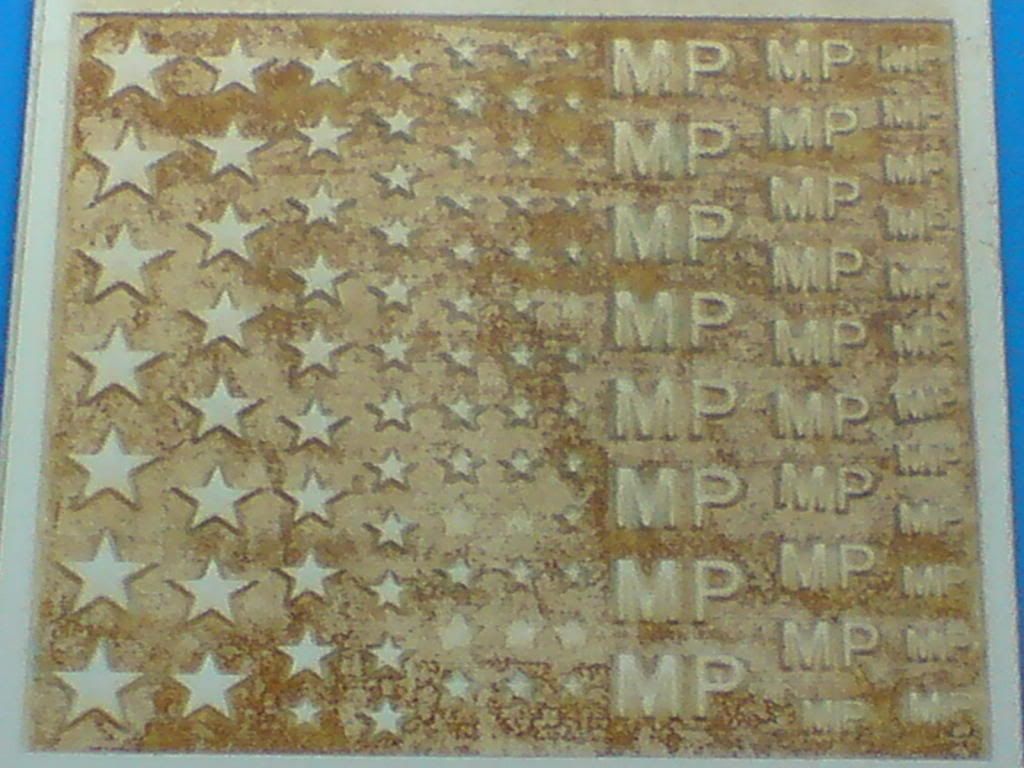
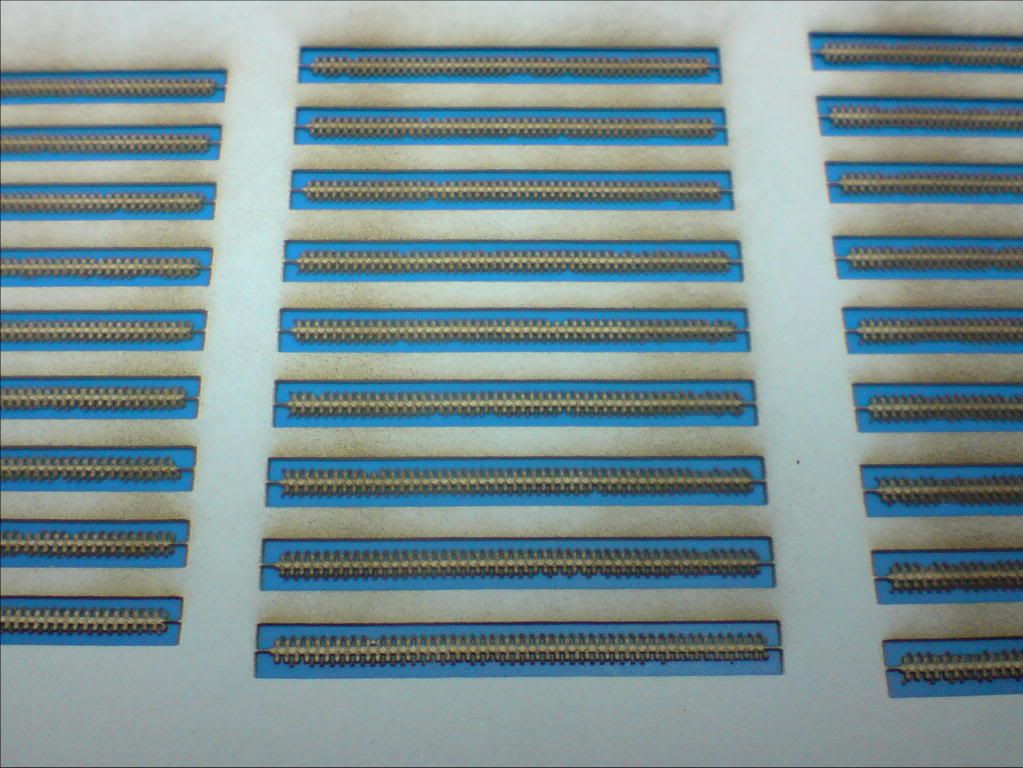
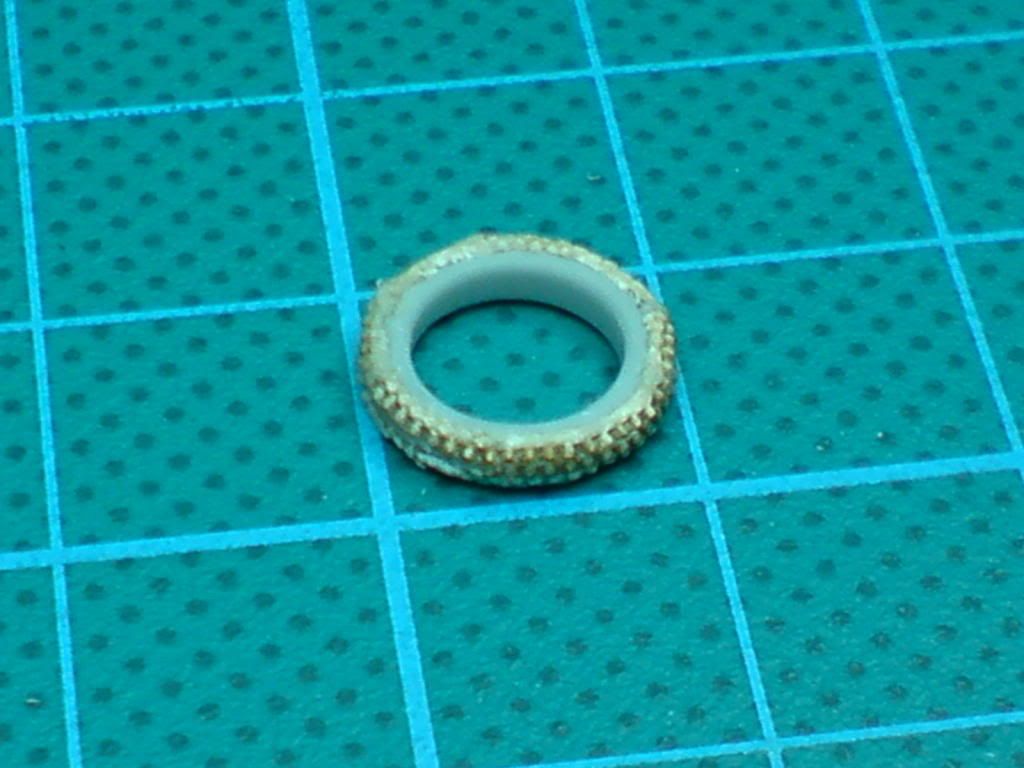
Few days ago I’ve received a parcel from DRAF MODEL with laser-cut decals and tire tread pattern. The decals are awesome. A little white decal sheet has been glued to a piece of cardboard and engraved with laser. A big advantage of that is lack of clear decal film, so the decals don’t shine. However on the other hand application of such decals is bit more difficult than just sliding off the backing paper, but if you like such challenges, then you won’t have to complain. The tire tread pattern has been cut from Bristol paper. DRAF MODEL has sent me three proposals in different sizes, so I can make tire in few sizes. I didn’t try to apply it on wheel yet, but DRAF MODEL suggested damping the paper so it’s more flexible and gluing it with acrylic glue (for children). If necessary it might need a gentle coat of CA glue. I’m happy that they have accepted my odd order and also gave me their suggestions. The contact is very easy and prices affordable to a modest modeler - like me.
Несколько дней назад я получила посылку из DRAF MODEL с лазерным вырезать наклейки и рисунка протектора шины. Отличительные знаки являются удивительными. Маленький белый пропуск лист был приклеен к кусок картона с выгравированным лазером. Большим преимуществом этого является отсутствие четких пропуск фильм, так что пропуска не горят. Однако, с другой рукой применения таких отличительных знаков немного сложнее, чем просто соскользнуть бумажная подложка, но если вы, как с такими проблемами, то вам не придется жаловаться. Рисунка протектора шины были вырезанные из бумаги "Бристоль". DRAF MODEL прислал мне 3 предложений в различных размерах, так что я могу делать шины в течение нескольких размеров. Я не пытался применить его на колеса еще нет, но DRAF MODEL предложил затухания бумаге, так это более гибкий и склеивания с акриловым клеем (для детей). При необходимости, возможно, потребуется мягкий слой клея CA. Я рад, что они приняли мое нечетного порядка, а также дал мне свои предложения. Контакт очень легко и ценам, доступным для скромных моделер - как и я.
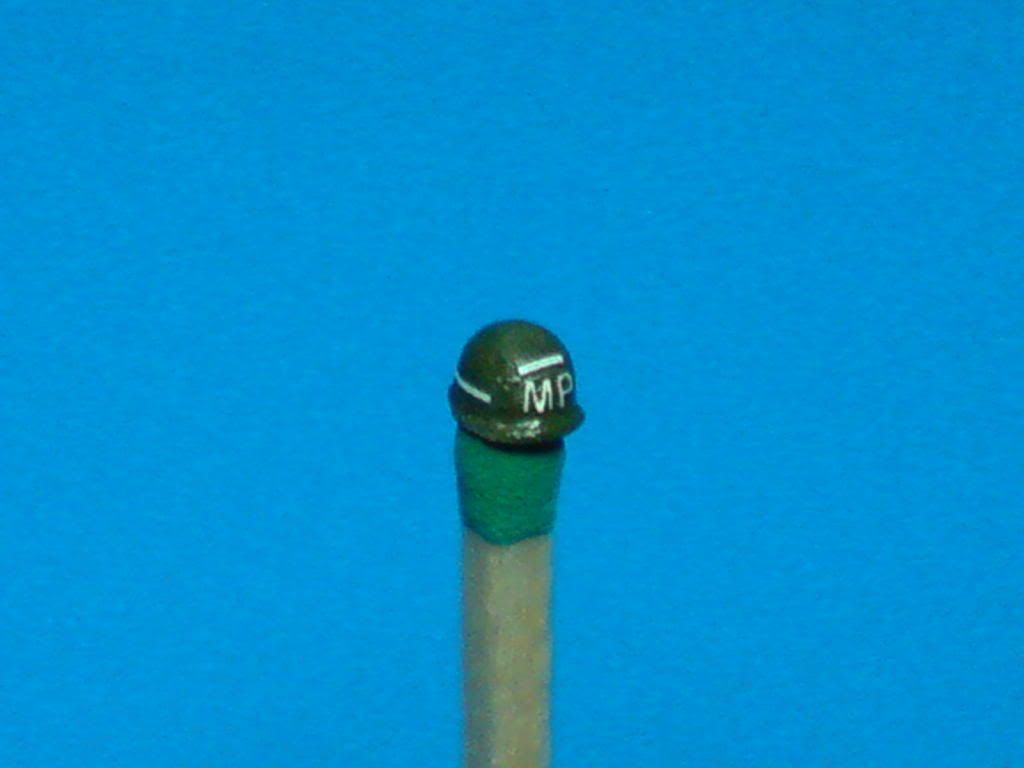
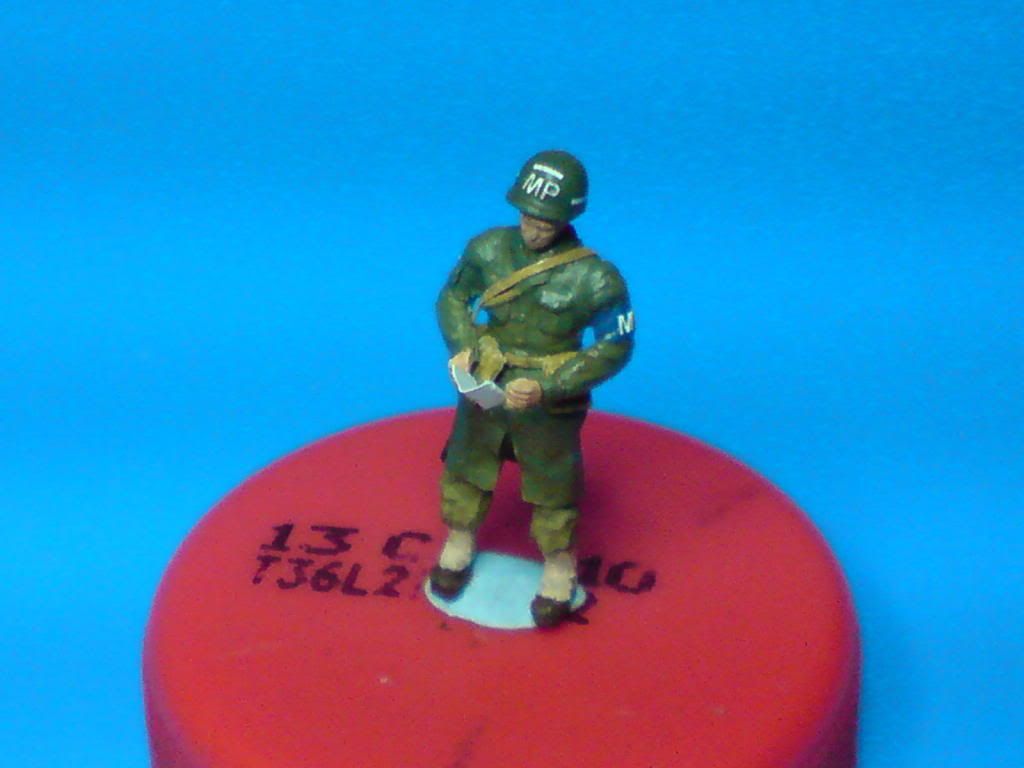
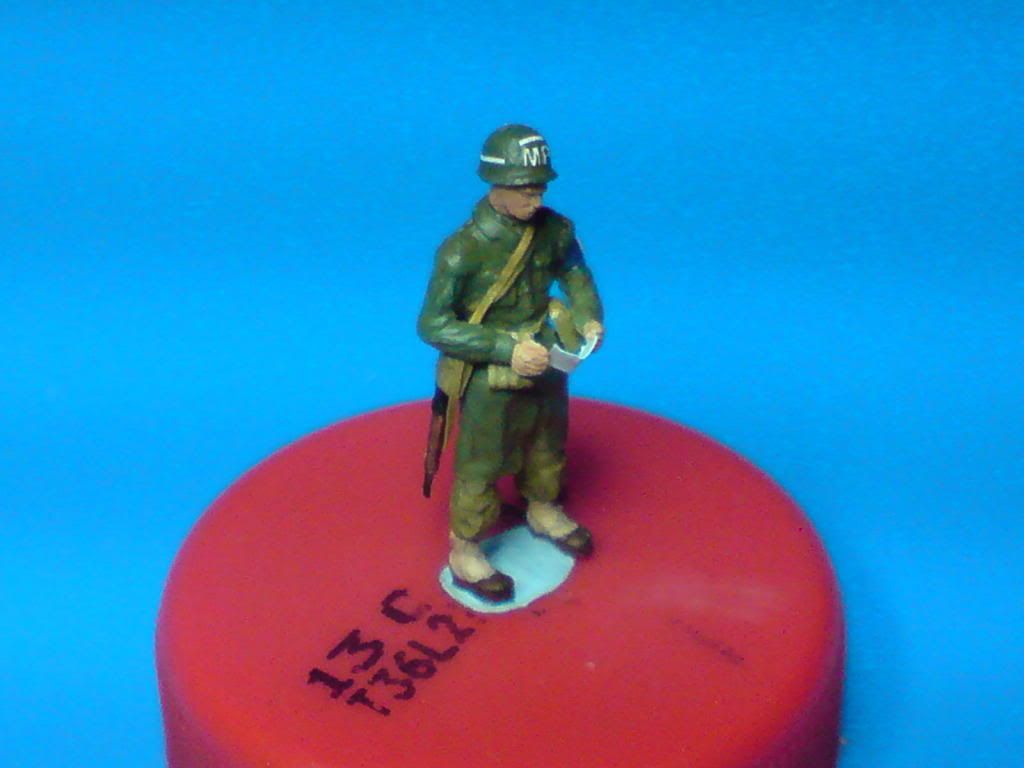
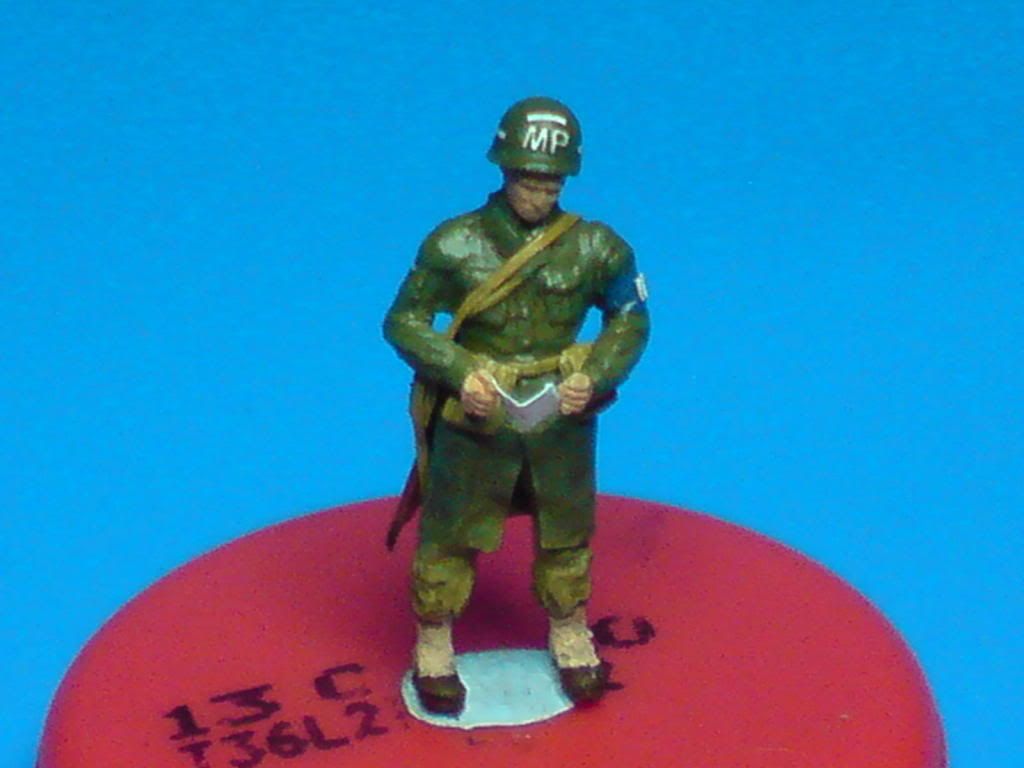
And here are: the figure painted with base colors, helmet with decal applied (there are 4 of them applied separately). The helmet needs a coat of matt varnish. I’ve applied MP decals on front mudguard and after applying stars on the fuel tank I’ve fixed the front suspension.
А здесь: цифра окрашены базовых цветов, шлем с пропусками применения (Есть 4 из них применяются отдельно). Шлем потребностей слой матового лака. Я подал депутат отличительные знаки на передних крыльев и после применения звезд на топливный бак я установил передняя подвеска.
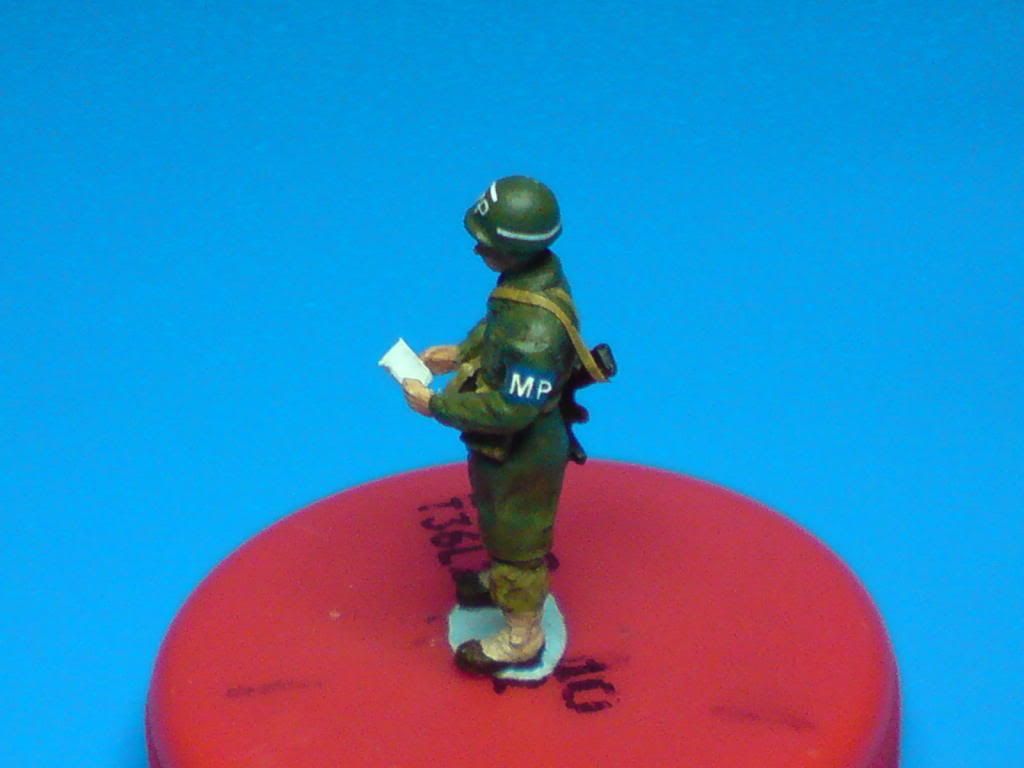
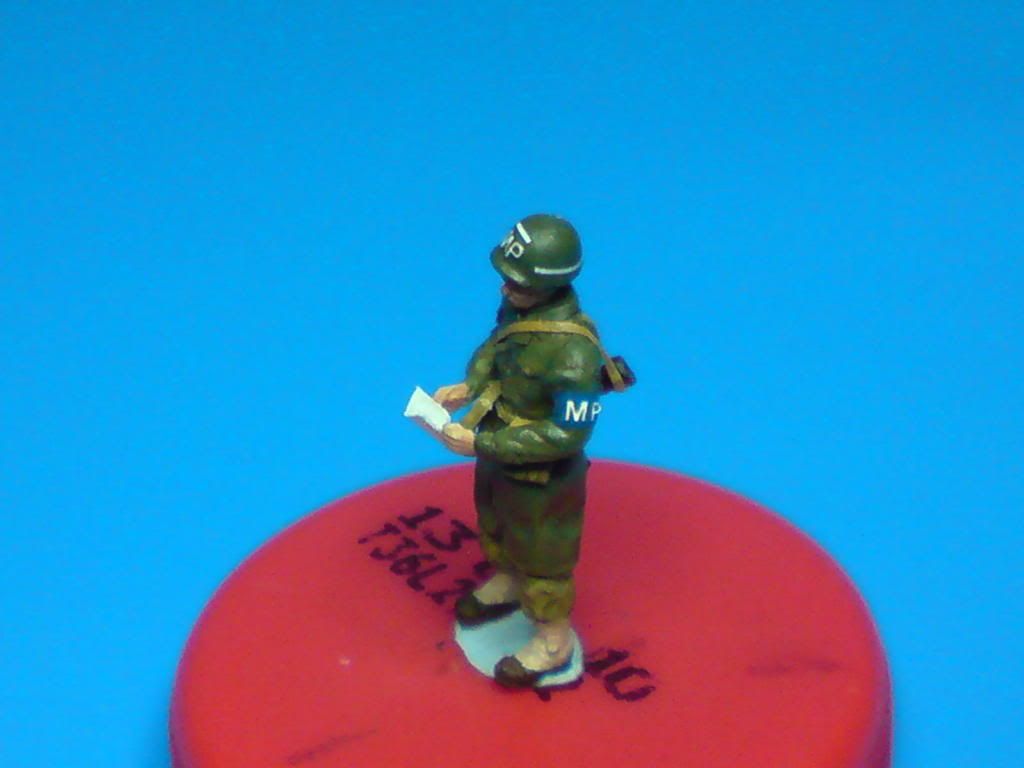
The gandarme figure is now finished. I've painted a blue band on the sleeve and applied MP decals. I hope that colours and equipment are historically correct. If no, please correct me.
Gandarme показатель в настоящее время закончена. Я нарисовал синей полосой на шарф и прикладных депутат отличительные знаки. Я надеюсь, что цвета и оборудование, исторически верны. Если нет, пожалуйста, поправьте меня.
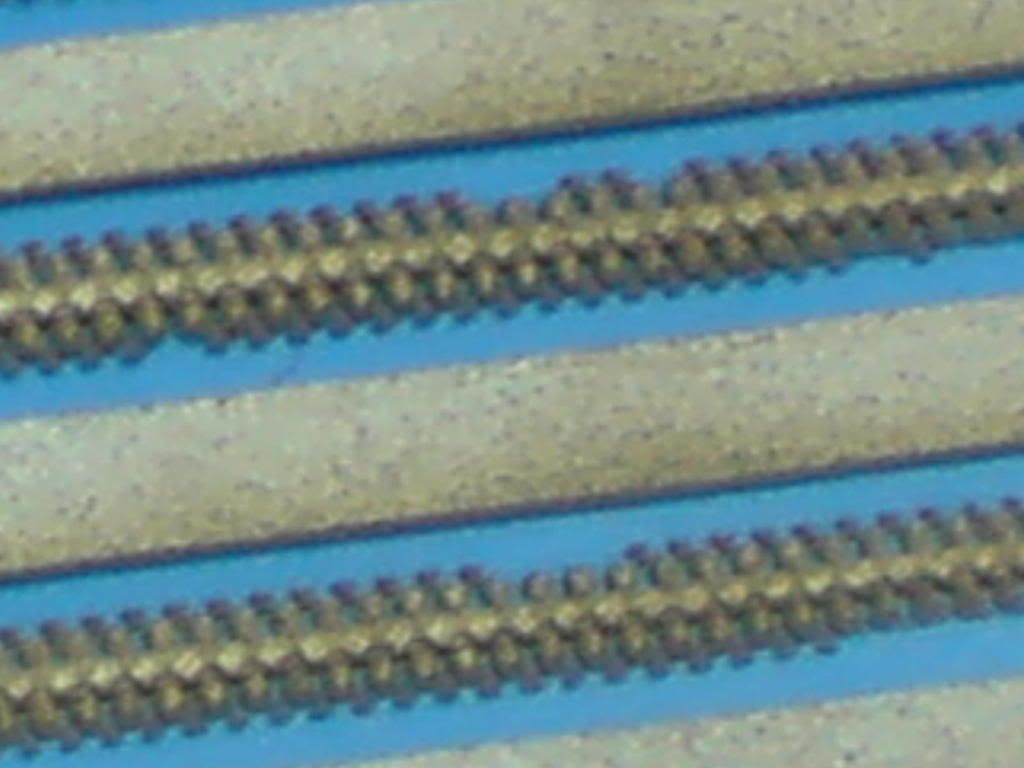
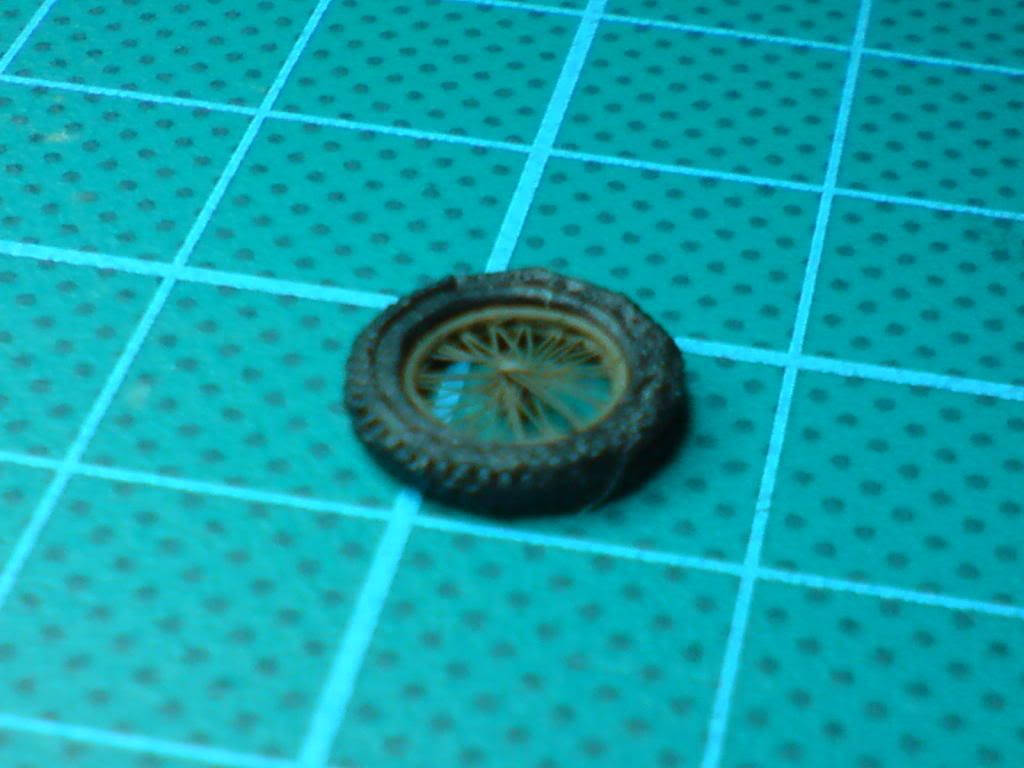
First trials of tire tread are succesful. I think that after painting the tire doesn't look much worse than Tamiya's part in 1:35. But judge it yourselves:
Первые испытания протектора успешно. Я думаю, что после покраски шин выглядит не намного хуже, чем часть Тамия в 1:35. Но судить его сами:
I still have to make the back wheel, exhaust pipe and clutch.
Я до сих пор, чтобы заднее колесо, выхлопной трубы и муфты ручки на руле.
Вы не можете начинать темы Вы не можете отвечать на сообщения Вы не можете редактировать свои сообщения Вы не можете удалять свои сообщения Вы не можете голосовать в опросах Вы не можете вкладывать файлы Вы не можете скачивать файлы